Welcome Index


Scribus - Open Source Desktop Publishing
Welcome to Scribus, a page layout program for Linux/UNIX, Mac OS X, OS/2 Warp 4, eComStation and Windows desktops. Since its humble beginning in the spring of 2001, Scribus has rapidly evolved into one of the premier Open Source desktop applications. Encouraged by professionals and beginners alike, the Scribus Team, supported by a large and constantly growing number of enthusiastic contributors from all over the world, is dedicated to develop and improve "one of the most powerful and useful open-source projects out there" (TechRepublic). Underneath a user-friendly interface, Scribus supports professional publishing features, such as CMYK colors, spot color support, ICC color management and versatile PDF creation. Scribus has many unexpected touches, such as powerful vector drawing tools, support for a huge number of file types via import/export filters, emulation of color blindness or the rendering of markup languages like LaTeX or Lilypond inside Scribus. The Scribus file format is XML-based and open. Unlike proprietary binary file formats, even damaged documents can be recovered with a simple text editor - sometimes a challenging problem with other page layout programs. Scribus has been translated into more than 25 languages, and more are coming in the future.Welcome Readme
What's New in Scribus 1.4?
This is a cursory overview over the changes in Scribus compared to to the latest stable version 1.3.3.14. Note that the file format has changed and is not backwardly compatible with any prior stable version (1.3.3.14 or earlier). To be precise, you will not be able to open 1.4.0 files with version 1.3.3.14 or any earlier version.General
On initial launch, 1.4 will offer to inherit the configuration data from any existing prior version, but it will store them separately, so you can run 1.3.3.x in parallel with 1.4 You can install both versions in parallel and run them at the same time. The only caveat is to install them using different installation directories, e.g 1.3.3.x in /usr/local and 1.4 in /opt or $home/bin on Linux/UNIX. If you're building Scribus from source, you can use the-DCMAKE_INSTALL_PREFIX:PATH= argument to configure where Scribus should be installed.
On other platforms you can determine the location during the installation process.
New in Scribus 1.4
Qt4 Port
One of the major endeavours on the way from 1.3.3.x to 1.4 was the porting to the Qt4 toolkit. Among others, it enabled a vastly better performance under MacOS X, as well as the creation of native DMGs for OS X. Scribus 1.4 DMGs will run on OS X 10.5 or later.Object Handling
Significant enhancements to Multiple Duplicate. Transform tools as known from Illustrator. New options to align and distribute objects. Advanced multiple object selection.Text and Typography
Typography:
Glyph Extension Variable First Line Offset for text frames. Character Styles. New Style Manager that allows for style hierarchies, cloned styles and style inheritance. A new glyph selector which allows for the creation of glyph sets that can be s + hared between users. Major improvements to the hyphenator. Optical margins to give the impression of a straighter edge with justified text by moving hyphens, commas and parts of certain glyphs slightly into the marginText
Basic spellchecking via aspell (not available for Windows, OS/2 and eComStation). New text variable: Number of pages. Undo/Redo is finally available for text-related actions.Vector Tools
New default shapes. New Path Tools, like Boolean path operations, lens effects or mesh distortion. More options for text on path.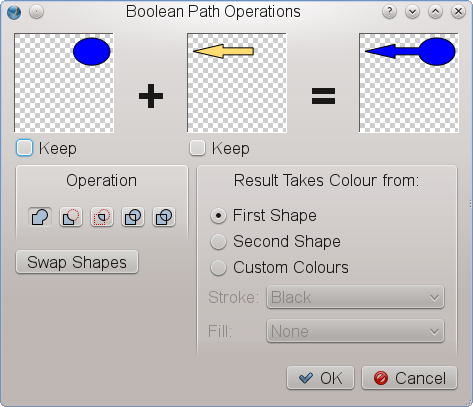 Boolean path operations
Lines
New line styles. Line style editor.Solid Colors, Gradients and Patterns
Major improvements to the Color Wheel (support for multiple color models). An option to replace solid colors throughout the whole document. Support for external color palette formats (EPS, AI, PS, SOC, GPL). Locking of standardized color palettes. Many new color palettes, among them the national standard color sets of Australia, France, Japan, the United Kingdom and the United States, as well as Resene color collections. New gradient types. Support for pattern fills: All graphics formats supported by Scribus can be used as patterns. Emulation of color blindness for all colors in a document.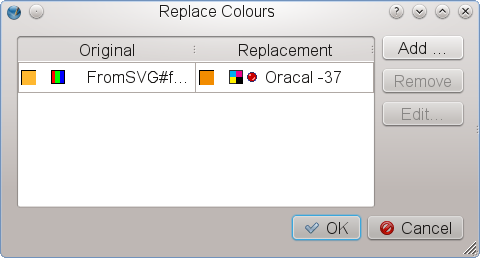 Replacing solid colors
Transparency
Blending modes as known from Photoshop or GIMP are now available for all objects in a Scribus document and can also be applied to layers.Render Frames
One of the major new features is the introduction of Render Frames, a special frame type that allows for rendering the output of programs like LaTeX, Lilypond or POV-Ray inside Scribus.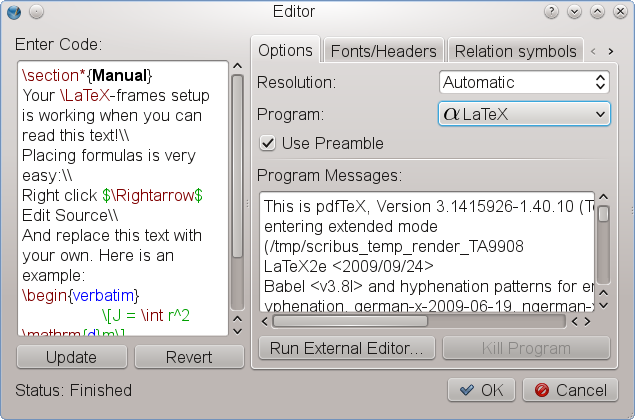 Render Frame Editor
Import Filters
A considerable amount of work has been spent on new import filters for vector formats, most notably Adobe Illustrator (AI). Scribus can now import both EPS and PDF based AI files. Other filters are: Windows Metafile (WMF), Xfig (FIG), Calamus Vector Graphics (CVG), Macintosh PICT (PICT), Kivio Stencils (SML) and DiaShapes (SHAPE).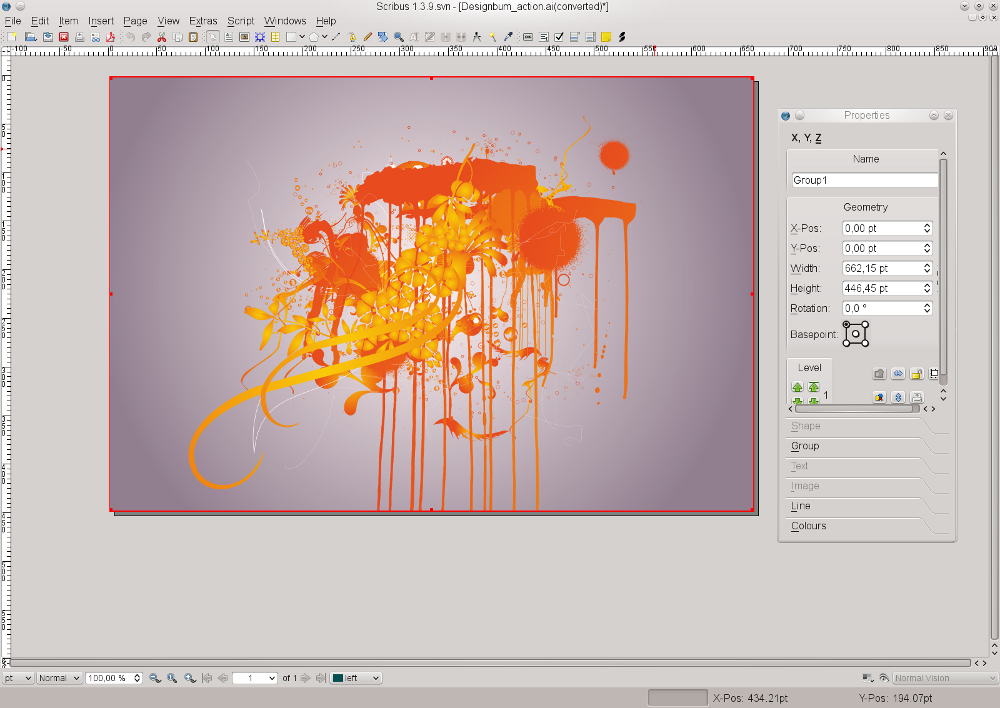 Adobe Illustrator import
Image Handling
New non-destructive image effects. Better handling of PSD-specific features, like clipping paths and layers. Major improvements to the image manager.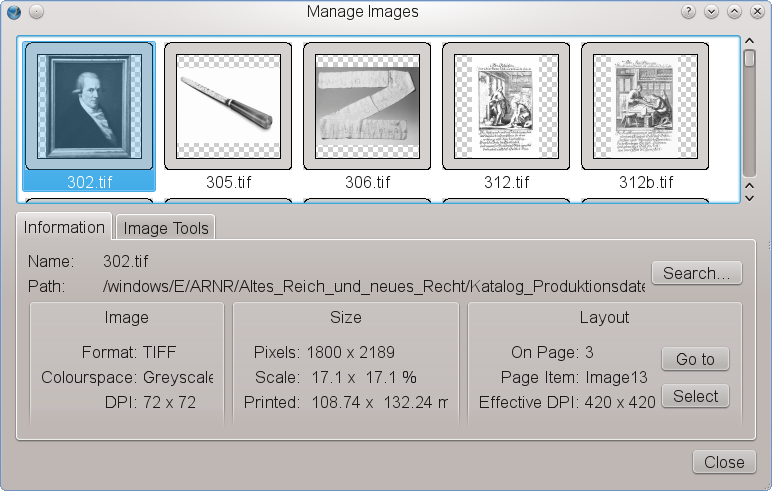 The new image manager
Layers
Scribus layers can now be exported as PDF layers (PDF 1.5 only). Duplicate Layers feature. Wireframe mode for layers to speed up performance. Enforceable text flow around objects on a lower layer.Pre-press
Enhancements to the Print Preview, like indication of ink coverage. Improvements to the Preflight Verifier. New pre-press features, like bleed and printing marks. Optional conversion of spot colors to process colors.PDF Export
Support for PDF 1.5 features, e.g. slide effects for PDF presentations or PDF layers. Optional embedding of EPS and PDF files in PDF documents. Better font subsetting.Usability
Much work has been spent on major and minor usability improvements throughout the whole program, e.g.: A search feature for the Document Outline. Many more viewing options, including a document preview without guides and frame borders. One-click activation of color management. Context menu for the document canvas with options to insert vector graphics directly or to activate viewing options Many more options to automate and speed up the insertion of frames (e.g. Insert Frame dialog, Sticky Tools option). Enhancements to the Scrapbook.Templates
Many templates, donated by artists, have been added. We have finally begun to translate the template categories and template descriptions into other languages.Help System
The content of the Online Help system has almost doubled since the relase of the latest stable version 1.3.3.14. Moreover, major parts of the existing documentation have been updated or completely rewritten to reflect the feature set of Scribus 1.4+. Many new tooltips have been added, and existing ones have been expanded. Online help resources are now accessible from the Help menu.Intro
Documentation
This section is the main area of the user documentation for Scribus. In this section we will outline major areas of interest from installation through getting your beautiful document ready for professional printing or the web. Read on for more, but don't hesitate to contact us if you have further questions. Since this Online Help probably can't answer all of your questions, you should also read the last section of the documentation to find out how to contact the Scribus Team and other users, who are more than willing to help you succeed.Basics
1 Scribus Basics 1.1 Why Page Layout is Different from Word Processing 1.2 The Final Assembly Line 1.3 Workflow 1.3.1 Planning 1.3.2 Preparing Your Suppliers 1.3.3 Getting Ready to WorkScribus Basics
Why Page Layout is Different from Word Processing
What can you do with Scribus – and what is a “page layout” program? First, you should be aware that Scribus, like all advanced DTP programs, is very different from a word processor. Word processors are designed to quickly set up a page, most likely US Letter or A4 size, then immediately begin entering text. Scribus, on the other hand, is an application designed to do page layout, such applications are more commonly known as Desktop Publishing (DTP) programs. These programs give users great flexibility in placing objects like photos, logos, text frames and shapes in an exact position and orientation with great precision. This page will cover some overall concepts of good, efficient page layout and design, but especially if you’re a first-time user, you are strongly encouraged to go through the Quick Start Guide to get a sense of what Scribus can do and how to avoid mistakes.The Final Assembly Line
First-time users of page layout applications like Scribus can find starting out quite frustrating, since they expect to open a new document and immediately start typing, but a Scribus document is really just a space to work in, and there is no expectation that there will be any text at all. You can compare a document that will be sent to a commercial printer or uploaded to the web to a car or a computer. Such a machine consists of thousands of parts, most of which haven’t even been produced by the car or computer manufacturer itself, but by suppliers. If you don’t like the assembly line metaphor, then consider yourself the chef running a kitchen, in charge of turning a mixture of raw materials, pre-processed items, cooking some foods yourself, then assembling them with artful design to please the diners’ eyes, noses, and palates, not to mention satisfying their appetites! What the manufacturer or chef does is assemble the parts into the final product, and that’s exactly the main purpose of a layout program: It’s the final assembly line of a document that is going to be published – most likely in print – hence the name “Desktop Publishing”.Workflow
Whether you’re a manufacturer, a chef, or doing page layout, in order to do your best work you must think ahead and plan what you wish to do. The whole process of planning, coordination and production is called workflow.Planning
It doesn’t matter whether you want to build a complex machine or create a complex layout – in both cases it often starts, quite literally, at the drawing board. Many products, including cars, have been first “created” on a sheet of paper. Thus, in design, it’s often a good idea to switch off the computer and to use a sketch block to outline your future layout. Since there are many inspiring designs for almost every purpose available, it’s quite easy to find examples to stimulate your imagination. However, learning from existing examples is something different than copying a layout – it’s actually hard work, because you need to analyze a layout, for example by using a ruler to determine page margins, dimensions etc. This isn’t to say that all that you see that is eye-grabbing is good design for all circumstances. Start with a sense of what you want to do, perhaps educate someone or show off some visual display or product. Your intended purpose can then help you look for good examples of design that do this well. Learning from the masters in the art will probably help you further with becoming creative yourself than anything else. Later you may find that reading books on page layout, typography or color theory help advance your knowledge, and most of them are full of inspiring examples. Once you think you have created a great layout on your drawing block, the analyzing doesn’t stop, quite the contrary! Part of the planning stage is to determine which parts of your layout are static and should become part of a Master Page. You also need to find out which elements will be repeatedly used in different places of your layout, as you can store all those elements in a single directory that can be used as a Scrapbook folder etc. Layout considerations aside, there is another important aspect to your project planning, namely the other side of the assembly process, commercial printing. It is very important to know beforehand what kind of files (e.g. PDF versions) a printer can handle, and if you plan to use <a href="color1.html">spot colors</a>, you should know in advance which colors the printer can reliably reproduce. All this information will influence the next stages of production on your side. Even if you will be printing on your own local printer, you need to be aware of the capabilities and limitations of your printer.Preparing Your Suppliers
Making all the materials yourself, such as text, images, and graphics, is certainly possible, but many who do page layout are coordinating and assembling these ingredients created or edited by others. Just like a manufacturer of machines is coordinating with its suppliers to avoid frictions and hiccups during the final assembly, you can avoid problems by providing guidelines to those who will produce the “components” or “ingredients” of your layout (and if you do everything yourself, you can make some mental notes to avoid hassles down the road). With experience, you will quickly see that altering the content can result in a need to extensively redesign the layout. For writers it should be clear which file formats are acceptable. Ideally, only a single file format should be used, and if that’s impossible, perhaps due to different software tools available, plain text files can be used as the lowest common denominator. Writers should also be advised to use consistent spelling, quotes, dashes, etc. As for graphics files, you should figure out which file formats work best for you and then ask contributors of graphics not to use anything else. You should also provide clear guidelines for the use of spot colors, image resolutions and color profiles.Getting Ready to Work
From experience it can be said that the final layout should only be started when you have collected all the components you need, and that’s especially true for text. If an image needs color corrections it can be done with the layout in place, but changes to a text, like adding a line or even a paragraph, can result in a lot of extra work, as the placement of graphics or captions needs to be adjusted. Thus, make sure that no surprises will happen down the line. As you start your work, it’s always good practice to collect all project files in a single project directory, with subdirectories for text, vector graphics, image files and other file types you need for your project. Files that you want to re-use often should be moved into a single Scrapbook directory for use in Scribus. Once you’ve done all this, you are ready to go ...Quickstart
1 Scribus Quick Start Guide 1.1 Step One: Creating a Document and a Page Background 1.2 Step Two: Inserting the Cover Picture 1.3 Step Three: Adding Text 1.4 Step Four: Adding the Publishing “Company”Scribus Quick Start Guide
Before we start explaining Scribus in depth, it might be useful to get a “feeling” for the way Scribus works. For that purpose, you can see how a simple front page of a magazine for an imaginary Rembrandt exhibition is being created. If you want to follow the description provided here, you need: The " Gentium and " Bitstream Vera Sans fonts installed on your computer. Rembrandt's self-portrait from Wikimedia. The Scribus logo from your Scribus install directory. This is what we want to achieve: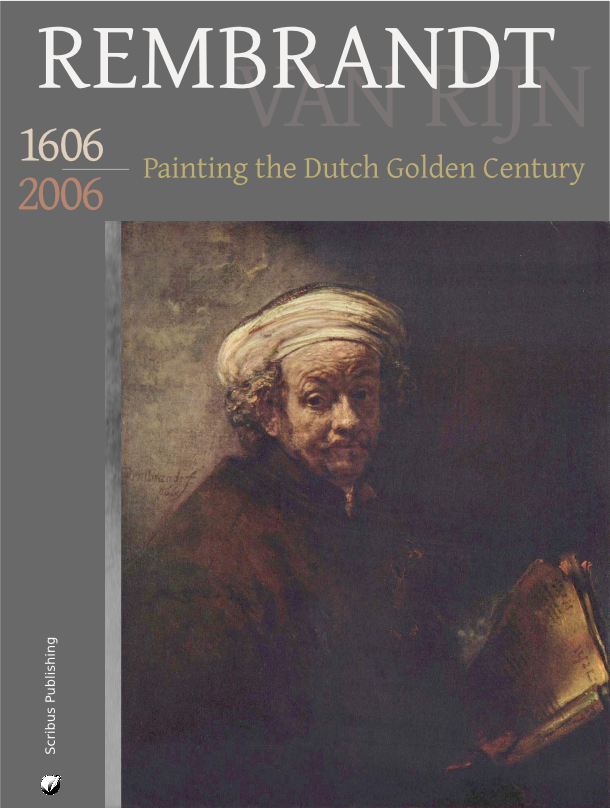 Before you start, you need to select the appropriate color palette for the project.
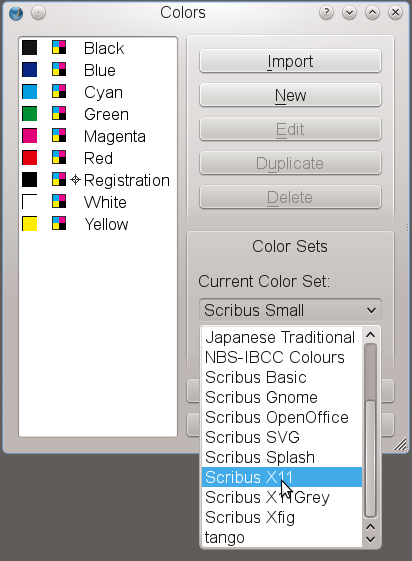
Make sure that no document is open, then go to Edit > Colors.
The default color palette is called “Scribus Basic”, as you can see in the dialog.
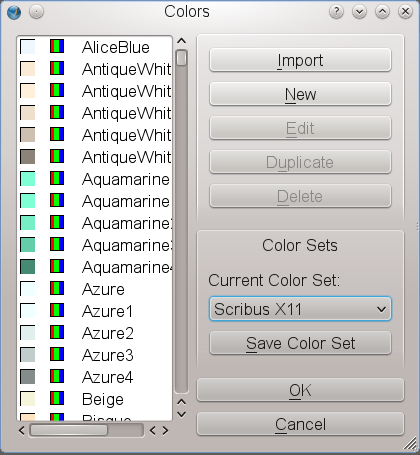
Here we need a swatch called “Scribus X11”.
You can select this palette under Color Sets in the Edit Colors dialog:
Before you start, you need to select the appropriate color palette for the project.
Make sure that no document is open, then go to Edit > Colors.
The default color palette is called “Scribus Basic”, as you can see in the dialog.
Here we need a swatch called “Scribus X11”.
You can select this palette under Color Sets in the Edit Colors dialog:
Step One: Creating a Document and a Page Background
You probably know what happens if you create a new file in a word processor: The program you're working with creates a new page and you can start typing. If a new page is necessary, the word processor will create it. This won't work in Scribus (or most other DTP programs). To create a new page, you have to tell the program to do exactly that. The main purpose of a DTP software is to give you a maximum of control over design and content of your document. So we click File > New, and Scribus brings up the following dialog: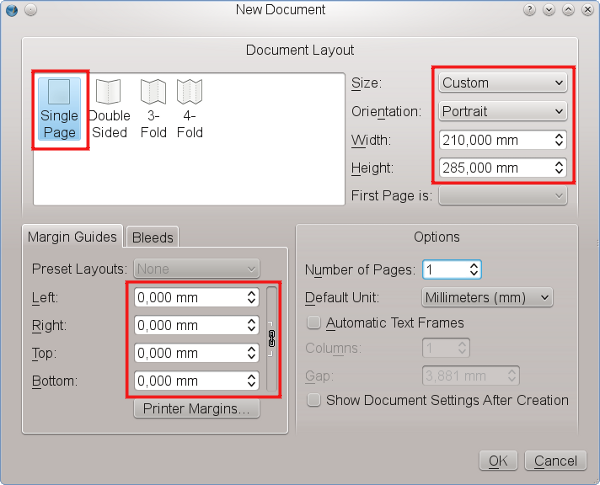 For our cover page we will choose a Single Page layout.
Set the Page Size to “Custom” (found at the bottom of the list in the Size dropdown box) and change the default value for Height to 285 mm.
This is going to be about the same as US Letter size.
The cover page won't need any margins, so that we use 0 mm as the value for all page margins.
Leave the rest of the default settings as they are.
After clicking the “OK” button, Scribus creates a new page:
For our cover page we will choose a Single Page layout.
Set the Page Size to “Custom” (found at the bottom of the list in the Size dropdown box) and change the default value for Height to 285 mm.
This is going to be about the same as US Letter size.
The cover page won't need any margins, so that we use 0 mm as the value for all page margins.
Leave the rest of the default settings as they are.
After clicking the “OK” button, Scribus creates a new page:
 Next, we need a gray background for our page.
Click on the white (or light gray) rectangle in the menu bar or simply press S on the keyboard.
Yes, you're reading correctly, pressing S doesn't mean anything will be “typed” on the page.
To type, you need a special environment called text frame, as you will see below.
In this case, we need a shape, thus the keyboard S command.
Your mouse pointer now turns into a rectangle with a + on its upper left corner.
Click and hold the mouse button, then drag the + across the page and let up – you have just created a shape.
Size, position and color don't matter here, as we will change them immediately.
Next, we need a gray background for our page.
Click on the white (or light gray) rectangle in the menu bar or simply press S on the keyboard.
Yes, you're reading correctly, pressing S doesn't mean anything will be “typed” on the page.
To type, you need a special environment called text frame, as you will see below.
In this case, we need a shape, thus the keyboard S command.
Your mouse pointer now turns into a rectangle with a + on its upper left corner.
Click and hold the mouse button, then drag the + across the page and let up – you have just created a shape.
Size, position and color don't matter here, as we will change them immediately.
 If you haven't clicked somewhere else on screen, your new rectangle is still selected, which means it is outlined in red dots and so-called handles at each corner and the middle of a line.
Now use Windows > Properties or press F2 to bring up the Properties Palette, which is the Swiss Army Knife of Scribus.
You will learn a lot more about its use later.
For the time being, let's stay in the default tab of this dialog, which is called “X,Y,Z”.
The more complex a document is, the more useful it is to give each object a unique name.
It will make it easier to find and to select it later on.
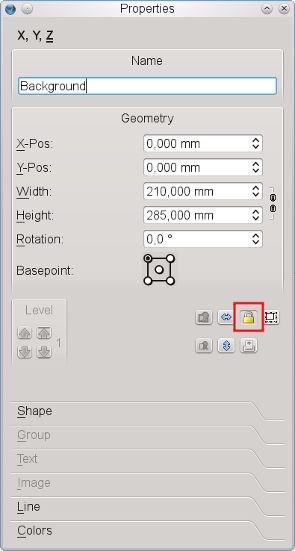
Not surprisingly, we'll call our Shape “Background”.
Next, make our rectangle match the size of the page.
Remember the values we chose for the page? Insert them here, but first don't forget to click on the chain symbol to the right of the boxes for changing the values for width and height.
If you try to do this without unlinking that chain, you will see that a change in one value changes the other in a proportional way, and it will seem like you are forever stuck, which you will be until you unlink that chain.
Now that our rectangle has exactly the size of our page, you need to make sure that it matches the page borders by setting its X and Y positions to 0.000 – if you just delete what is there and replace with 0, then press Tab or Enter, Scribus will make the decimal point and other zeros for you.
If you haven't clicked somewhere else on screen, your new rectangle is still selected, which means it is outlined in red dots and so-called handles at each corner and the middle of a line.
Now use Windows > Properties or press F2 to bring up the Properties Palette, which is the Swiss Army Knife of Scribus.
You will learn a lot more about its use later.
For the time being, let's stay in the default tab of this dialog, which is called “X,Y,Z”.
The more complex a document is, the more useful it is to give each object a unique name.
It will make it easier to find and to select it later on.
Not surprisingly, we'll call our Shape “Background”.
Next, make our rectangle match the size of the page.
Remember the values we chose for the page? Insert them here, but first don't forget to click on the chain symbol to the right of the boxes for changing the values for width and height.
If you try to do this without unlinking that chain, you will see that a change in one value changes the other in a proportional way, and it will seem like you are forever stuck, which you will be until you unlink that chain.
Now that our rectangle has exactly the size of our page, you need to make sure that it matches the page borders by setting its X and Y positions to 0.000 – if you just delete what is there and replace with 0, then press Tab or Enter, Scribus will make the decimal point and other zeros for you.
 Hint: Now that you see how to do this manually, note that there is in 1.4.0 a new shortcut for creating a frame and filling to the margins.
After you press S to activate the shape icon, now hold down the Shift key and click anywhere on the page – instantly you have a frame filled to the margins, in this case the entire page since we set our margins to 0.
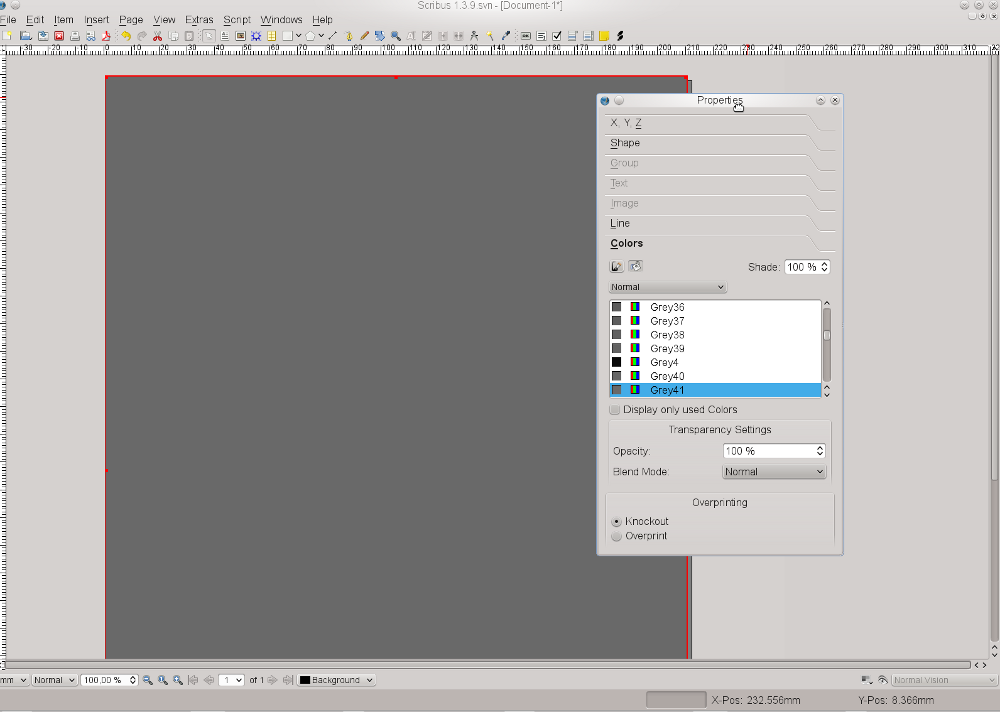
By default, Scribus uses “Black” as the fill color for shapes, which is not what is needed here.
Provided our shape is still selected, we use the Properties Palette again to assign new colors to it.
For that purpose we select the “Colors” tab.
From the list select “Grey41” as the Fill Color.
Each shape and each frame in Scribus has a border.
In the case of shapes the default color is always black.
Since we don't want any color for our Frame border, click on the symbol with the brush and select the color “None”, which is always at the top of the list.
Hint: Now that you see how to do this manually, note that there is in 1.4.0 a new shortcut for creating a frame and filling to the margins.
After you press S to activate the shape icon, now hold down the Shift key and click anywhere on the page – instantly you have a frame filled to the margins, in this case the entire page since we set our margins to 0.
By default, Scribus uses “Black” as the fill color for shapes, which is not what is needed here.
Provided our shape is still selected, we use the Properties Palette again to assign new colors to it.
For that purpose we select the “Colors” tab.
From the list select “Grey41” as the Fill Color.
Each shape and each frame in Scribus has a border.
In the case of shapes the default color is always black.
Since we don't want any color for our Frame border, click on the symbol with the brush and select the color “None”, which is always at the top of the list.
 Our page background is now finished.
To make sure it isn't changed unintentionally, return to the “X,Y,Z” tab of the Properties Palette and click on the “lock” symbol, so that our background is protected from any further changes.
Our page background is now finished.
To make sure it isn't changed unintentionally, return to the “X,Y,Z” tab of the Properties Palette and click on the “lock” symbol, so that our background is protected from any further changes.
Step Two: Inserting the Cover Picture
Now that the background has been created, you need to place the cover picture. You may be used to inserting images directly in your word processor, but in Scribus they are inserted in a container (called a frame). For images, or, more precisely, for bitmap images, create an image frame by clicking on the Image Frame icon in the toolbar or by pressing I on the keyboard. Draw your image frame as you did with the rectangle and go to the “X,Y,Z” tab of the Properties Palette again. Rename this image frame “Rembrandt1”, and for width and height enter the values as shown in the screenshot below. Our cover picture needs to be placed exactly in the lower right of our page. How can this be achieved? Actually, it's quite simple. We know the X and Y coordinates of our page, namely 210 mm and 285 mm. So you can enter these values in “X-Pos” and “Y-Pos”, but wait! Not so fast. Before you do that, first change the Basepoint of our object. When you set 0.000 values for our background shape, the values were for the upper left of the page. But our image will have to align to our lower right page margins, so we change the Basepoint to lower right before we enter the X and Y values. Also, fix the size of our image frame by locking it: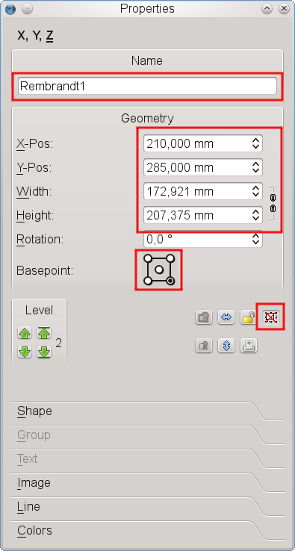 To make our design a bit more stylish, let's add an edited copy of it.
We won't see much of it, just a small stripe on the left.
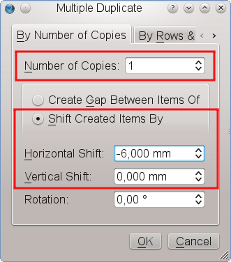
Use Item > Multiple Duplicate for this operation, because it allows us to enter precise numbers for horizontal and vertical shift.
We need one copy, and for “Horizontal Shift” insert -6mm, as you want to place the copy on the left of the cover image:
To make our design a bit more stylish, let's add an edited copy of it.
We won't see much of it, just a small stripe on the left.
Use Item > Multiple Duplicate for this operation, because it allows us to enter precise numbers for horizontal and vertical shift.
We need one copy, and for “Horizontal Shift” insert -6mm, as you want to place the copy on the left of the cover image:
 Since the new image frame is a copy of “Rembrandt1”, there is no need to change its size, and the position has been determined by the copying action.
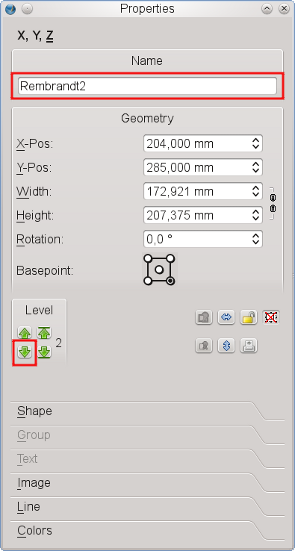
Assign the name “Rembrandt2” to the frame, but there's another problem: The new image frame is placed on top of the frame for the cover picture.
The solution is to move it behind the cover picture.
So far, 3 items have been created, and each new object is placed on top of the others.
Therefore, we simply move the copy one level down, i.e.
behind “Rembrandt1”:
Since the new image frame is a copy of “Rembrandt1”, there is no need to change its size, and the position has been determined by the copying action.
Assign the name “Rembrandt2” to the frame, but there's another problem: The new image frame is placed on top of the frame for the cover picture.
The solution is to move it behind the cover picture.
So far, 3 items have been created, and each new object is placed on top of the others.
Therefore, we simply move the copy one level down, i.e.
behind “Rembrandt1”:
 Now we have to become a little more serious and get stuff from outside of Scribus into our document.
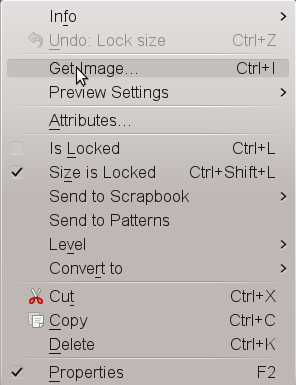
To load our cover picture into “Rembrandt1”, right-click on the Frame and click on “Get Image”:
Now we have to become a little more serious and get stuff from outside of Scribus into our document.
To load our cover picture into “Rembrandt1”, right-click on the Frame and click on “Get Image”:
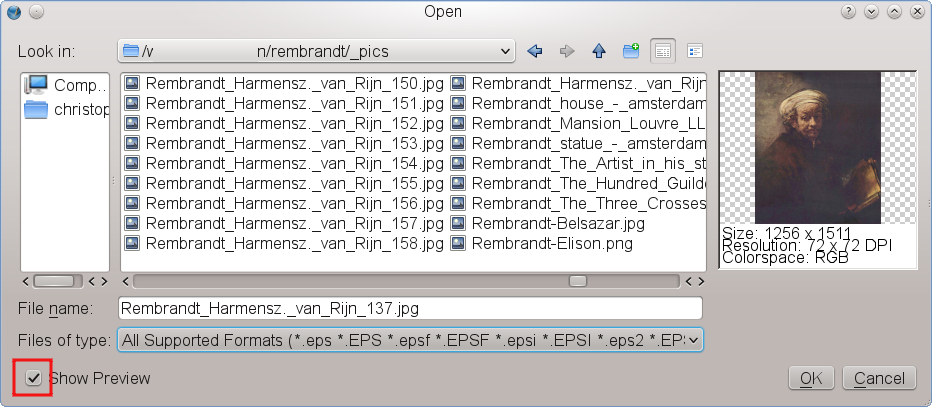
 This will open a file dialog, but, as usual with exhibitions, there are loads of images with similar names in one directory.
How can we identify the correct file? Houston, we have a problem! Not.
Fortunately, Scribus offers a preview in its file dialog for images:
This will open a file dialog, but, as usual with exhibitions, there are loads of images with similar names in one directory.
How can we identify the correct file? Houston, we have a problem! Not.
Fortunately, Scribus offers a preview in its file dialog for images:
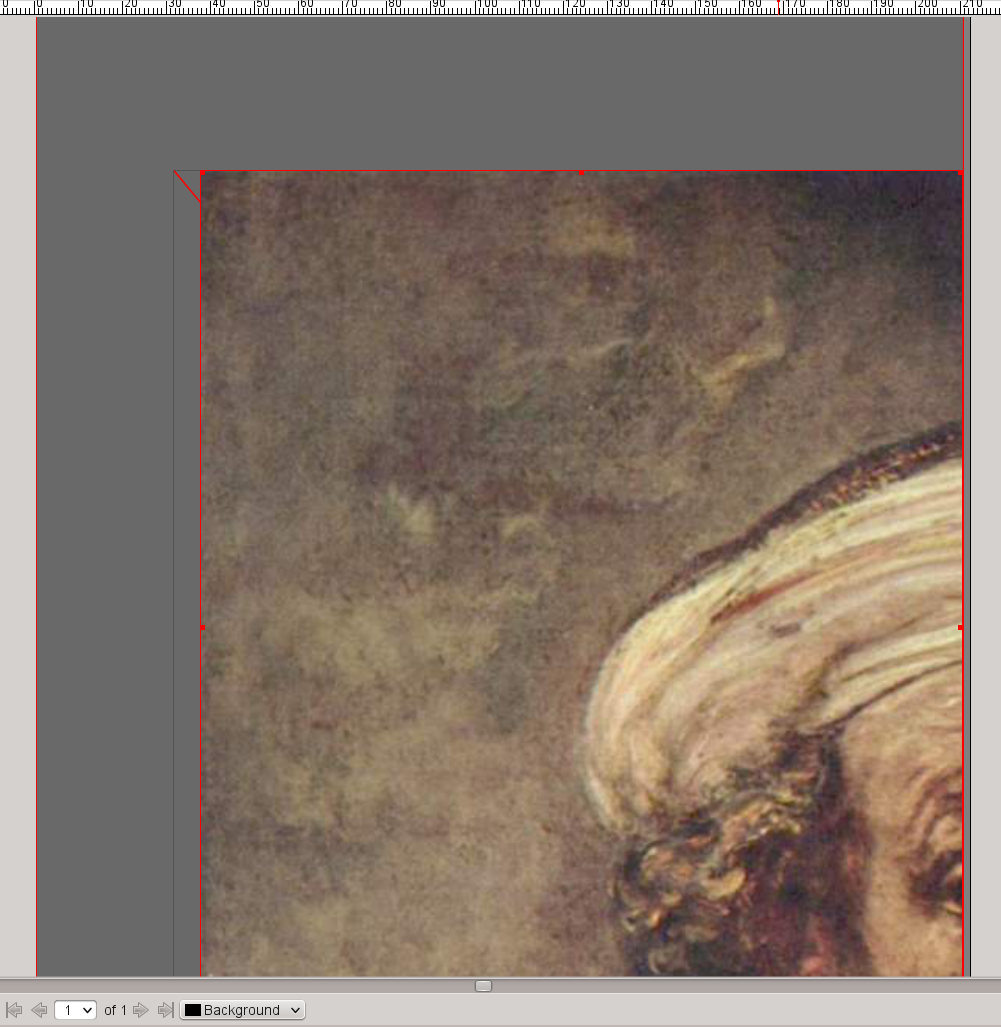
 Now that we have identified the correct version of the file, click on the “Open” button or just double-click, but what's that?
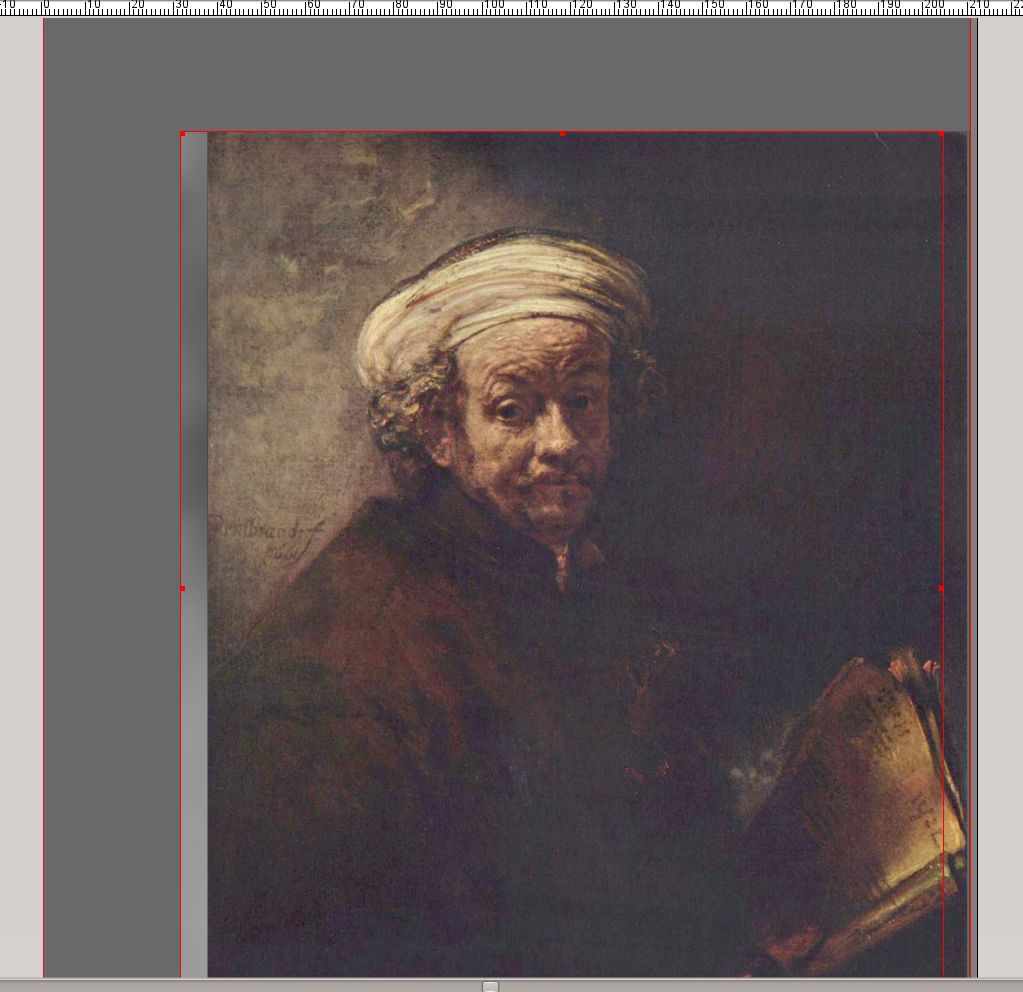
 It seems obvious that the size of the image and the size of the image frame are not identical twins, but fortunately, the Properties Palette will come to our rescue and force them to behave as if they were.
In the “Image” tab check “Scale to Frame Size” and “Proportional” and our cover picture will be perfectly placed:
It seems obvious that the size of the image and the size of the image frame are not identical twins, but fortunately, the Properties Palette will come to our rescue and force them to behave as if they were.
In the “Image” tab check “Scale to Frame Size” and “Proportional” and our cover picture will be perfectly placed:
 The next thing we need is a copy of the “Rembrandt1” content in “Rembrandt2”.
Right-click on “Rembrandt1” and click “Contents > Copy”.
Then right-click on the visible stripe of “Rembrandt2” and click “Contents > Insert”.
The result is everything but spectacular, so that you will need to apply some magic to “Rembrandt2”.
Once again, use the right mouse button to bring up the context menu, this time to bring up the image effects dialog:
The next thing we need is a copy of the “Rembrandt1” content in “Rembrandt2”.
Right-click on “Rembrandt1” and click “Contents > Copy”.
Then right-click on the visible stripe of “Rembrandt2” and click “Contents > Insert”.
The result is everything but spectacular, so that you will need to apply some magic to “Rembrandt2”.
Once again, use the right mouse button to bring up the context menu, this time to bring up the image effects dialog:
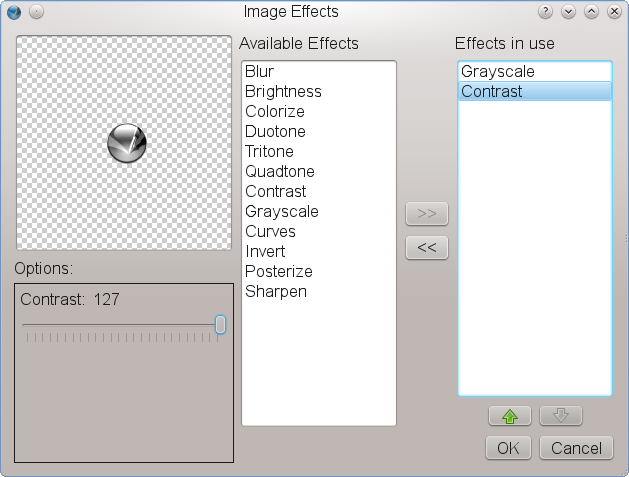
 In the image effects dialog, let's go all out and apply four different effects to the image: invert, blur (radius: 7.0), grayscale, and brightness (set to -44):
 Now, that looks a lot better, doesn't it?
Step Three: Adding Text
Next, let's tell our audience who the hero in the image is. For that purpose, create a text frame by clicking on the Text Frame icon in the toolbar or by pressing the T key – surely you're seeing this pattern now. You can create this frame by dragging, just as you did with the shape. It should be big enough to contain the text as shown below. Then double-click on the text frame and type REMBRANDT. Next, click somewhere else on screen and select the text frame again by clicking on it (single click). Open the Properties Palette (F2) and open the “Text” tab. In the font selector choose the “Gentium” font, set the font size to 97 pt and choose the text color “White” for Rembrandt's name. The result should look like this: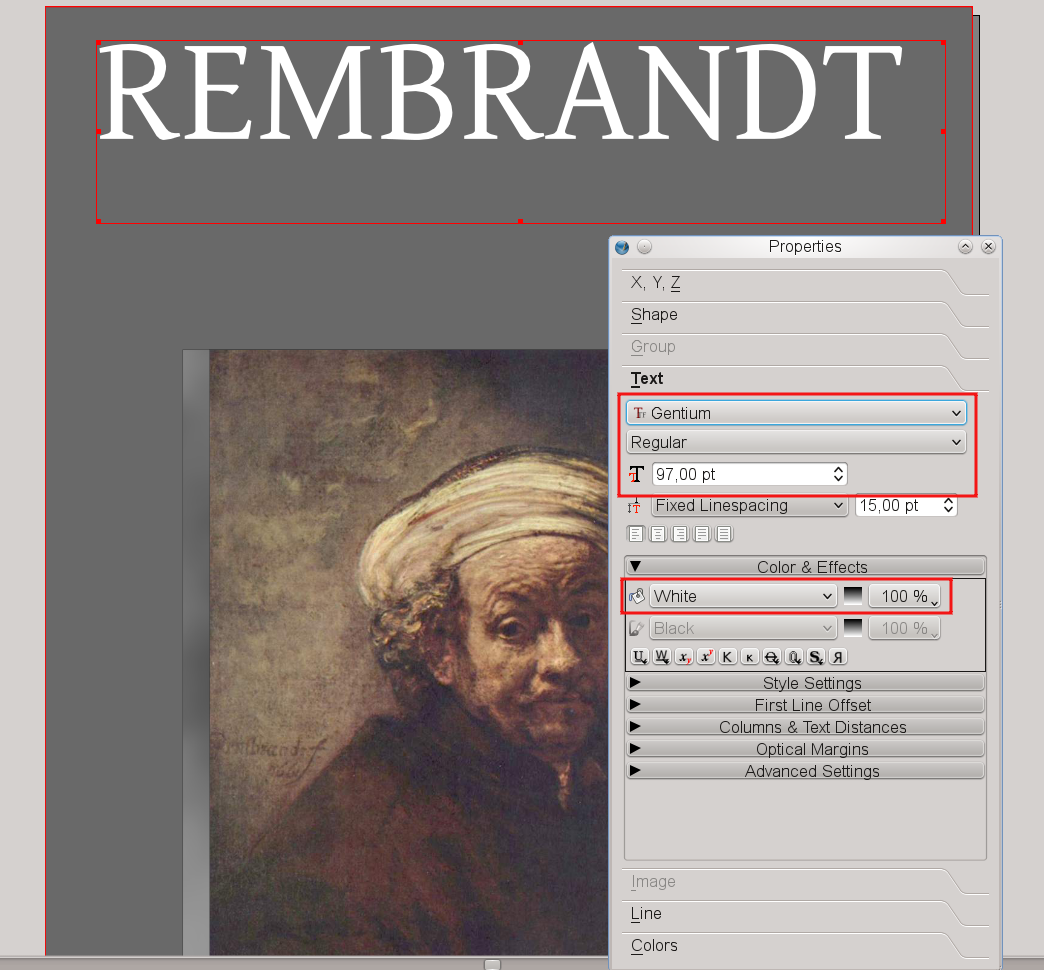 So far, our cover looks ok, but a bit boring.
Time to add some tasteful features.
Historical facts are on our side when we try to accomplish our task: Rembrandt was the man's (admittedly uncommon) first name, while his surname was “van Rijn”.
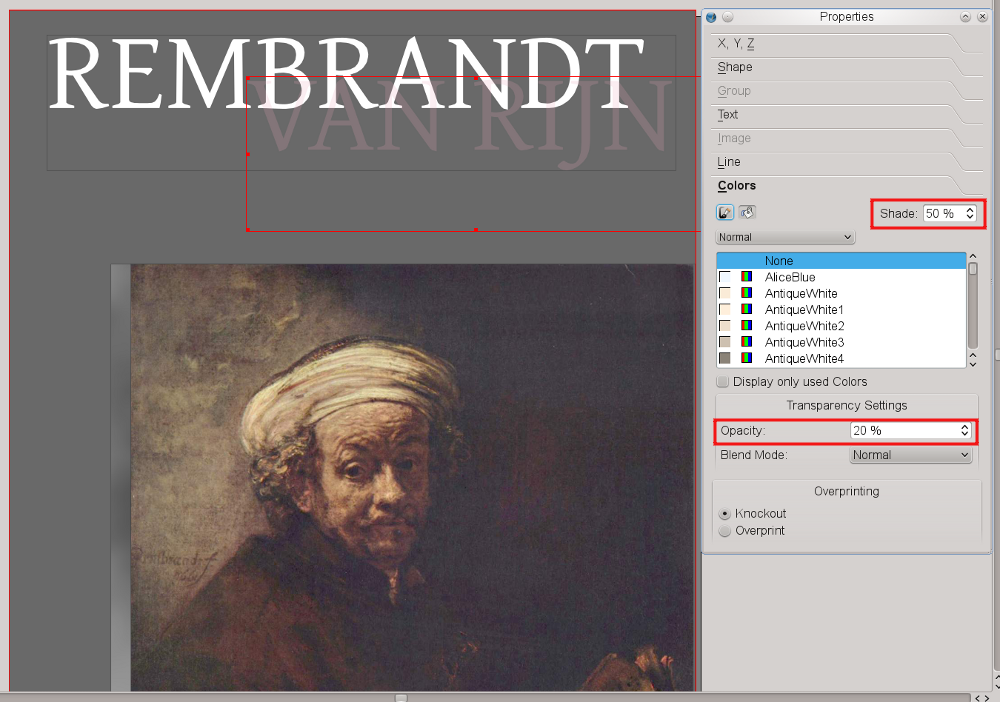
So create another text frame, double-click and type VAN RIJN.
Choose the same font and the same font size as in the first text frame, but instead of white select “Pink2”.
“What?” you say, “Pink? Rembrandt would shoot you on the spot!” Sure he would, if he wouldn't have seen where we're going with this, and we're not finished yet.
Switch to the “Colors” tab and set “Shade” to 50% and “Opacity” to 20%.
Better now? We told you so, and even Rembrandt is happy with the result – you can almost see him smile.
So far, our cover looks ok, but a bit boring.
Time to add some tasteful features.
Historical facts are on our side when we try to accomplish our task: Rembrandt was the man's (admittedly uncommon) first name, while his surname was “van Rijn”.
So create another text frame, double-click and type VAN RIJN.
Choose the same font and the same font size as in the first text frame, but instead of white select “Pink2”.
“What?” you say, “Pink? Rembrandt would shoot you on the spot!” Sure he would, if he wouldn't have seen where we're going with this, and we're not finished yet.
Switch to the “Colors” tab and set “Shade” to 50% and “Opacity” to 20%.
Better now? We told you so, and even Rembrandt is happy with the result – you can almost see him smile.
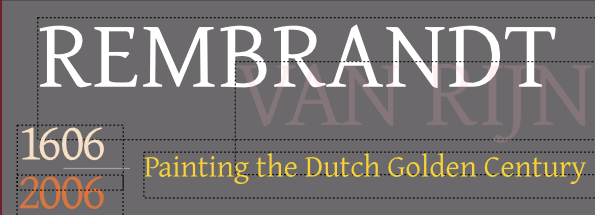
 Finally, move the “Van Rijn” frame one level down, behind the “Rembrandt” frame:
Now add 3 other text frames and insert the texts “1606”, “2006” and “Painting the Dutch Golden Century”.
Use the Gentium font for all text frames.
The numbers need a font size of 53 pt and the text one of 31 pt.
Select text colors that resemble those you see on screen.
After what you've learned so far, this should already be easy.
Here's a design tip: notice how pleasing this looks, even though we are using different colors and sizes, when we use the same font for all these text elements.
Finally, move the “Van Rijn” frame one level down, behind the “Rembrandt” frame:
Now add 3 other text frames and insert the texts “1606”, “2006” and “Painting the Dutch Golden Century”.
Use the Gentium font for all text frames.
The numbers need a font size of 53 pt and the text one of 31 pt.
Select text colors that resemble those you see on screen.
After what you've learned so far, this should already be easy.
Here's a design tip: notice how pleasing this looks, even though we are using different colors and sizes, when we use the same font for all these text elements.
 To finish our title, draw a straight line by clicking on the “Line” icon in the Toolbar and dragging with the mouse.
Draw your mouse from left to to right and press Ctrl while you drag to make sure the line is exactly horizontal.
Then open the Properties Palette and switch to the “Line” tab.
Here you can experiment with the Line Width, then open the “Colors” tab, open the color list for lines (brush icon) and select “WhiteSmoke” from the list.
Finally, move the Line halfway between the “1606” and the “2006” text frames.
To finish our title, draw a straight line by clicking on the “Line” icon in the Toolbar and dragging with the mouse.
Draw your mouse from left to to right and press Ctrl while you drag to make sure the line is exactly horizontal.
Then open the Properties Palette and switch to the “Line” tab.
Here you can experiment with the Line Width, then open the “Colors” tab, open the color list for lines (brush icon) and select “WhiteSmoke” from the list.
Finally, move the Line halfway between the “1606” and the “2006” text frames.
Step Four: Adding the Publishing “Company”
The final steps include adding an imaginary publishing company and its logo. We'll decide in modesty to call the company “Scribus Publishing”. That way, we need not rack our brains about a logo, but can simply use the Scribus logo. You'll find it in the folder~/share/scribus/icons, where ~ is your Scribus installation directory.
The filename is scribus.png.
Now create a small Image Frame at the bottom the page, between the page border and the cover image(s).
Make sure the fill color of the image frame is set to “None”, because we are going to import an image with a transparent background.
Then, as with our first image, we import the icon via right-click > Get Image.
To prevent the icon's colors from interfering with the colors chosen for our layout, open the Image Effects dialog as explained in Step Two.
Setting the image to “Greyscale” and raising the contrast makes sure the logo won't “disappear”, and at the same time it won't clash with the rest of our colors.
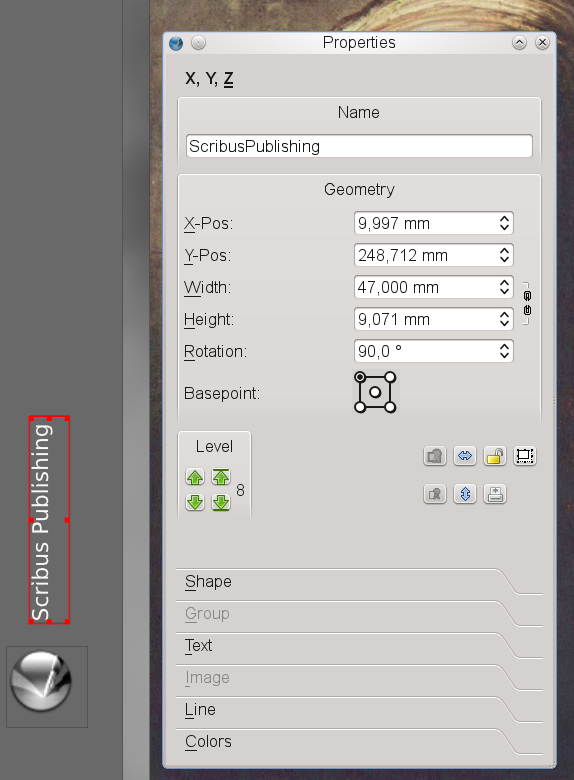
 To add our company name, create a Text Frame somewhere, call it “ScribusPublishing” in the “X,Y,Z” tab of the Properties Palette and enter the text “Scribus Publishing”.
Choose “Bitstream Vera Sans” as the font, set the font size to 13 pt and the font color to “Grey97”.
Finally, rotate the text frame 90 degrees.
The “X,Y,Z” tab of the Properties Palette is the right place to do this.
Just change the value for “Rotation” to 90:
To add our company name, create a Text Frame somewhere, call it “ScribusPublishing” in the “X,Y,Z” tab of the Properties Palette and enter the text “Scribus Publishing”.
Choose “Bitstream Vera Sans” as the font, set the font size to 13 pt and the font color to “Grey97”.
Finally, rotate the text frame 90 degrees.
The “X,Y,Z” tab of the Properties Palette is the right place to do this.
Just change the value for “Rotation” to 90:
 Now use the mouse to move the rotated text frame to a position above the Scribus logo.
Now click File > Save, enter “Rembrandt-tp” as the file name and click “OK”.
Voilà! You just successfully created your first document in Scribus.
It wasn't that hard, was it?
Now use the mouse to move the rotated text frame to a position above the Scribus logo.
Now click File > Save, enter “Rembrandt-tp” as the file name and click “OK”.
Voilà! You just successfully created your first document in Scribus.
It wasn't that hard, was it?
Commandline
Scribus Command Line Reference
Just like any other program, Scribus can be launched from the command line. Below you find the command line options for Linux/UNIX (including Mac OS X). On other operating systems the parameters may have to be used differently.-l, --lang xx Overrides the system locale and runs Scribus in language xx.
The language is specified with the same POSIX language codes that are used in the LANG and LC_ALL environment variables.
For example, English can be selected with 'en' (generic English), 'en_GB' (British English), 'en_US' (American english), etc.
Similarly, German can be selected with 'de' or 'de_DE'.
-la, --langs-available Print a list of languages for which user interface translations are available.
To use that language run Scribus as 'scribus -l xx' where xx is the short language code.
-v, --version Prints the Scribus version number and exits.
-f, --file Open the specified file.
It's possible to simply pass the file name as an unqualified argument instead of using this, though if the name begins with a - you will need to use --, eg 'scribus -- -myfile.sla'.
-h, --help Print a brief usage summary.
-fi, --font-info Shows the font file listing as Scribus starts.
This can be used for diagnosing missing glyphs within fonts or possibly broken font files.
-pi, --profile-info Shows the color profiles listing which Scribus can use.
This can be used for diagnosing missing or broken color profiles.
-ns, --no-splash Suppresses display of the splash screen during Scribus start-up.
-nns, --never-splash Stop the showing of the splashscreen on startup.
Writes an empty file called .neversplash in ~/.scribus.
-sb, --swap-buttons Use right to left dialog button ordering (e.g.
Cancel/No/Yes instead of Yes/No/Cancel)
-u, --upgradecheck Downloads a file from our scribus server indicating latest available versions.
This material may be distributed only subject to the terms and conditions set forth in the Open Publication License, v1.0 or later.
Distribution of the work or derivative of the work in any standard (paper) book form is prohibited unless prior permission is obtained from the copyright holder.
A copy of the license is included in the section entitled "Text of the Open Publication License."
Frames
1 Working with Frames 1.1 Creating Frames 1.2 Context Menus 1.3 Manipulating Frames 1.3.1 How to Use Spinboxes 1.3.2 Moving Frames 1.3.3 Resizing Frames 1.3.4 Rotating Frames 1.3.5 Moving Frames – Level to Level or Layer to Layer 1.3.6 Final Section of Properties: X,Y,Z 1.3.7 Copy, Cut, Paste, Delete 1.3.8 Selecting Multiple Frames 1.3.9 Selecting Frames Under Other Frames 1.4 Line and Colors of Frames 1.5 Text Flow Around FrameWorking with Frames
Working with Scribus is for the most part working with a frames environment. Some more generic terms you may see in menus and commands are objects or items, of which frames are one kind of object or item. There are five kinds of frames you will work with in Scribus: Text frames WwImages.html Image frames WwRenderframes.html Render frames WwShapes.html Shapes Each of these have their own section in this online manual, but here we will explain features they share.Creating Frames
There are at least six ways to create frames: Clicking the toolbar icon for the type of frame Choosing from the menu, Insert > Type of frame Using the keyboard shortcut (when not in Edit Contents mode in an already existing frame) T for Text frame I for Image frame D for Render frame S for Shape P for Polygon Using Duplicate or Multiple Duplicate to make one or more copies of the selected frame Duplicating a Layer with its contents Copying a page, with all of its contents If you change your mind or pressed the wrong key (at least in the cases 1, 2 and 3), you can press Esc or the Spacebar to cancel, or click the toolbar icon for your next choice. When you make one of the choices 1–3, your mouse cursor becomes activated to draw the frame, and a tooltip pops up to tell you the cursor's X-Pos and Y-Pos. As you click-drag to make the frame from one corner to its opposite, the tooltip now displays the Width and Height frame you are creating. For Shapes and Polygons, this describes the dimensions of the Bounding Box. Usually the next step is adding or doing something with the content, but we will leave that to the individual sections regarding each type of frame.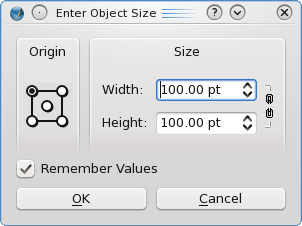 Here we see the Enter Object Size dialog that comes up if you left-click somewhere on the page, rather than doing a click-drag operation.
Obviously this can be very handy for creating a frame of a precise size.
The fields Width and Height are spinboxes whose use will be explained below.
Here we see the Enter Object Size dialog that comes up if you left-click somewhere on the page, rather than doing a click-drag operation.
Obviously this can be very handy for creating a frame of a precise size.
The fields Width and Height are spinboxes whose use will be explained below.
Context Menus
Each frame type has its own particular Context Menu, found by right-clicking on it. Since these are variable depending on the type of frame, they will not be elaborated upon here. Keep in mind that you can find interesting things in Scribus by right-clicking on various items.Manipulating Frames
How to Use Spinboxes
Hover the cursor over the spinbox value and use your mousewheel to change it Click the up or down arrow to the right side of the spinbox Use the arrow keys – cursor must be over the appropriate spinbox Change the value with the keyboard. Hint: Scribus will do math for you. Enter (615/2+20), for example. There are some keywords you can use also, and combine with math operations: pagewidth/2, for example. Other keywords are pageheight, width (of selected item), and height (of selected item). The mousewheel digit changed can be modified: No key pressed: units Shift key held: tenths Shift + Alt: hundredths Ctrl or Alt: tens Ctrl + Alt: hundreds – Careful with this one with a page measurement unit like inches Except for those that use Alt, you can use most of these keymods when moving the frame with the arrow keys (cursor not over spinbox), but not for resizing with arrow keys.Moving Frames
The simplest method is to click-hold inside the frame and move with the mouse. While this is taking place a tooltip tells you the position of the Basepoint (default basepoint is left upper corner). You can also use the arrow keys to move the frame as long as the cursor is not over any spinboxes. For more precise movement, use Properties > X,Y,Z tab (X-Pos and Y-Pos) and its spinboxes.Resizing Frames
A selected frame shows a dotted red border and in addition small square handles at the corners and at the midpoints of each side. Click and drag a handle to make manual adjustments. If you hold down the Alt key and the cursor is not over a spinbox, you can resize the frame using the arrow keys. To resize a frame proportionally, press Ctrl+Alt while moving a handle. Use the Width and Height spinboxes in the Properties Palette for precision.
Rotating Frames
There are 2 ways to rotate a frame: Click the Rotate icon on the toolbar. You then click-drag inside the frame to rotate. As long as you click inside a frame, the basepoint is always the center of the frame. However, if click on any of the corner handles, the basepoint is the opposite corner. Use the Rotation spinbox in Properties. In this case, you can choose the basepoint around which rotation takes place, as well as have more precision.Moving Frames – Level to Level or Layer to Layer
You can move up or down levels using Properties > X,Y,Z tab, in the area labelled Level, either one level at a time or to the top or bottom. The number beside these arrows tells you which level your object is on (1 is the bottom). There are also keyboard shortcuts: Home: to the top End: to the bottom Ctrl+Home: up one level Ctrl+End: down one level If you have more than one layers.html layer, you can use the Context Menu (right-click on the frame) to send the frame to a different layer.Final Section of Properties: X,Y,Z
Looking at the last group of seven buttons in the lower right corner of X,Y,Z, the two leftmost buttons, grayed out in this picture, will group and ungroup a collection of selected objects (note that vector drawings are always imported as groups of objects). The next two buttons, with the blue arrows, flip the object horizontally or vertically. The picture of the lock is where you can lock or unlock the selected object, and just to its right you can lock or unlock only the size of the object. The last button in the lower right corner enables is disables printing (and export to PDF) of the object.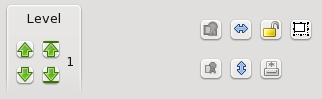
Copy, Cut, Paste, Delete
Most users should be familiar with these kinds of operations common to many types of editing software. They can be found in the Context Menu or the Edit menu, and have the standard keyboard shortcuts of Ctrl+C, Ctrl+X, Ctrl+V, and Del. In Scribus, Delete operates similar to Cut, since it can be undone, but in contrast is not copied to the clipboard and therefore cannot be pasted. If you move from one page or one layer to another, Paste will place the new copy at the same coordinates it had on the original page or layer.Selecting Multiple Frames
You might do this as a prelude to grouping the frames, so you can move or scale them as a unit. The simplest way of selecting a group of frames is to click-drag around them. You have to be sure that any frame you wish to be selected is fully within the temporary rectangle you see during this operation. This may not work when you only want some of the frames in a particular rectangular space. In that situation you can manually select additional frames in a cumulative way by holding down Shift as you click. If you make a mistake, click again while holding Shift to deselect individual frames. If you have not yet grouped the frames, click outside these collectively selected frames to "break" the multiple selection. You can also combine these approaches by click-dragging around a number of frames, then Shift-clicking any you wish to select in addition or deselect.Selecting Frames Under Other Frames
If all you want to do is select an individual frame that happens to be completely underneath some other frame, hold Shift+Ctrl, and click serially on a particular spot to toggle through the frames covering that spot. You will cycle through the frames, but also at some point select none of them. Note: if you find an inability to select a frame underneath another using this method, consider that this frame may be on another layer. You may only work on one layer at a time.Line and Colors of Frames
The line of a frame is the border. For text, image and render frames, the default color of the line is None, so none of the line settings have any meaning until the line is given a color in the Colors tab of the Properties Palette. The default background or fill color of text and image frames is also None. For Shapes and Polygons, the default fill color is set to None, wheras the default line color is Black. For all kinds of frames these default colors can be set in File > Document Setup > Tools for the current document and in File > Preferences > Tools for new documents.Text Flow Around Frame
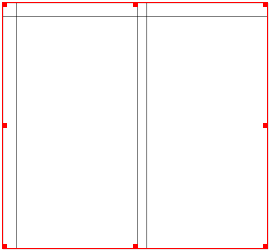
The first important thing to remember is that this can be a property of any kind of frame, and that it applies to any text frames underneath it, underneath being not only on a lower level, but also a lower layer. Secondly, you need to choose whether you want flow around the frame, the contour line, or the bounding box – making your choice in the Shape tab of Properties. For text and image frames, all 3 coincide with each other when they are created. As for shapes and polygons, only only the frame and contour lines coincide (i.e., they are identical with the shape/polygon itself), whereas the boundling box is always the surrounding rectangle. Details will be found elsewhere, but in the Shape tab of the Properties Palette you can edit the frame/shape or the contour line independently. In this screenshot below, the left column flows around the frame, the right around an edited (enlarged) contour line:
Textframes
1 Working with Text 1.1 Using Story Editor 1.2 On the Main Screen 1.3 Inline Graphics 1.4 Importing Text From a File 1.5 Plain Text 1.6 CSV, HTML, and ODT files 1.7 Tagged Files 1.8 Context Menu 1.9 Linking Text Frames 1.10 Linking Existing Text Frames 1.11 Properties: Text 1.12 Baseline Grid 1.13 Color & Effects 1.14 Style Settings 1.15 First Line Offset 1.16 Columns and Text Distances 1.17 Tabulators 1.18 Optical Margins 1.19 Advanced Settings 1.20 Word Tracking and Glyph ExtensionWorking with Text
Unlike using a wordprocessor, Scribus uses a frames environment. Therefore, you cannot simply enter text on a document page. See Working with Frames to learn about frame creation and manipulation. Once you have a text frame, your task now is to put some text into it. You may place text into a text frame in the following ways: Using Story Editor. Directly into the frame on the main screen. Importing text from a plain text file. Importing from selected formatted files, such as ODT, HTML, CSV. There are other file formats such as DOC files which can import only the text without any formatting. You can also set up custom tags in text files to act as a filter for formatting on import.Using Story Editor
This is listed first because it is the recommended way to enter text manually from the keyboard. Bring up the Story Editor (SE) from the Context menu or with Ctrl+T. Because SE is very versatile, it will be covered in detail in its own section. Its main disadvantage is that you will not see the final appearance of the text until you update the frame, with or without exiting SE. SE is also a convenient way to create, edit, and apply Paragraph and Character Styles.On the Main Screen
A selected frame can enter Edit Contents mode by clicking the Edit Contents icon on the toolbar or double-clicking on the frame (keyboard: E). The advantage of this is that you can see immediately the appearance of your additions or edits. It is a bit slower, since screen refreshes are involved. You can use Properties to change the font, style, and other characteristics such as linespacing. For small edits and frames which only contain a small amount of text, Edit Contents can serve your needs well.Inline Graphics
You may also insert any graphics in a line of text. Simply copy the item (Ctrl+C, for example), then paste into the line of text while in Edit Contents mode. This will not work in Story Editor.Importing Text From a File
We'll collapse our above list a bit, so that we consider all these unformatted, formatted, and tagged files close together.Plain Text
<p>Clicking Get Text will bring up a file dialog and by default look for files ending in .csv, .html, .htm, .odt, .pdb, .sxw, and .txt, so if you save a plain text file, try to save as *.txt. You can also import .doc files in Linux if you have installed antiword – on Windows versions of Scribus this is already present. If the frame has content that you want to add to, use Append Text instead. While appending text works in both Select Item and Edit Contents modes, they both will append text at the end. If you really do want to insert a file somewhere in the middle, append, then select the text in Edit Contents mode, cut, then paste at the point you wish it to go, while in Edit Contents mode or in Story Editor. Plain text into an empty frame will use the default font settings for your text frames, which you can change in File > Preferences > Tools .CSV, HTML, and ODT files
CSV files (comma-separated values) are typically generated by spreadsheet or database programs, but they are simple enough that they could be created with a text editor. The data will be arranged so that a comma or some other character tells Scribus when the next field is coming, and a newline tells when the next row comes in the file. On importation, you have an opportunity to declare the separator, and also declare a value separator, typically quotation marks. The value separator is optional, and would be used to allow the inclusion of a comma inside the field. If you check that the first row is a header, those values will be made bold. When Scribus pulls in the data, it will use tabs between the fields. For the header row, these will be center-type and for the rest left-type. Considering the wide variety of HTML tags, it shouldn't be surprising that there are limitations to what Scribus can interpret from an HTML file. It will interpret text only between the <body> and </body> tags and mainly focus on recognizing headers, paragraph and line breaks, and text styles, though the styles available may depend on the fonts on the system. You can expect at least some extraneous text in a complex HTML file. Scribus will assign styles to variously formatted text. ODT files (from OpenOffice.org) are the recommended format when you want to automatically assign Scribus styles to text you import into a frame. Generally a very good to excellent result can be expected for recognizing and assigning styles, provided that you use styles in oowriter. This can also be a workaround for DOC or other files, by importing into oowriter and then saving as an ODT file. You cannot expect good results importing tables in this fashion, even in an ODT file.Tagged Files
The idea of putting some kind of text indicator, or tag, at intervals in a text file in order to trigger some action when the file is read is elegant and has survived since the early days of computing. The purpose in Scribus would be to automatically cause the application of some edit to the text, most commonly a paragraph style. These tags can be anything you want, but should be a combination of easy to type, easy to find visually as you scan the file, and unique. This is why the suggestions you see on the wiki and the printed manual use 2-3 letter combinations, beginning with a backslash (\). On the textfile end of things you want to put these tags, let's say \h1 and \h2, at the beginning of a paragraph which is to receive some style. Once you have saved the file, you then import it, initially no different than a plain text file, by using Get Text. You likely did not see it, but please now note the button labeled Automatic in the dialog. Clicking this shows a drop-down list, where you can find Text Filters as a choice.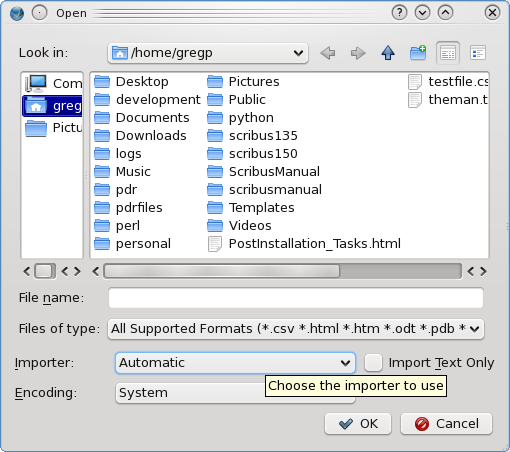
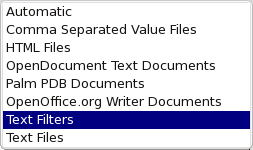 On choosing Text Filters, and then selecting your file and pressing Ok, you now have a bit of work to do, since unless you have already created the specific actions based on your tags, you must do so now.
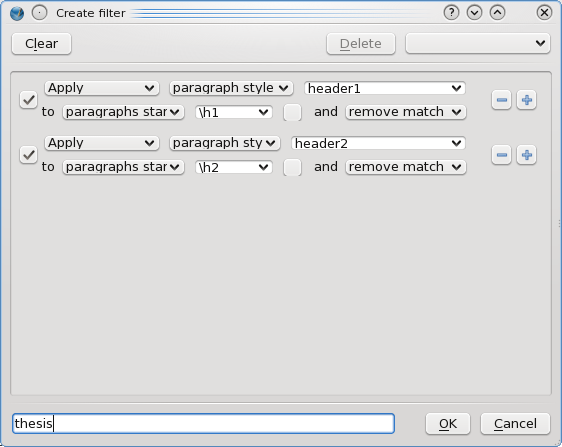
For each tag you have a choice of Remove, Replace, or Apply as the action, and of course here we want to apply a style, but as you can imagine, we might also use this to remove or replace some text on import without altering the file itself.
In this small example, we have set up a filter that we have named thesis by choosing to Apply a paragraph style, named header1 for paragraphs starting with our tag, \h1, and we will remove match (the \h1).
Had we previously set up thesis, it could be chosen from the drop-down button in the upper right corner of the dialog.
Similarly, if we have already created these styles, they could be chosen from a list where you see header1 and header2.
We could delete an action by clicking on the '-' button, and add another with the '+' button.
On choosing Text Filters, and then selecting your file and pressing Ok, you now have a bit of work to do, since unless you have already created the specific actions based on your tags, you must do so now.
For each tag you have a choice of Remove, Replace, or Apply as the action, and of course here we want to apply a style, but as you can imagine, we might also use this to remove or replace some text on import without altering the file itself.
In this small example, we have set up a filter that we have named thesis by choosing to Apply a paragraph style, named header1 for paragraphs starting with our tag, \h1, and we will remove match (the \h1).
Had we previously set up thesis, it could be chosen from the drop-down button in the upper right corner of the dialog.
Similarly, if we have already created these styles, they could be chosen from a list where you see header1 and header2.
We could delete an action by clicking on the '-' button, and add another with the '+' button.
Context Menu
Right-click on a frame to show its context menu, seen to the right. We will not cover all the features of the text frame context menu, but here is the particular list of choices available for text frames. At the top, Info gives information about the content of the frame, statistics on number of paragraphs, lines, and so forth, and also whether this frame is set to print, which also applies to whether it will be included in PDF export. Undo will undo the last operation on the frame, but it's important to mention that this does not include text editing, which is currently not Undo-able. Redo is available when some operation has been undone. Get Text and Append Text allow for importation of text data from a file. Edit Text brings up the Story Editor</b> Sample Text allows for importing so-called Lorem ipsum text, not only in the original Latin, but also many other languages. A dialog comes up for choice of the language and amount of sample text to create. Attributes and PDF Options are advanced features not covered here. Is Locked will lock all characteristics of a frame, such as position, size, and contents. It cannot be deleted, but can be copied and pasted, and the copy will also be locked. If you Duplicate a locked frame, the duplication will not be locked. Size is Locked, as the name suggests, only locks the size of the frame. Send to Scrapbook and Send to Patterns will not be covered here, except to say that this allows for saving content to be shared among documents. Level allows you to move the frame up or down levels on the current layer. If your document has more than one layer, there will also be an item Send to Layer to allow moving the frame to a different layer. Convert to gives you the following sub-choices: Image Frame converts to that kind of frame, in which case your text becomes invisible, but will be restored if you convert back to a text frame. You cannot show text and an image together, except where text is incorporated in an image. Use a superimposed text frame to apply text over an image. Outlines transforms the glyphs (characters) into vector graphics, which are then grouped. Some caution is advised here, since even though there seems to be an option to convert back to a text frame, this will not allow editing of the text. Best to Undo back to before the text to outlines conversion, but you must do this with the toolbar Undo or Ctrl+Z. Polygon, like Image Frame, converts to a polygon, with apparent loss of text, recoverable with Convert to Text Frame. Cut, Copy, and Delete are covered in Working with Frames. Contents > Clear is only present when your frame has content, and you will get a dialog to Ok the operation. Properties brings up or hides the Properties palette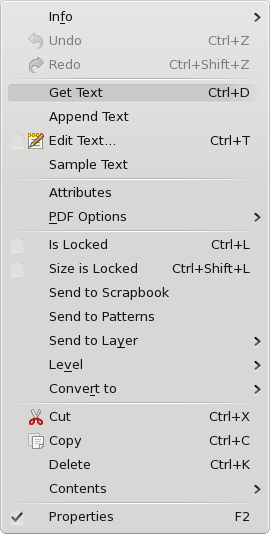
Linking Text Frames
Any multipage document is likely to need to link text from one page to the next. An automatic way of setting this up is when a new document is created. This graphic is from the lower right corner of the New Document dialog. We have set the Options for 4 pages initially, with 2-column frames (which will fill to the margins), and an 11-point gap between columns. Show Document Settings After Creation will bring up the Document Settings dialog after OK is clicked. You may freely edit the individual frames on pages afterward without losing your text linkage. Furthermore, if you add more pages to your document, they will also have these same linked frames. If you unlink somewhere in the middle, you will need to re-establish your linking pattern.
Linking Existing Text Frames
 A selected but unlinked text frame will show the toolbar icon to the left (green arrow) active.
Click the link icon, then click the next frame that your selected frame is to link to.
If you have more frames you wish to link to, continue clicking on them in order.
When your linking is finished, remember to click the link icon to deactivate it.
A selected but unlinked text frame will show the toolbar icon to the left (green arrow) active.
Click the link icon, then click the next frame that your selected frame is to link to.
If you have more frames you wish to link to, continue clicking on them in order.
When your linking is finished, remember to click the link icon to deactivate it.
 Unlinking is a similar process.
The icon will only be active if you have selected a linked frame.
Select the frame where you want the linking to stop, click the unlink icon, then click the next frame in the linkage.
You will need to re-establish a linking pattern if you simply want to skip over a particular frame.
Unlinking is a similar process.
The icon will only be active if you have selected a linked frame.
Select the frame where you want the linking to stop, click the unlink icon, then click the next frame in the linkage.
You will need to re-establish a linking pattern if you simply want to skip over a particular frame. Properties: Text
Baseline Grid
The baseline grid is always present but hidden by default, and is never seen in printed output or in your PDF. Click View > Show Baseline Grid to see it. Its default setting is 14.40 points, and the default is adjustable in File > Preferences > Guides, where you will see that the Offset is also adjustable – this is the displacement of glyphs from the baseline, and can have a positive or negative value. To the right we see text aligned to the baseline grid for the entire frame, along with an illustration of localized adjustments in Edit Contents mode. The Offset here is 0. As you can see, this is also a method for keeping linespacing constant when font size varies in a paragraph, since aligning to the baseline grid is just another kind of fixed linespacing. The other common use for aligning to baseline grid is to make sure that lines of text match their spacing in adjacent frames or columns.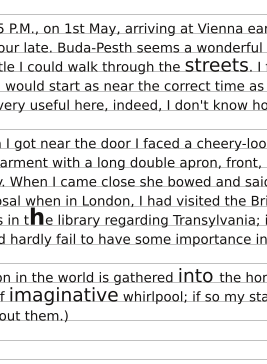
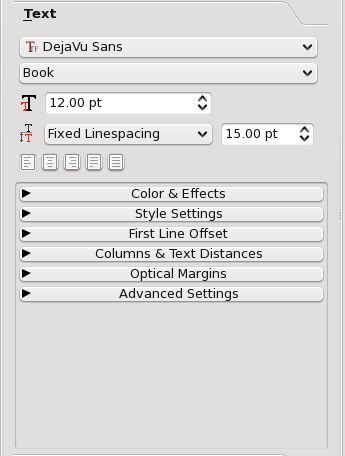
Color & Effects
Here we choose the colors for text. The fill color for a font is the main color. The line color only is active when outline or shadow effects are activated, and there is only one color applied to both effects. From left to right, the effects buttons are as follows: Underline sections of text, including intervening spaces. Hold down the button to make adjustments of Displacement and Linewidth. Defaults are in File > Preferences > Typography. Underline words only, not intervening spaces. Hold down the button to make adjustments of Displacement and Linewidth. Defaults are in File > Preferences > Typography. Subscript. Relative size (<Scaling) and Displacement are set in File > Preferences > Typography. Superscript. Defaults are in File > Preferences > Typography. All caps. Small caps. There are a few fonts that have a real small caps subset, but this is a workaround for those that do not. Strikethrough. Hold down the button to make adjustments of Displacement and Linewidth. Defaults are in File > Preferences > Typography. Outline. Hold down the button to adjust Stroke width. Shadow. Hold down the button to adjust the X- and Y-Offsets. Right to Left Writing. Glyphs are flipped horizontally and run from right to left. Only available on a frame-wide basis, i.e., not by glyph/word/paragraph.
 To the left is a workaround for the apparent inability to reverse only an individual word using inline graphics.
A small text frame was made with our word to be reversed, then converted to outlines.
The group of outlines was then flipped, copied, then inserted inline (as in inline graphics) into our sample text.
To the left is a workaround for the apparent inability to reverse only an individual word using inline graphics.
A small text frame was made with our word to be reversed, then converted to outlines.
The group of outlines was then flipped, copied, then inserted inline (as in inline graphics) into our sample text.
Style Settings
Here in the Properties palette, we can only set an already created style. An explanation on creating and editing styles is found in WwStyles.html Working with Styles.First Line Offset
First line offset refers to how closely the first line of text approaches the top of the frame or the space it is allowed. In this example, where we have set a top distance, we see from left to right, Maximum Ascent, Font Ascent, and Line Spacing offsets.
Columns and Text Distances
 Formerly, this was in the Shape tab, but now has sensibly moved to Text, since it does apply to text frames.
Another enhancement is that now we can see in this example that two Columns, a Gap, and Top and Left distances have been set, even in an empty frame.
This feature can be turned off/on with View > Show Text Frame Columns.
Formerly, this was in the Shape tab, but now has sensibly moved to Text, since it does apply to text frames.
Another enhancement is that now we can see in this example that two Columns, a Gap, and Top and Left distances have been set, even in an empty frame.
This feature can be turned off/on with View > Show Text Frame Columns.
Tabulators
Tabulators will also be covered in Working with Styles, but here we can create and apply frame-wide tab stops. Operationally this is quite easy. Simply click somewhere along the ruler, and a Left tab is created. Adjust Position manually or with the spinbox. If desired you can change the tab type to Right, Period, Comma, or Center. To delete an individual tab, click-drag it off the ruler. The space between stops (Fill Char) will by default be white space (None), or can be Dot, Hyphen, Underscore or a Custom character of your choice. Tab Types Left - entered text goes to the right of the stop. Right - entered text goes to the left until Tab is pressed again. Period - entered text or numbers center on a period/decimal point, ending when Tab is pressed again. Comma - entered text or numbers center on a comma/decimal separator, ending when Tab is pressed again. Center - entered text centers on the middle of a string, ending when Tab is pressed again.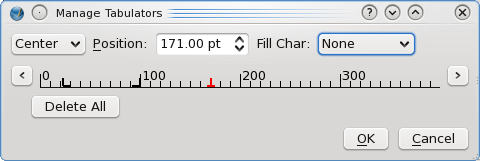
Optical Margins
When there is punctuation ending or beginning a line, the adjacent characters will be pushed in a bit resulting in a slightly ragged edge to the text. Application of optical margins allows the punctuation to extend from the frame just a bit so that the edges of other characters line up more closely. In the image to the right, on the left side we see the edge with no optical margins applied, and the right side shows what we see with optical margins.
Advanced Settings
The upper part of this sub-tab contains some features long present in Scribus, but have simply moved here. Starting from the upper left spinbox and going clockwise, we have an adjustment to baseline, and not just for align to baseline grid, so that selected words can be shifted above or below the baseline for the desired effect. Next we have kerning, in which the spaces between glyphs can be adjusted, again in a smaller than normal (negative percent) or larger fashion. In the lower right corner we can stretch or shrink glyphs vertically, and in the lower left shrink or stretch horizontally.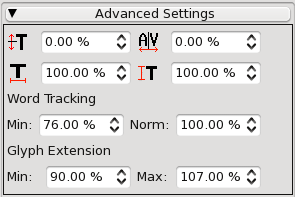
Word Tracking and Glyph Extension
You might consider these a more advanced or intelligent kerning and character width adjustment, where we can, by setting the Minimum and Normal, or Minimum and Maximum parameters, allow for adjustments in spacing in a selective fashion, yet frame-wide. As you adjust these, you will see only some words, some lines adjusting. The idea is to adjust for more pleasing, even layout of the words in the frame, trying to avoid or eliminate problems like white space rivers.Imageframes
1 Working with Images 1.1 The Context Menu 1.2 Properties: Image 1.3 Edit Contents ModeWorking with Images
See Working with Frames to learn about Image Frame frame creation and manipulation. Note that the image frame shows as a red border with small square handles at the corners and at the midpoints of each side. Diagonals in black are drawn to indicate that it is an image frame. Note that these small square handles disappear when the frame is locked. The quickest way to load an image into the frame is to right-click on the frame, and select Get Image from the Context menu. Pressing Ctrl+D or menu File > Import > Get Image will also work. A file dialog will appear, showing the image types that Scribus can import, which include bitmap formats TIFF, PNG, JPG and GIF as well as vector format PS (PostScript) and PDF files, which will be converted to bitmaps. Note that after import the image may only partly show. We'll see below in Properties: Image how to adjust scaling and positioning of the image in the frame. <p>Descriptions, advantages and disadvantages of various file formats will be discussed elsewhere.The Context Menu
Right-click on the empty frame to show its context menu as seen to the right. An empty frame will not show all these choices. Info gives a short list of information about the image, its name, the PPI (pixels per inch) of the original and as shown in Scribus, its colorspace, and whether it is set to print (and export to PDF). Undo will undo the last operation, which should be indicated. If applicable, there will also be a Redo item. Get Image allows for importing an image, as indicated above. Adjust Frame to Image enlarges or shrinks the width and height of your frame to fit the image at its current resolution. Adjust Image to Frame adjusts the image to the frame. Image will remain proportional if this is checked in Image tab of Properties. Update Image reloads the image. Would be used if you have edited the source file. See Edit Image below. Preview Settings This allows to image to be visible or not, and if visible, the resolution can be selected. Lower resolution or not showing images will speed up screen refreshes if this is sluggish. Full Resolution can only be as high as your monitor supports. These settings do not affect printing your image or exporting to PDF. Image Effects (also Ctrl + E) provide for a number of editing types, like blurring or changing contrast and brightness. These edits happen in a nondestructive way, i.e., the source file is not altered. Edit Image starts your image editor as set in the File->Preferences->External Tools and loads the image. Attributes will not be discussed here. Is Locked locks the frame's position, size, and content. Size is Locked locks only the size. Frame and image can otherwise be moved and edited. Send to Scrapbook and Send to Patterns will not be covered here, except to say that these allow for saving content to be shared among documents. Level allows you to move the frame up or down levels on the current layer. If your document has more than one layer, there will also be an item Send to Layer to allow moving the frame to a different layer. Convert to gives you the following sub-choices: Polygon, converts to a polygon, with apparent loss of your image, recoverable with Convert to Image Frame. Text Frame converts to that kind of frame, in which case your image becomes invisible, but will be restored if you convert back to an image frame. You cannot show text and an image together, except where text is incorporated in an image. Use a superimposed text frame to apply text over an image. Cut, Copy, and Delete are covered in Working with Frames. Contents > Clear is only present when your frame has content, and you will get a dialog to Ok the operation. There is also a choice Contents > Copy to copy only the content of the frame, as opposed to copying the frame and its contents. Properties brings up or hides the Properties palette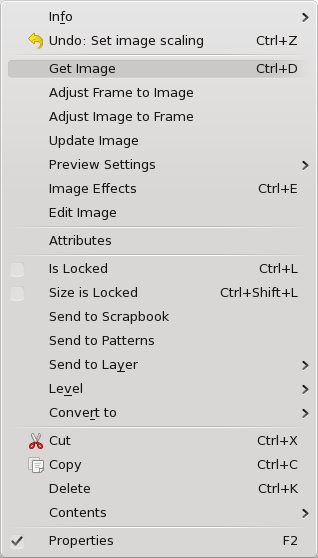
Properties: Image
When an Image is first loaded, the default is for it to have Free Scaling, and will be imported at its "native" size, at 72 DPI (your monitor's resolution). Under Free Scaling the spinboxes are: X-Pos and Y-Pos - Relative position of the left upper corner of the image to the left upper corner of the frame. X-Scale and Y-Scale - Magnification of the image, compared to when it is at 72 DPI. Actual X-DPI and Actual Y-DPI - These of course are inversely related to magnification. Your monitor will still likely be showing the image at no better than 72 PPI, but this refers to the final resolution to be exported to the PDF. In many cases, we may have a more or less set frame size we wish to squeeze an entire image into, in which case choosing Scale to Frame Size (or Adjust Image to Frame from the Context menu) makes sense. Without checking Proportional, the image is simply stretched to fit the frame and may be quite distorted. You should find the combination of scaling to frame size (proportional) and then Adjust Frame to Image from the Context menu very useful for making a frame exactly the right size for your image. Image Effects will be discussed elsewhere.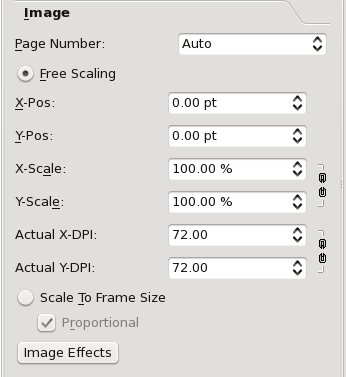
Edit Contents Mode
Enter Edit Contents mode by clicking the icon on the toolbar, or pressing E from the keyboard. Go back to Select Item mode by pressing Esc, or clicking outside, then inside the frame. You will need to have checked Free Scaling in order for this to be operational. With image frames, Edit Contents mode allows you to click-drag with the mouse to shift the image relative to the frame, i.e., the same as adjusting the X-Pos and Y-Pos in the Image tab.Styles
1 Working with Styles 1.1 Paragraph Styles 1.1.1 Drop Caps 1.2 Character Style 1.3 Importing StylesWorking with Styles
Why would someone want to use styles, or why might they be a good idea? Just what are styles in Scribus? There are two main categories of styles in Scribus, which you will see if you bring up the Style Manager dialog with Edit > Styles. The first is Line Styles, which will be discussed elsewhere in WwLines.html Working with Lines & Line Styles. The other kind of style applies to text layout, and you will see that this has two subtypes, Paragraph Styles and Character Styles. You will also see that there are defaults for each of these. These default settings come in part from the default font settings in File > Preferences > Tools for text frames, but you can also edit the default styles here in the Style Manager. Paragraph Styles are applied to an entire paragraph of text, as the name implies, while Character Styles will be applied to a collection of letters, words, or even paragraphs of text irrespective of the paragraph style setting. It gets even a bit more confusing since a paragraph style will always contain a character style within its definition. The why of styles is a matter of convenience, but also of easily achieving a consistent look in a document. For a newsletter, one may want to always use a precise collection of font attributes for headings, the body of the text, sidebars, whatever elements your newsletter may contain. Another convenience with styles is that, once you have applied them, if you edit a style later, the changes will automatically be applied wherever that style is used. Furthermore, styles can be imported from other Scribus documents, or you may clone a style to slightly modify it for some other purpose. Lastly, if you use OpenOffice.org and save in ODT format, you can import and automatically create any styles in Scribus that you may have created in Writer. With this brief introduction, let's start by making some paragraph styles.Paragraph Styles
 When you open the styles dialog, it may have the appearance you see here or be expanded.
We'll imagine that we want to create two styles for a newsletter, one style for headings/titles, and another for body text.
We want headings to stand out from the body text, and the body text should be pleasing to the eye and have easy legibility – we will not spend time on the pros and cons of font choice in various settings, since many factors may be involved.
When you open the styles dialog, it may have the appearance you see here or be expanded.
We'll imagine that we want to create two styles for a newsletter, one style for headings/titles, and another for body text.
We want headings to stand out from the body text, and the body text should be pleasing to the eye and have easy legibility – we will not spend time on the pros and cons of font choice in various settings, since many factors may be involved.
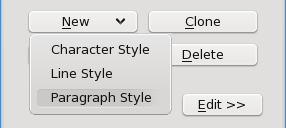 Click the New button for the drop-down list and select Paragraph Style.
The default name will be New Style.
Initially, the Properties tab will be active, and as you can see, this has settings for various attributes of our glyphs in relationship to lines, other paragraphs, the margins and tabulators, but nothing about the font itself.
Click the New button for the drop-down list and select Paragraph Style.
The default name will be New Style.
Initially, the Properties tab will be active, and as you can see, this has settings for various attributes of our glyphs in relationship to lines, other paragraphs, the margins and tabulators, but nothing about the font itself.
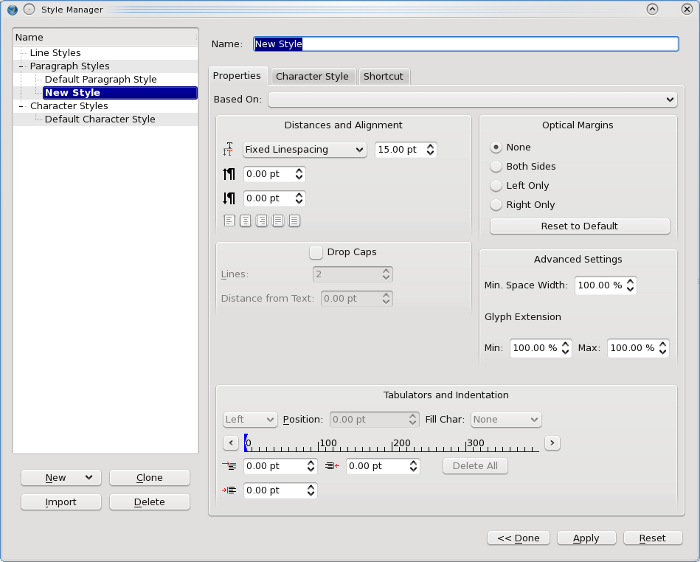 We will not cover various items that you will find in Working with Text, but mainly focus here on settings that are not in the Text tab of the Properties palette.
Underneath the linespacing settings we see two spinboxes for determining the white space above and below the paragraph this style is used for.
Any space setting will add to the space set for the preceding or following paragraphs.
Down below the tabulator settings we also saw in Properties are spinboxes which control indentation.
On the left-top, we can set the indentation of the first line of a paragraph relative to the left margin of the paragraph.
Assign a negative value for so-called hanging indent.
On the left-bottom, we set any paragraph-wide indentation from the other settings of the frame - this include the border of the frame and also any left text distance setting for the frame – this defines the left margin of the paragraph as just mentioned.
You can only set for a hanging indent when this value has some positive number, and the absolute value of the hanging indent can be no larger than this value.
Example: if you want a hanging indent of -15 pts, you will need a paragraph margin setting of 15 pts or greater.
Finally, on the right, we have the right margin of the paragraph, analogous to the paragraph-wide left indentation just mentioned.
Here we show a hanging indent and extra space above paragraphs – note that the space above paragraph does not apply to the first paragraph in the frame.
We will not cover various items that you will find in Working with Text, but mainly focus here on settings that are not in the Text tab of the Properties palette.
Underneath the linespacing settings we see two spinboxes for determining the white space above and below the paragraph this style is used for.
Any space setting will add to the space set for the preceding or following paragraphs.
Down below the tabulator settings we also saw in Properties are spinboxes which control indentation.
On the left-top, we can set the indentation of the first line of a paragraph relative to the left margin of the paragraph.
Assign a negative value for so-called hanging indent.
On the left-bottom, we set any paragraph-wide indentation from the other settings of the frame - this include the border of the frame and also any left text distance setting for the frame – this defines the left margin of the paragraph as just mentioned.
You can only set for a hanging indent when this value has some positive number, and the absolute value of the hanging indent can be no larger than this value.
Example: if you want a hanging indent of -15 pts, you will need a paragraph margin setting of 15 pts or greater.
Finally, on the right, we have the right margin of the paragraph, analogous to the paragraph-wide left indentation just mentioned.
Here we show a hanging indent and extra space above paragraphs – note that the space above paragraph does not apply to the first paragraph in the frame.
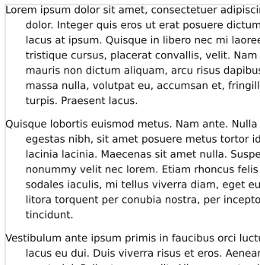
Drop Caps
Drop caps are enlarged first letters of a paragraph, which overlap two or more lines of text. The value for Lines must be an integer. The Distance from Text applies to the space to the right of the enlarged letter. This distance can be a negative number, even though it would seem that might have limited utility. Here we see examples of drop caps, the top and middle with a distance from text of 0, and in the bottom paragraph a distance of 10 pts. The middle paragraph has the drop cap set at 3 lines, and also uses a hanging indent for additional effect. Drop caps can be a very interesting visual effect, but do not lend to easy legibility, so in general should be used sparingly.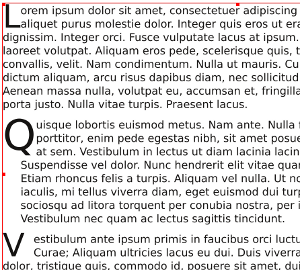
Character Style
Here we see the Character Style tab in Style Manager – now we can set the various font attributes and glyph modifications. Almost all of these settings have their counterparts in the Text tab of Properties palette, so check Working with Text for their explanation. The exception is the far-right spinbox in the upper row of spinboxes, next to Tracking. This sets the default width of the space character or glyph (keep in mind that a space is a glyph, but in contrast, a tab is not). It does not affect the space between all glyphs, such as is done with the tracking setting. If one is simply trying to create a character style not associated with a paragraph style, then you will only see this tab with its choices. Character styles can only be applied in the main window, i.e., there is no way to apply a character style in Story Editor – only a paragraph style with its associated character style may be used. There is a hierarchy to text formatting styles, in that a character style will override a paragraph style, even if it is applied to an entire frame, such as one might do in Select Item mode. This hierarchy is also something to keep in mind if you are trying to apply a paragraph style in Story Editor and it doesn't seem to be working.
Importing Styles
If you click the Import button on the Style Manager dialog, you will then get a file dialog to select a Scribus file for style importation. While you could select any kind of file, styles will only be found in Scribus files – there will be no error message. As seen here, you can then select which styles you wish to import, and can make sure there are no name conflicts. Renaming is an automatic process with this dialog, but of course you can rename the style once it's imported into your document. Hint #1: You might consider creating some files which are empty documents, but contain a collection of styles for use in other documents. Hint #2 for those who like to dissect .sla files: You will also find that, for the purposes of importing a style, you can strip out everything from a file except for the following tags: the <?xml...>, <SCRIBUSUTF8NEW...>,<DOCUMENT....>, <STYLE.....> (however many), </DOCUMENT>, and </SCRIBUSUTF8NEW> tags, and still have something that the styles can be imported from. Do not try to load this as a document, however.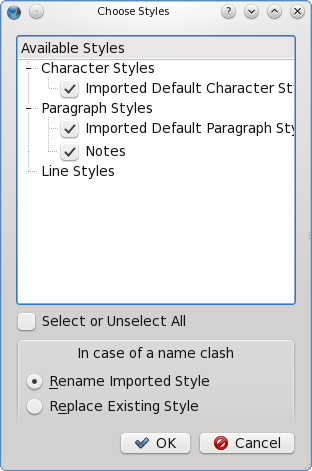
Renderframes
1 Introduction 2 Creating a Render Frame 3 Editing Render Frames 4 Preconfigured Programs 4.1 LaTeX 4.2 Lilypond 4.3 gnuplot 4.4 dot/Graphviz 4.5 POV-Ray 5 Rendering 5.1 Additional Notes 6 Configuration Introduction Since version 1.3.5 Scribus contains a powerful new feature called Render Frames. Originally planned as a means to insert formulas into Scribus documents, the inventor, Hermann Kraus, has enabled the creation of almost any kind of special typesetting, like formulas, musical notation or chess notation, from within Scribus. The trick here is that Scribus uses other programs in the background. It imports their output into a special frame type called Render Frames. While this feature is extremely versatile, you must not forget that the use of it requires knowledge of the markup codes required by a particular program. These commands are beyond the scope of the Scribus documentation. Creating a Render Frame To create a Render Frame, click on the Render Frame icon in the menu bar, use Insert > Render Frame, or press D on the keyboard: The cursor will then turn into a frame symbol with an L inside:
 The next step is to click-drag the frame and let up, just like you would do with a text frame.
By default, Scribus will display a welcome message, which indicates that at least the configuration for LaTeX is correct.
What you see below is the output from LaTeX, rendered in Scribus.
The welcome message will be displayed in the language of the user interface as set in File > Preferences.
If no translation of the message is available, you will see the English version:
The next step is to click-drag the frame and let up, just like you would do with a text frame.
By default, Scribus will display a welcome message, which indicates that at least the configuration for LaTeX is correct.
What you see below is the output from LaTeX, rendered in Scribus.
The welcome message will be displayed in the language of the user interface as set in File > Preferences.
If no translation of the message is available, you will see the English version:
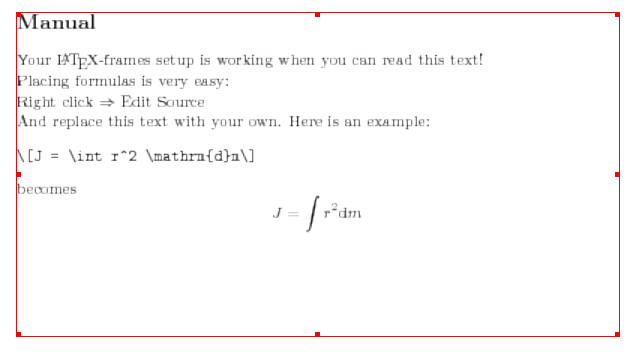 The screenshot above has been made with the default resolution of 72 dpi, which, obviously, isn't enough for printing.
You can easily change the resolution as you'll learn below.
The screenshot above has been made with the default resolution of 72 dpi, which, obviously, isn't enough for printing.
You can easily change the resolution as you'll learn below.
Editing Render Frames
If you right-click on a Render Frame, the context menu shows an entry called "Edit Source:"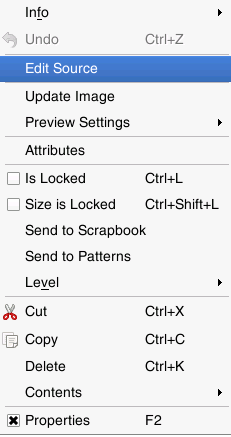 Selecting it brings up the "heart" of the Render Frame, the editor:
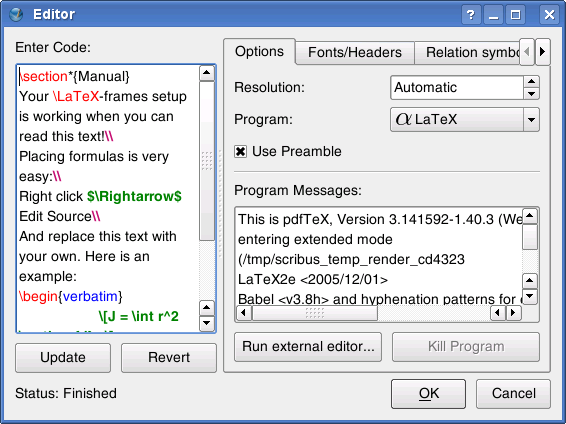 In Scribus 1.3.5, the editor is preconfigured to use LaTeX, Lilypond, gnuplot, dot/GraphViz and POV-Ray.
To the left you see a field with the caption "Enter Code." Here you can insert the markup code for the output you want from the external program.
For preconfigured renderers Scribus is shipped with some simple code snippets that will enable you to test if the respective programs are installed and configured properly.
As you can see, the editor provides syntax highlighting.
The "Update" button beneath the text field will update the content of the Render Frame, so that you can visually check the results of changes you made to the markup text without closing the editor.
"Revert" will revert any change you made to the text.
Please be aware that once you started editing the text, it's no longer possible to change the markup renderer, e.g., if you started editing LaTeX sourcecode, you cannot switch to Lilypond anymore.
To the right you see a row of tabs.
These are not available for all preconfigured markup languages, so sometimes the editor only shows the "Options" tab.
In the "Options" tab, the first entry is "Resolution." Its default setting is "Automatic," thus, 72 dpi as explained above.
You can easily change the resolution of the output to something more suitable for printing.
"Program" shows the list of supported programs.
The editor will list all programs that are configured in File > Preferences> External Tools.
If you check "Use Preamble," the editor will automatically use the preamble and the postamble as specified in the XML configuration files.
See below for more details.
"Program Messages" shows the messages that would otherwise be displayed in a command-line interpreter.
They are "intercepted" by Scribus, just like the final output, and they are often useful to find out what went wrong if the rendering failed.
If you click on "Run external editor," Scribus will start the editor as specified in File > Preferences, and "Kill Program" will stop the external program.
This can be useful when the external program stumbles across an error you made in your markup that causes the external program to fail or even crash.
In Scribus 1.3.5, the editor is preconfigured to use LaTeX, Lilypond, gnuplot, dot/GraphViz and POV-Ray.
To the left you see a field with the caption "Enter Code." Here you can insert the markup code for the output you want from the external program.
For preconfigured renderers Scribus is shipped with some simple code snippets that will enable you to test if the respective programs are installed and configured properly.
As you can see, the editor provides syntax highlighting.
The "Update" button beneath the text field will update the content of the Render Frame, so that you can visually check the results of changes you made to the markup text without closing the editor.
"Revert" will revert any change you made to the text.
Please be aware that once you started editing the text, it's no longer possible to change the markup renderer, e.g., if you started editing LaTeX sourcecode, you cannot switch to Lilypond anymore.
To the right you see a row of tabs.
These are not available for all preconfigured markup languages, so sometimes the editor only shows the "Options" tab.
In the "Options" tab, the first entry is "Resolution." Its default setting is "Automatic," thus, 72 dpi as explained above.
You can easily change the resolution of the output to something more suitable for printing.
"Program" shows the list of supported programs.
The editor will list all programs that are configured in File > Preferences> External Tools.
If you check "Use Preamble," the editor will automatically use the preamble and the postamble as specified in the XML configuration files.
See below for more details.
"Program Messages" shows the messages that would otherwise be displayed in a command-line interpreter.
They are "intercepted" by Scribus, just like the final output, and they are often useful to find out what went wrong if the rendering failed.
If you click on "Run external editor," Scribus will start the editor as specified in File > Preferences, and "Kill Program" will stop the external program.
This can be useful when the external program stumbles across an error you made in your markup that causes the external program to fail or even crash.
Preconfigured Programs
LaTeX
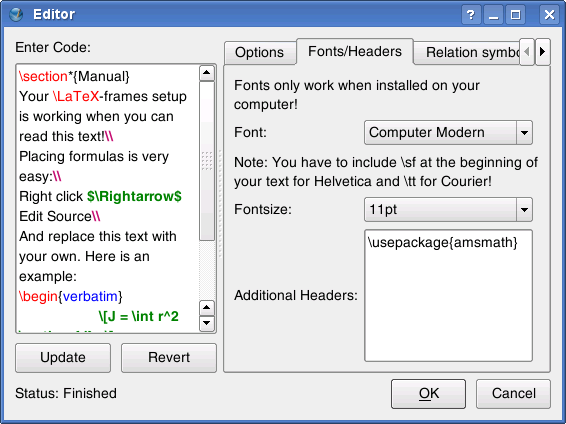 The first LaTeX tab is called "Fonts/Headers." In the upper drop-down list you can set the font used for a Render Frame that uses LaTeX.
By default, only four fonts are listed, but you can easily add more by editing the LaTeX XML configuration file as described in detail below: Just add another font under
The first LaTeX tab is called "Fonts/Headers." In the upper drop-down list you can set the font used for a Render Frame that uses LaTeX.
By default, only four fonts are listed, but you can easily add more by editing the LaTeX XML configuration file as described in detail below: Just add another font under <list name="font" default=""> in the file.
Please note that the font list for LaTeX (and many other markup programs) is completely different from the fonts available to you in Scribus and other programs, as LaTeX uses its own fonts and needs to be configured to use the Type 1, TrueType and OpenType fonts available to you in programs like Scribus or OpenOffice.org.
For more information about LaTeX font configuration see the LaTeX Font Selection Guide (PDF).
The next drop-down list allows for changing the default font size.
If you are used to LaTeX, you will already know that this is the setting for the base font.
Other necessary font sizes, e.g.
for superscript and subscript are determined by LaTeX.
You will also note that the editor lists only a selection of base font sizes.
Again, you can easily add other sizes under <list name="fontsize" default="11pt"> in the LaTeX XML configuration file.
Since there are almost no limits as to the possibilities you have for the configuration of a LaTeX file, you will appreciate the option to select different XML configuration files in File > Preferences > External Tools.
The text field "Additional Headers" allows for the insertion of additional headers to the preamble of the LaTeX markup, which will be stored within the Scribus sla file.
Finally, you find different tabs with symbols and characters that can be created by LaTeX:
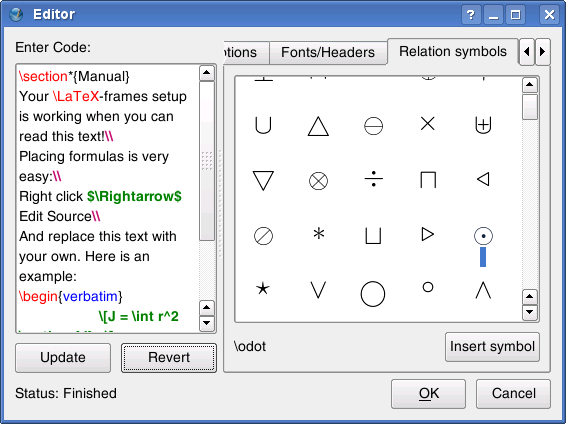 To insert a single symbol into your markup code, you can either select the symbol and click "Insert Symbol" or double-click on the icon in the field.
For more information see the official LaTeX website.
To insert a single symbol into your markup code, you can either select the symbol and click "Insert Symbol" or double-click on the icon in the field.
For more information see the official LaTeX website.
Lilypond
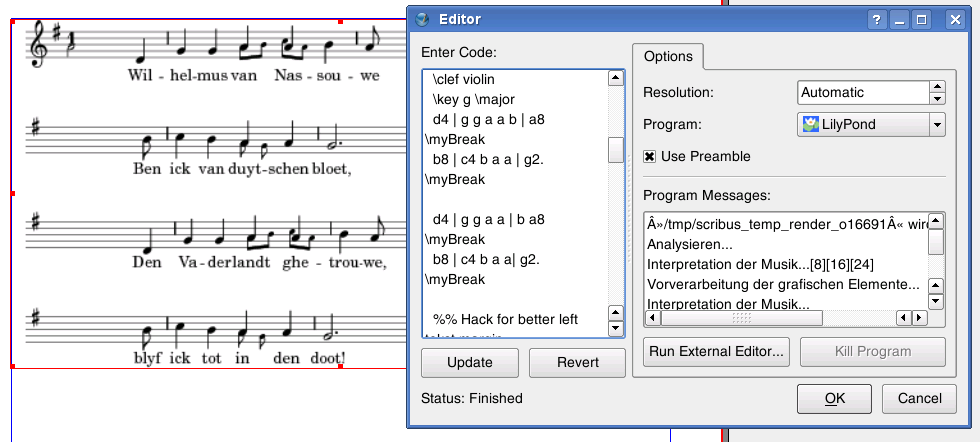 There are no additional options for Lilypond available.
For more information see the official Lilypond website.
There are no additional options for Lilypond available.
For more information see the official Lilypond website.
gnuplot
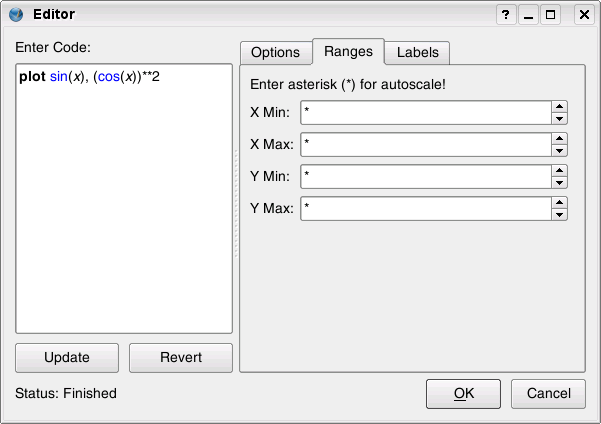 The gnuplot options are very basic.
Under Ranges you can enter the start and end digits for the x- and the y-axis.
The default is an asterisk, which will result in gnuplot creating the digits automatically, according to the values set in the markup text.
The gnuplot options are very basic.
Under Ranges you can enter the start and end digits for the x- and the y-axis.
The default is an asterisk, which will result in gnuplot creating the digits automatically, according to the values set in the markup text.
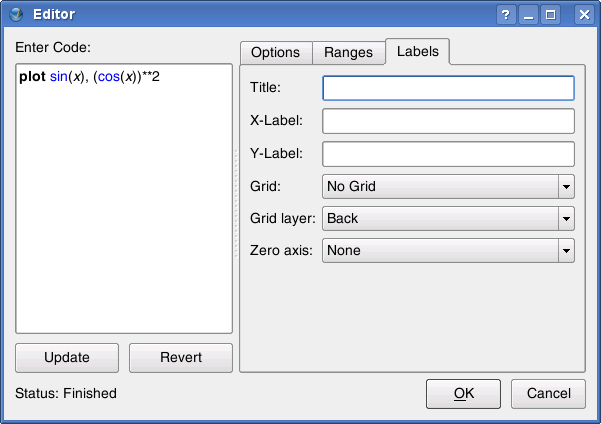 The tab called Labels serves as an assistant to determine some visual aspects of a graph: Title will create a title for your graph, which will be placed at the top of the rendered image.
X-Label and Y-Label will create captions for the x- and y-axis.
Grid and Grid layer work similiar to the guides/page grid settings in Scribus, except that the grid in the graph will become part of the rendered image.
You can choose between no grid at all, the major grid ("Major ticks only") and major plus minor grid ("Major and minor ticks").
Just like in Scribus you can also decide to have the grid rendered in the background or in the foreground.
Zero axis will create a dotted line to indicate either the x- or the y-axis, or both.
Note that using any grid will make the setting of any zero axis unnecessary, as both use the same colour.
If you want to use a different line style for grid and the axes, you have to do this in the markup text.
Likewise, adding a z-axis requires the editing of the graph's source code.
For more information see the official gnuplot website.
The tab called Labels serves as an assistant to determine some visual aspects of a graph: Title will create a title for your graph, which will be placed at the top of the rendered image.
X-Label and Y-Label will create captions for the x- and y-axis.
Grid and Grid layer work similiar to the guides/page grid settings in Scribus, except that the grid in the graph will become part of the rendered image.
You can choose between no grid at all, the major grid ("Major ticks only") and major plus minor grid ("Major and minor ticks").
Just like in Scribus you can also decide to have the grid rendered in the background or in the foreground.
Zero axis will create a dotted line to indicate either the x- or the y-axis, or both.
Note that using any grid will make the setting of any zero axis unnecessary, as both use the same colour.
If you want to use a different line style for grid and the axes, you have to do this in the markup text.
Likewise, adding a z-axis requires the editing of the graph's source code.
For more information see the official gnuplot website.
dot/Graphviz
There are no additional options for dot/Graphviz available. For more information see the official Graphviz website.POV-Ray
 The editor offers only one tab for the rendering of POV-Ray files, namley "Rendering Options:"
Quality provides the same seven quality levels as the POV-Ray command-line interface, and the editor uses the same default level ("Compute media and radiosity").
Otherwise, the quality levels are listed in an ascending order, "Just show quick colors" providing the lowest quality.
Antialiasing is a technique to "smoothen" edges in a rendered image.
It can dramatically improve the quality of an image, but using it may result in much longer rendering times.
The options Antialiasing Threshold and Antialiasing Depth are explained in detail in the POV-Ray documentation, but the default values should suffice in most cases.
For more information see the official POV-Ray website.
The editor offers only one tab for the rendering of POV-Ray files, namley "Rendering Options:"
Quality provides the same seven quality levels as the POV-Ray command-line interface, and the editor uses the same default level ("Compute media and radiosity").
Otherwise, the quality levels are listed in an ascending order, "Just show quick colors" providing the lowest quality.
Antialiasing is a technique to "smoothen" edges in a rendered image.
It can dramatically improve the quality of an image, but using it may result in much longer rendering times.
The options Antialiasing Threshold and Antialiasing Depth are explained in detail in the POV-Ray documentation, but the default values should suffice in most cases.
For more information see the official POV-Ray website.
Rendering
Once you have created the markup to your satisfaction, you can click the "OK" button. If you made a mistake, and the external program cannot render your markup, Scribus displays an error message: A blue X in the Render Frame along with an error message will then indicate that no content could be rendered:

Additional Notes
If you look at the context menu for Render Frames, you will get the impression that they are image frames. In a sense, that's correct, as you can change the preview settings for Render Frames or update the content. There is, however, a major difference: As said above, the markup text is stored within a Scribus file, and the rendered content is always created "on the fly." Each time you open a Scribus file that contains a Render Frame, Scribus will run the respective program that's necessary to render the content and create a temporary image file which will then be loaded into the frame. This is why Render Frames aren't listed in Extras > Manage Images. This behaviour has some consequences. While you can use a Scribus file with images on another computer by using File > Collect for Output and copying the resulting archive to another machine, Render Frames require the presence of the used software on this machine. Moreover, the feature might not work between different operating systems, because the command-line options can be different. Another limitation is that you can't apply any image effects to Render Frames.Configuration
To make Render Frames work, you need to have the required programs installed on your computer. By default, Scribus supports five programs, namely LaTeX, Lilypond, gnuplot, dot/Graphviz and Lilypond. On Linux, your package manager will take care about the installation and the dependencies of the software. On other platforms you might need to install the programs separately and edit some configuration files. If you open the tab "External Tools" in File > Preferences, you see the configuration options for Render Frames at the bottom of the dialog: Under "Configurations," Scribus shows the default configuration files.
Each program you want to use from within Scribus needs a separate configuration file.
To add a new program to your Render Frames, you have to create an XML file with some required settings.
Below you see an abridged and commented gnuplot configuration file, which will serve as an example:
Under "Configurations," Scribus shows the default configuration files.
Each program you want to use from within Scribus needs a separate configuration file.
To add a new program to your Render Frames, you have to create an XML file with some required settings.
Below you see an abridged and commented gnuplot configuration file, which will serve as an example:
<editorsettings description="Gnuplot" icon="gnuplot.png"> This line sets the description of the program, as well as the icon for the drop-down list in the Render Frame Editor.
It must be stored in the same directory as the XML file.
You can use PNG, XPM and SVG icons.
<executable command="gnuplot"> This is the command-line call of the program.
You can only use software that can work on the command-line.
Also, the program needs to be able to create output in either PNG, PDF or EPS format.
By default, Scribus uses the command-line options for Linux/UNIX systems.
<imagefile extension=".png"/> Here you tell the editor which file format it has to expect from the external program.
<highlighter> </highlighter> This part is mainly interesting for programmers, as it allows for the creation of indvidual syntax highlighting schemes by using Regular Expressions.
For further information see: http://docs.kde.org/kde3/en/kdeutils/KRegExpEditor/index.html and http://doc.trolltech.com/4.4/qregexp.html.
<empty-frame-text> Here you can enter sample text in the markup language of the program you want to use, for instance:
plot sin(x), (cos(x))**2
<preamble> If the markup language you want to use requires a preamble, you can enter it here.
It will not be displayed in the editor.
<postamble> If the markup language you want to use requires a postamble, you can enter it here.
It will not be displayed in the editor.
<tab type="settings"> Here's where translations to existing GUI strings as well as new tabs or other UI elements can be added via simple XML entries, for example:
<title><i18n>
<en>Ranges</en> <de>Bereiche</de> <fr>Rangées</fr> <pl>Zakresy</pl> <ru>Диапазоны</ru>
To add a new configuration file, click on the "Add..." button, which will bring up a file dialog.
Select your file and click "Open." The file will then be added to your Render Frame configuration.
By moving entries of XML configuration files in the list up or down, you can change the order of entries in the editor's drop down list.
If you want to use a different XML configuration file for a particular markup language (for example, if you need another default preamble for LaTeX frames in a project), you can change the path to the alternative file by clicking on "Change ..." or simply add a new configuration file with an appropriate name, like "MyLateX".
If you prefer another editor for your markup, for example if you can't live without Emacs or vi, or if the editor window is simply too small for you, you can override the built-in Scribus Render Frame Editor by using another editor like vi or Kate.
Just insert the path to the executable file in the text field "External Editor." The external editor won't override the Render Frame editor: As soon as you save your markup from the external editor, Scribus "intercepts" the data and renders the output into the frame or will display error messages in the "Program Messages" field.
The interception also means that any change to the markup text won't be saved anywhere but in your Scribus file.
If you haven't specified an external editor in Preferences < Tools, Scribus will display an error message:
 In addition, you have the option to start with an empty frame.
By checking "Force DPI," Scribus will render the output of every Render Frame with the resolution set in the spinbox to the right.
It's set to 72 dpi by default for performance reasons.
If you want to produce a document for professional printing, you will want to choose a higher resolution.
In addition, you have the option to start with an empty frame.
By checking "Force DPI," Scribus will render the output of every Render Frame with the resolution set in the spinbox to the right.
It's set to 72 dpi by default for performance reasons.
If you want to produce a document for professional printing, you will want to choose a higher resolution.
Shapes
1 Working with Shapes & Polygons 1.1 Shapes 1.2 Polygons 1.3 Context Menu 1.3.1 Editing ShapesWorking with Shapes & Polygons
In Working with Frames there is information on manipulation of frames which is applicable to all frame types. There we only explained how to start creation of shapes and polygons by using the appropriate toolbar icon, or using keyboard S or P. With shapes and polygons, you have a number of choices to make with each about what kind of shape or polygon to create. All of these are vector drawings, so you can freely resize or edit them after creation. Let's start with shapes.Shapes
Shapes are a collection of predetermined shapes, and with version 1.3.5+ have been greatly increased in number. The default shape when you start Scribus is the simple rectangular shape which the icon shows. Just to the right side of the shape figure on the toolbar is an arrow for a drop down list of subselections. Once you select from a drop down category and specific type (click with the mouse), you see the toolbar icon change to your selected shape. Note: the appearance of the Shapes icons has been enhanced in the image to the right - they will not appear as distinct as this. As stated in Working with Frames, the default line and fill color for shapes and polygons is black. You can change that for the current documents in File > Document Setup > Tools > Shape (icon), and for future documents in File > Preferences > Tools > Shape (icon). Just like other frames, you simply click-drag from one corner of the shape to its opposite. If you hold down Shift while click-dragging, when you let up on the mouse the shape will fill to the margins of your page.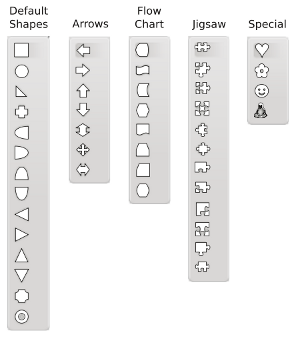 Another option with shapes is to make your selection from the list, then simply click on the page, i.e., do not drag the mouse.
This brings up a new dialog, Enter Object Size, in which you can make a shape of pre-determined dimensions.
This would be useful, for example, for making an exact square or circle.
The Origin relates to the point on the page where you clicked to bring up this dialog.
Another option with shapes is to make your selection from the list, then simply click on the page, i.e., do not drag the mouse.
This brings up a new dialog, Enter Object Size, in which you can make a shape of pre-determined dimensions.
This would be useful, for example, for making an exact square or circle.
The Origin relates to the point on the page where you clicked to bring up this dialog.
Polygons
Polygons in Scribus are regular polygons, which when drawn with equal width and height dimensions, will have equal sides and angles. Default is for 4 sides (corners), although you may have anything from 3 to 999 sides. The Polygons icon will always show a pentagon, but by selecting Properties from the drop-down you get the dialog to the right. As you see, your choices here are restricted to the geometry of the polygon. You can set defaults for line and fill colors and shading, and line thickness in File > Preferences > Tools > Shape (icon) or in File > Document Settings > Tools > Shape (icon). Your choices in File > Preferences > Tools > Polygon (icon) and in File > Document Settings > Tools > Polygon (icon) will be limited to what you see here in the Polygon Properties dialog. Number of Corners and Rotation need no explanation, but note that the rotation can be set in the spinbox or with the slider. Apply Factor is not so intuitive, but the small preview will quickly show you that a factor of less than 0% will bend the sides inward at the midpoint, and greater than 0% bend them outward. Curvature transforms the angulated bend into a curve instead.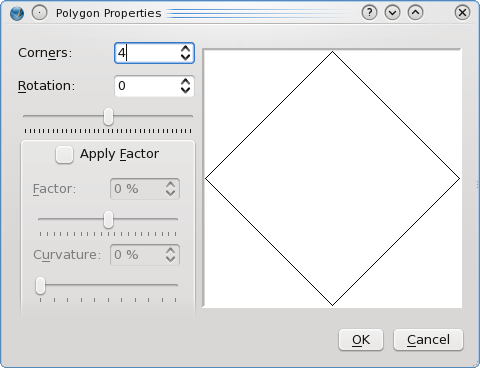 The best way to learn what the various settings do is simply to play with them then see the results.
If you draw your polygon with unequal width and height, you will see various kinds of distortions compared to the small preview window.
Below are some variations on a 4 and a 7-sided polygon which you might try to duplicate.
Just as with shapes, if you activate the polygons icon, then click the canvas, you will get the Enter Object Size dialog.
The best way to learn what the various settings do is simply to play with them then see the results.
If you draw your polygon with unequal width and height, you will see various kinds of distortions compared to the small preview window.
Below are some variations on a 4 and a 7-sided polygon which you might try to duplicate.
Just as with shapes, if you activate the polygons icon, then click the canvas, you will get the Enter Object Size dialog.

Context Menu
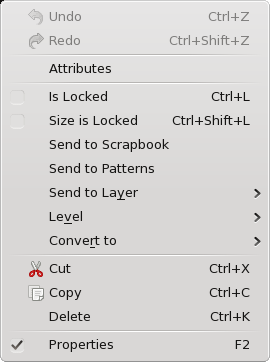 The context menu with shapes and polygons has fewer choices than with text or image frames.
Undo is active only when there is some operation on the frame which can be undone.
Redo is only present when some action has been undone.
Attributes will not be covered here.
Is Locked can be checked to lock all features of the object.
Size is Locked locks only that feature.
Send to Scrapbook and Send to Patterns allow you to easily use the object again in this or another document.
Send to Layer is present when your document has more than one layer.
Level is for raising or lowering this object relative to others on this layer.
Convert to allows conversion to Bezier curve - this would be necessary to Attach Text to Path using a shape or polygon.
Image Frame - you may need to edit line and fill colors.
If your image completely fills the frame, the fill color will not show unless there is transparency.
Text Frame - you may need to edit line and fill colors. Cut, Copy, and Delete are covered in Working with Frames Properties simply shows or hides the Properties palette.
The context menu with shapes and polygons has fewer choices than with text or image frames.
Undo is active only when there is some operation on the frame which can be undone.
Redo is only present when some action has been undone.
Attributes will not be covered here.
Is Locked can be checked to lock all features of the object.
Size is Locked locks only that feature.
Send to Scrapbook and Send to Patterns allow you to easily use the object again in this or another document.
Send to Layer is present when your document has more than one layer.
Level is for raising or lowering this object relative to others on this layer.
Convert to allows conversion to Bezier curve - this would be necessary to Attach Text to Path using a shape or polygon.
Image Frame - you may need to edit line and fill colors.
If your image completely fills the frame, the fill color will not show unless there is transparency.
Text Frame - you may need to edit line and fill colors. Cut, Copy, and Delete are covered in Working with Frames Properties simply shows or hides the Properties palette.
Editing Shapes
This will be handled in its own section, since it has much greater applicability than just to geometric figures.Editshapes
1 Editing Shapes 1.1 Properties: Shape 1.2 Edit Button 1.3 Skewing 1.4 Rotating, Enlarging, Shrinking 1.5 What is a Bounding Box? 1.6 Finally: What is a Contour Line? 1.7 Combining PolygonsEditing Shapes
Many of the objects that can be incorporated into a Scribus document are vector drawings, and as such can be edited. Even though the title seems to refer to the geometric shapes that can be easily created, the same procedures can be applied to all of these: Shapes Polygons Frames - all types Contour lines Bézier curves Freehand lines Outlines created from text glyphs Imported vector drawings, such as EPS and SVG As you may be aware or recall, when you consider the ability to convert from one kind of object to another, there is a great deal of flexibility in what you can do. Here we have edited the shape of a text frame, then taken a large glyph, converted to an outline, then converted to an image frame, and finally we take a polygon and convert to a text frame. The final state of the object determines its editing capabilities, so the large B can be edited like any other image frame, the polygon can have its text edited in Story Editor.
Properties: Shape
Here is our Shape tab from Properties, or at least the bigger part of it. We'll get to what's left (Fill Rules) farther down below in Combining Polygons. Let's look at the Round Corners item first, since it's a simple kind of edit, that does what it says. Since the spinbox is active, we know that the object this relates to is either a "regular" frame, like text, image, or render frame, or it's the rectangle shape (and not the 4-sided polygon). What the number in the spinbox refers to is the radius of the corner. You can keep going up on this until 2 adjacent rounding operations meet - if you start with a square, for example, you will end up with a circle. A rectangle looks more like a capsule with flattened sides and rounded ends. This could just as easily be a text or image frame.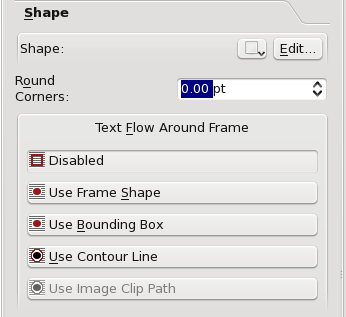
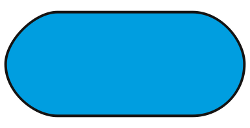 The next quickie edit is the icon with the drop-down arrow, next to the Edit button.
The drop-down lists are the familiar ones from the toolbar shape icon, but this is a transformation, not making a new shape.
Thus we can convert our capsule to a squat and overfed-looking Tux if we want.
In fact, we can do this with text and other frames as well, although you can expect the utility of a Tux-shaped text frame to be limited.
The next quickie edit is the icon with the drop-down arrow, next to the Edit button.
The drop-down lists are the familiar ones from the toolbar shape icon, but this is a transformation, not making a new shape.
Thus we can convert our capsule to a squat and overfed-looking Tux if we want.
In fact, we can do this with text and other frames as well, although you can expect the utility of a Tux-shaped text frame to be limited.

Edit Button
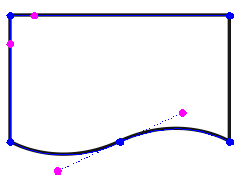 Now we get to the main event here, editing a shape/frame with its nodes and control points.
When you click the Edit button on the Shape tab, the Nodes dialog to the right pops up and your shape/frame is transformed something like what you see on the left, with these blue and magenta circles.
Something to note at the outset is that generally where there is a sharp corner in a shape you only see the blue nodes, but where there is a smooth curve of some sort, these magenta control points are visible, sticking out like antennae from the node.
Actually, all of these nodes have control points, but you don't see them when they are at the same position as the node.
Now we get to the main event here, editing a shape/frame with its nodes and control points.
When you click the Edit button on the Shape tab, the Nodes dialog to the right pops up and your shape/frame is transformed something like what you see on the left, with these blue and magenta circles.
Something to note at the outset is that generally where there is a sharp corner in a shape you only see the blue nodes, but where there is a smooth curve of some sort, these magenta control points are visible, sticking out like antennae from the node.
Actually, all of these nodes have control points, but you don't see them when they are at the same position as the node.
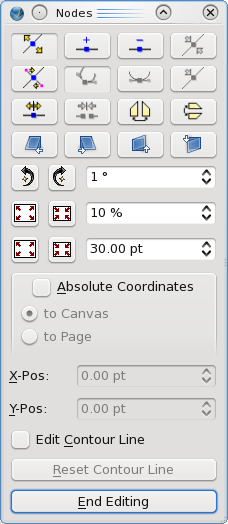
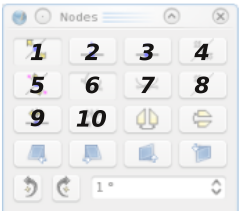 As we begin to describe the usage of the shape edit dialog, let's use this numbering scheme to refer to the various buttons on the dialog to the far right.
When the dialog first comes up, button 1 will be selected, in which case you can move the blue nodes using the mouse.
In addition to moving individual nodes, you can click-drag a line segment between nodes and move the segment along with its nodes.
The segment retains its size, shape, and orientation - adjoining line segments do the adjusting.
If you click button 5, you can then move the magenta control points.
Once you have clicked on a node or control point it turns red, and at this point, in addition to moving it with the mouse, the X-Pos and Y-Pos spinboxes become active and refer to this selected point.
If Absolute Coordinates is not checked, then these numbers are relative to the upper left corner of the bounding box for the frame or shape (see What is a Bounding Box? below).
Let's mention at this point that all of our editing steps here are Undo-able, i.e.
can be undone with Ctrl-Z in case you change your mind.
Button 2 allows for adding nodes, though they must be added somewhere along the line of the shape.
Button 3 deletes the node you subsequently click on.
The tooltip for button 4 says Reset Control Points, but it is not clear how to make this button active.
Button 6, when clicked, allows for each individual control point to move independently.
If button 7 is clicked, then the two control points at a node will arrange themselves on opposite side of a node and equidistant from it once either one is moved.
This tends to produce a very smooth curved transition through the node.
When a control point is selected, button 8 will be active and when clicked, resets the control point to its node's position.
Button 9 will split the curve/shape when it is checked - click this button, then click anywhere along the line.
It will appear that a node has been created, like using button 2, but actually there are now 2 nodes at that position, so that if you move one, you will see the line is broken.
Button 10 performs the opposite procedure, by joining a broken curve or shape (and can also be used to make a closed figure out of a Bezier curve).
Finishing out these first 3 rows, the unnumbered buttons next to the one we've labeled 10 flip the shape horizontally or vertically, respectively.
As we begin to describe the usage of the shape edit dialog, let's use this numbering scheme to refer to the various buttons on the dialog to the far right.
When the dialog first comes up, button 1 will be selected, in which case you can move the blue nodes using the mouse.
In addition to moving individual nodes, you can click-drag a line segment between nodes and move the segment along with its nodes.
The segment retains its size, shape, and orientation - adjoining line segments do the adjusting.
If you click button 5, you can then move the magenta control points.
Once you have clicked on a node or control point it turns red, and at this point, in addition to moving it with the mouse, the X-Pos and Y-Pos spinboxes become active and refer to this selected point.
If Absolute Coordinates is not checked, then these numbers are relative to the upper left corner of the bounding box for the frame or shape (see What is a Bounding Box? below).
Let's mention at this point that all of our editing steps here are Undo-able, i.e.
can be undone with Ctrl-Z in case you change your mind.
Button 2 allows for adding nodes, though they must be added somewhere along the line of the shape.
Button 3 deletes the node you subsequently click on.
The tooltip for button 4 says Reset Control Points, but it is not clear how to make this button active.
Button 6, when clicked, allows for each individual control point to move independently.
If button 7 is clicked, then the two control points at a node will arrange themselves on opposite side of a node and equidistant from it once either one is moved.
This tends to produce a very smooth curved transition through the node.
When a control point is selected, button 8 will be active and when clicked, resets the control point to its node's position.
Button 9 will split the curve/shape when it is checked - click this button, then click anywhere along the line.
It will appear that a node has been created, like using button 2, but actually there are now 2 nodes at that position, so that if you move one, you will see the line is broken.
Button 10 performs the opposite procedure, by joining a broken curve or shape (and can also be used to make a closed figure out of a Bezier curve).
Finishing out these first 3 rows, the unnumbered buttons next to the one we've labeled 10 flip the shape horizontally or vertically, respectively.
Skewing
The first full row of buttons below the numbered ones are skewing operations. Each click on the button skews the shape in a small increment. Here we see the results of skewing using the 4 buttons, left to right, just like our images, each being clicked 10 times. Initially, the tops of all these shapes had the same Y-Pos.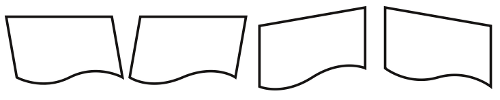
Rotating, Enlarging, Shrinking
Below the 4 rows of buttons we have spinboxes paired with buttons to the left. These are quite intuitive and the two buttons are complementary actions, for rotation, and then two ways to enlarge and shrink, either by percentage or number of points. Each click produces the amount of change indicated in the spinbox.What is a Bounding Box?
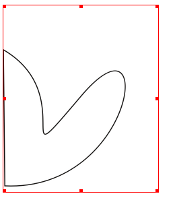
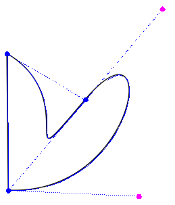 A Bounding Box is the rectangular space that defines the boundaries of a shape and all of its descriptive components.
Here we see this illustrated on the far left, noting that the bounding box is much larger than the actual shape.
When we go to edit mode in the near left, we see that the box must include all of the control points for the shape.
There is a constraint on the X-Pos and Y-Pos so that they cannot be less than 0.0 when referring to the Bounding Box, so you will not be able to use the spinboxes to move nodes or control points lower than this value.
Nonetheless, they can be moved with the mouse and the bounding box's left upper corner will then reposition.
Using Absolute Coordinates is another workaround, since these values can be less than zero.
Use Bounding Box is one of the choices for Text Flow mode, as shown in the Shape tab graphic.
A Bounding Box is the rectangular space that defines the boundaries of a shape and all of its descriptive components.
Here we see this illustrated on the far left, noting that the bounding box is much larger than the actual shape.
When we go to edit mode in the near left, we see that the box must include all of the control points for the shape.
There is a constraint on the X-Pos and Y-Pos so that they cannot be less than 0.0 when referring to the Bounding Box, so you will not be able to use the spinboxes to move nodes or control points lower than this value.
Nonetheless, they can be moved with the mouse and the bounding box's left upper corner will then reposition.
Using Absolute Coordinates is another workaround, since these values can be less than zero.
Use Bounding Box is one of the choices for Text Flow mode, as shown in the Shape tab graphic.
Finally: What is a Contour Line?
Or maybe we should say, what is it for? A contour line is itself never visible, except in this editing mode. Let's imagine you have a frame/shape which is not rectangular, and you wish to flow around it, but not necessarily follow the contours of the frame/shape. Even if it's a shape and has a bounding box, as we saw above sometimes the bounding box is not what we want either, therefore we can use a contour line to flow in our precisely desired way. While you are editing your contour line, you will see the text flow change to help you get the look you want.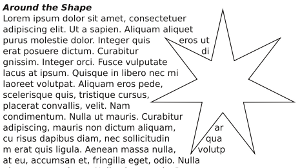
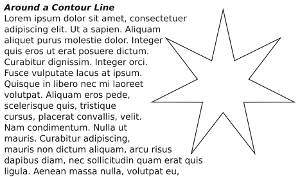 Contour lines are not considered part of the graphic components, so therefore its nodes and control points can be outside the bounding box.
Combining Polygons
This operation really applies to both polygons and shapes, and mixtures of the two. The idea is to combine 2 or more shapes on different levels into a single one.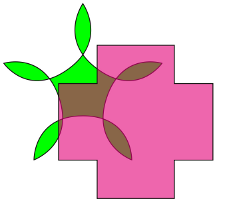
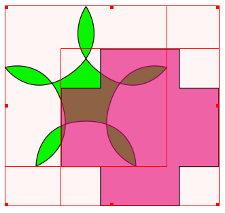
 This top row shows our starting point, with a shape overlapping a polygon, the shape having some transparency.
In the middle, we select both by click-dragging the mouse around them, then select Item > Combine Polygons from the menu, to get what we see on the right.
With this method, the colors derive from the bottom object.
This top row shows our starting point, with a shape overlapping a polygon, the shape having some transparency.
In the middle, we select both by click-dragging the mouse around them, then select Item > Combine Polygons from the menu, to get what we see on the right.
With this method, the colors derive from the bottom object.

 In the left graphic here, we selected the shapes by holding down Shift and clicking the cross shape first, then combined, so even if you combine more than two shapes this way, the colors derive from the first one clicked.
The middle shows that our combined polygon has retained the transparency.
On the right, we see the results of Item > Split Polygons.
It is not recommended to Undo combined polygons, since results are unpredictable and may cause a subsequent crash, depending on what you do next.
Something else to point out here is that in the bottom row, the leftmost combination uses an Even-Odd Fill Rule from the Shape tab, and the middle uses Non Zero.
You apply the fill rule after you combine polygons.
In the left graphic here, we selected the shapes by holding down Shift and clicking the cross shape first, then combined, so even if you combine more than two shapes this way, the colors derive from the first one clicked.
The middle shows that our combined polygon has retained the transparency.
On the right, we see the results of Item > Split Polygons.
It is not recommended to Undo combined polygons, since results are unpredictable and may cause a subsequent crash, depending on what you do next.
Something else to point out here is that in the bottom row, the leftmost combination uses an Even-Odd Fill Rule from the Shape tab, and the middle uses Non Zero.
You apply the fill rule after you combine polygons.
Multiduplicatetransform
Multiple Duplicate and Transform
Duplicating items on a page with precision is an important feature of every layout or drawing application. While it's always possible to use a simple copy and paste operation to duplicate an object, letting the computer calculate the position of duplicates can make life easier and save a lot of time. Scribus offers two powerful and versatile tools for the creation and the placement of copied items: Multiple Duplicate and Transform. In some ways, these two feature are quite similar, but each allows for slightly different approaches to making multiple copies of some object on your page.Multiple Duplicate
Let's just mention briefly that Duplicate (Item > Duplicate or Ctrl+D) is a simple operation, making a copy of your selected object, with a displacement of 10 points in each of the X and Y directions. If you wish to specify another form of placement automatically, then use Multiple Duplicate and make just one copy. Prior to 1.3.5, Multiple Duplicate (Item > Multiple Duplicate) was a simple process of making one or more copies of an object with successive X and Y offsets from one copy to the next. It still can work that way, but first we'll have a look at what may be a more useful method - creating rows and columns. This is not creating a table, but a simple repetitive array of your selected object. To the right, we see the "By Rows and Columns" tab. The settings you see in the dialog will result in the montage you see below. One feature to notice is that "Horizontal Gap" refers to these vertical spaces between columns.
 Now to the right we see the other tab, "By Number of Copies".
This works similar to how Multiple Duplicate did in previous versions, but even here we see the option for creating a gap between copies rather than just shifting by some absolute amount, which does still remain an option.
The settings here will produce one of the rows you see in the above example.
Notice that 3 copies in addition to the original produces 4 columns.
You may also notice the spinbox labeled Rotation in this dialog, and thus you can also add some rotation to each successive object.
In the example below, 3 copies were made, with an 8-point gap and 10° rotation from one to the next.
The dotted line you see is a horizontal guide placed to show that the axis of rotation is around the basepoint, in this case the upper left corner of the frame.
Also see how the content rotates with the frame - below we will see how Transform is quite different in this regard.
Now to the right we see the other tab, "By Number of Copies".
This works similar to how Multiple Duplicate did in previous versions, but even here we see the option for creating a gap between copies rather than just shifting by some absolute amount, which does still remain an option.
The settings here will produce one of the rows you see in the above example.
Notice that 3 copies in addition to the original produces 4 columns.
You may also notice the spinbox labeled Rotation in this dialog, and thus you can also add some rotation to each successive object.
In the example below, 3 copies were made, with an 8-point gap and 10° rotation from one to the next.
The dotted line you see is a horizontal guide placed to show that the axis of rotation is around the basepoint, in this case the upper left corner of the frame.
Also see how the content rotates with the frame - below we will see how Transform is quite different in this regard.
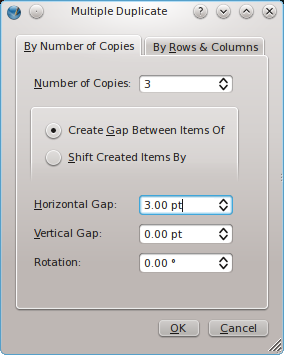

Transform
In its simplest usage, Transform (Item > Transform) can modify an object in one or more of the following ways: Scaling Translation Rotation Skewing To be clear, "Translation" refers to moving an object right/left and up/down on the document. Each of these operations is available somewhere else in Scribus, so using one of these to change an object is hardly efficient. The value to the Transform feature rather rests with the fact that you can perform these operations serially, and that you can use it to serially create copies of the object, performing the modifications serially each time. Here is a montage of the various options when you select these operations:Linesstyles
1 Working with Lines & Line Styles 1.1 Properties: Lines 1.2 Edges and Endings 1.3 Type of Line and Line Width 1.4 Start Arrow & End Arrow 1.5 Basepoint 1.6 Line StylesWorking with Lines & Line Styles
Properties: Lines
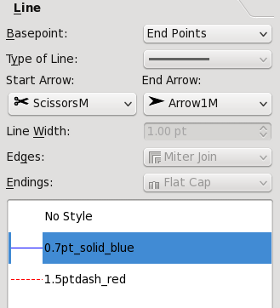 Here in the Line tab of the Properties palette is where we set the line attributes of the various kinds of lines used in Scribus, which includes: Straight lines (single line segments)
Bezier curves
Freehand lines
Borders of Shapes and Polygons
Borders of frames of all kinds - these must have a color assigned for these settings to show.
We are going to describe these Line tab items a bit out of order, since it seems to make more sense this way for demonstration purposes.
The bottom of our graphic here looks different from the default appearance, since in addition to the default No Style, we have created some Line Styles that we can use repeatedly in our document.
This will be covered at the end of this section.
Here in the Line tab of the Properties palette is where we set the line attributes of the various kinds of lines used in Scribus, which includes: Straight lines (single line segments)
Bezier curves
Freehand lines
Borders of Shapes and Polygons
Borders of frames of all kinds - these must have a color assigned for these settings to show.
We are going to describe these Line tab items a bit out of order, since it seems to make more sense this way for demonstration purposes.
The bottom of our graphic here looks different from the default appearance, since in addition to the default No Style, we have created some Line Styles that we can use repeatedly in our document.
This will be covered at the end of this section.
Edges and Endings

Type of Line and Line Width
Here we see only a part of the extensive drop-down list for Type of Line choices. In addition to a wide array of predetermined choices, at the bottom of the list is a choice, Custom, which brings up the dialog you see below.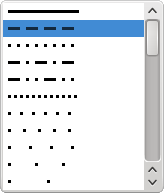 You can either manually move the sliders or use the spinboxes to make adjustments.
If you have used Gradients in the Color tab, this slider should be familiar.
Like gradients, not only can you adjust the transition points use see here, you can also add more by clicking the space underneath the slider - you will see a + appear next to the mouse cursor.
The red triangle indicates the point for which the spinboxes apply.
Remove points by click-dragging them off the slider (but you cannot have less than two).
As you can see, these spinboxes have no units, since they are relative to the width of the line.
The Offset shifts your pattern along the line and thus helps to prevent a space from occurring at the beginning or at some transition point such as a corner.
You can either manually move the sliders or use the spinboxes to make adjustments.
If you have used Gradients in the Color tab, this slider should be familiar.
Like gradients, not only can you adjust the transition points use see here, you can also add more by clicking the space underneath the slider - you will see a + appear next to the mouse cursor.
The red triangle indicates the point for which the spinboxes apply.
Remove points by click-dragging them off the slider (but you cannot have less than two).
As you can see, these spinboxes have no units, since they are relative to the width of the line.
The Offset shifts your pattern along the line and thus helps to prevent a space from occurring at the beginning or at some transition point such as a corner.
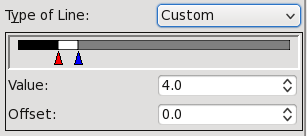
 The Line Width setting should need no explanation, but here to the left we see the effects of changing linewidth on the length and spacing of the same dash pattern, using linewidth settings of Hairline, 1.0 pts, and 2.0 pts respectively.
The Edge and Endings settings here are the same for each line as was used above, so as you can see especially with round joins and caps, these also apply to our dashes.
The Line Width setting should need no explanation, but here to the left we see the effects of changing linewidth on the length and spacing of the same dash pattern, using linewidth settings of Hairline, 1.0 pts, and 2.0 pts respectively.
The Edge and Endings settings here are the same for each line as was used above, so as you can see especially with round joins and caps, these also apply to our dashes.
Start Arrow & End Arrow
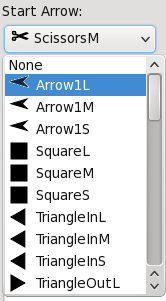 Just as with Type of Line, we see in Start Arrow and End Arrow a quite extensive list of choices which you can discover on your own.
Since these terms apply to opposite ends of a line, they can only be used with a line or an open figure, and therefore these buttons will be inactive with shapes, polygons, and frame borders.
Below we see what began as a shape but then was edited to break up the triangle, so that the arrows could be applied - obviously, some "arrows" aren't arrows at all.
Just as with Type of Line, we see in Start Arrow and End Arrow a quite extensive list of choices which you can discover on your own.
Since these terms apply to opposite ends of a line, they can only be used with a line or an open figure, and therefore these buttons will be inactive with shapes, polygons, and frame borders.
Below we see what began as a shape but then was edited to break up the triangle, so that the arrows could be applied - obviously, some "arrows" aren't arrows at all.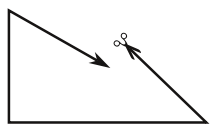
Basepoint
We've left this setting for last since it's a bit tricky. For any sort of line or figure, the initial settings in the X,Y,Z tab of Properties show the X-Pos and Y-Pos of the basepoint, which at first is the upper left corner of the frame or bounding box. In the case of a straight line, X-Pos and Y-Pos refer to the initial point from which the line was drawn. The other spinboxes in X,Y,Z show Width and Height of the bounding box - except for a straight line, which is defined by Width (i.e., length) only, plus the direction (Rotation) of the line, and its thickness. This condition is true for the Line tab Basepoint setting of Left Point. If you change the Basepoint to End Points, the X,Y,Z tab now shows spinboxes for X1, Y1, and X2, Y2. For a straight line, this means that X1 and Y1 refer to the starting point of the line, i.e., where the beginning of the line was when it was drawn. X2 and Y2 refer to the coordinates of the other end of the line. The example below is for a straight line - where you can see that X-Pos = X1, and Y-Pos = Y1. For anything more complex than a straight line, the values refer to the bounding box, in which case X1 and Y1 refer to the basepoint as set in the X,Y,Z tab, and the X2 and Y2 values refer to the width and height of the bounding box, and therefore will always be positive numbers. Basepoint: Left Point Basepoint: End Points
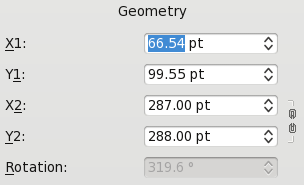
Line Styles
Now that we've explained various line attributes, it makes sense to talk about line styles.
In Working with Styles we discuss how to make text layout styles in Scribus.
Here is our Style Manager dialog we saw there.
If we click New, then choose Line Style from the drop-down list, we then expand the dialog to show the section for creating/editing line styles.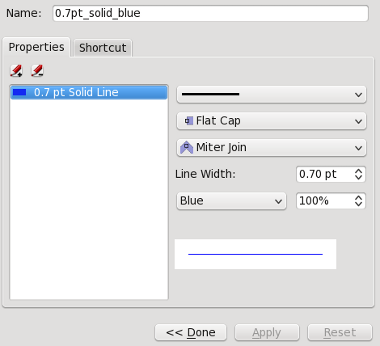
Fill
1 Working with Fill: Colors, Gradients and Patterns 1.1 Fill Colors 1.2 Gradients 1.3 PatternsWorking with Fill: Colors, Gradients and Patterns
Fill Colors
Let's first talk about the most intuitive part of using a solid color as a fill for a frame by simply choosing a color from your current color set when "Normal" is chosen from the drop-down list just below the icon buttons for Edit Line Color Properties and Edit Fill Color Properties. Remember that in order to switch to a different color set you must go to Edit > Colors ... with no document open. Choosing colors from the list changes the fill color, which will be obvious for text frames, shapes, or polygons, but may be less apparent for an image frame where an image fills the entire frame. Beyond this simple choice of color, you can then adjust the Shade (the color saturation) and Opacity (the degree of transparency). For a text frame, the saturation of the text itself is a separate setting in the Text tab of the Properties Palette. In contrast, if you adjust opacity in the Colors tab, you will see that this not only affects the transparency of the fill color, but also the text in a text frame, and the image in an image frame. Below the opacity setting you also see an ability to select a Blend Mode, a feature whose intricacies will be explained elsewhere.Gradients
Clicking on the abovementioned button which shows "Normal" by default produces a drop-down list with the following choices: Normal Horizontal Gradient Vertical Gradient Diagonal Gradient Cross Diagonal Gradient Radial Gradient Free Linear Gradient Free Radial Gradient Choosing any of these gradients brings up the gradient selector, initially only having 2 color stops, both black, at opposite ends of the selector. The red arrow indicates the currently selected color stop. You can choose another one by clicking on it. The selected stop is the one whose color will be affected by any change you make to color, shade or opacity. Move the position by click-dragging with the mouse or use the "Position" spinbox. You have at least two stops, but you may add as many additional ones as you like, each of which can have its own properties. When you place your cursor in the space below the gradient adjuster, a + sign appears next to it, and clicking creates a new color stop, which will now be the new active stop. You can remove stops by click-dragging them downward out of their starting location - sliding them in other directions will be a hopeless endeavour to get rid of them. You can also adjust Shade and Opacity of gradient colors, and each color can have its own settings. Furthermore, changing the opacity of one or more gradient colors does not affect the opacity of text in a text frame.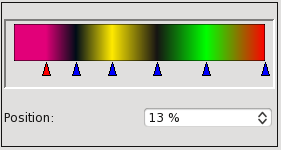
 Selecting either "Free Linear" and "Free Radial" gradients brings up another button: "Move Vector".
This button enables adjustment of the first and last color stops with the mouse and also brings up this spinbox dialog for numerical adjustments:
Selecting either "Free Linear" and "Free Radial" gradients brings up another button: "Move Vector".
This button enables adjustment of the first and last color stops with the mouse and also brings up this spinbox dialog for numerical adjustments:
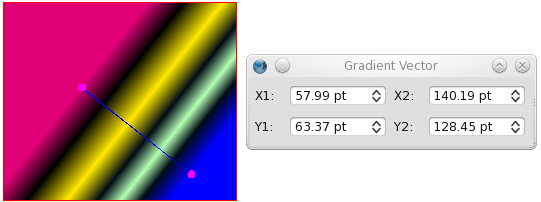
Patterns
The first thing to know about using patterns (also known as "tiles") is that you can't use them if you have none. What this means is that you have to tell Scribus what it is supposed to use as a pattern. This can be done with the pattern dialog, which you access from Edit > Patterns ... in the Menu Bar, where you can load individual files ("Load File") or a directory of files by choosing "Load Set". Patterns can be either bitmaps or vectors.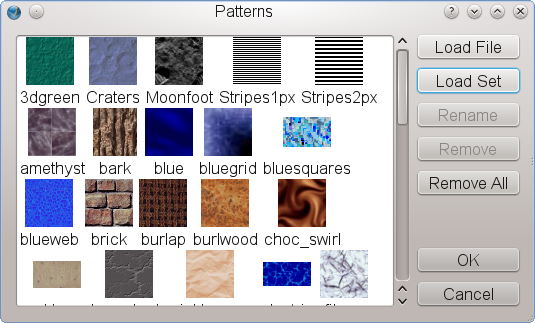 You can also use any item (frame, group, shape etc.) in your document as a pattern by using the "Send to Patterns" command from either the Context Menu or the Item menu in the Menu Bar.
Once you have created some patterns, when you go back to the Color tab of the Properties Palette, you will see at the end of the drop-down gradient list a new choice, called "Pattern".
In addition to bringing up a small window showing your pattern options, you can see spinboxes for X and Y offsets, scaling and rotation:
You can also use any item (frame, group, shape etc.) in your document as a pattern by using the "Send to Patterns" command from either the Context Menu or the Item menu in the Menu Bar.
Once you have created some patterns, when you go back to the Color tab of the Properties Palette, you will see at the end of the drop-down gradient list a new choice, called "Pattern".
In addition to bringing up a small window showing your pattern options, you can see spinboxes for X and Y offsets, scaling and rotation:
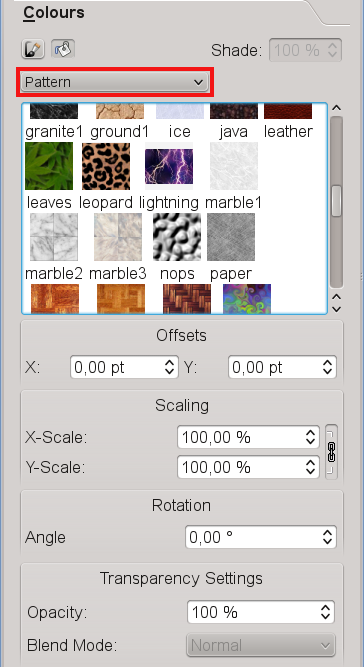 Something which you will find out is that, if you wish to use transparency for your pattern, it will also affect the text in a text frame.
One workaround for this, so that your text is not affected by transparency, would be to copy the frame, with the copy exactly superimposed over the other, then choose "None" for fill color and set the top frame's opacity to 100%.
Something which you will find out is that, if you wish to use transparency for your pattern, it will also affect the text in a text frame.
One workaround for this, so that your text is not affected by transparency, would be to copy the frame, with the copy exactly superimposed over the other, then choose "None" for fill color and set the top frame's opacity to 100%.
Layers
1 Working with Layers 1.1 Switching between layers 1.2 Moving objects between layers 1.3 Hints for working with layersWorking with Layers
You may know the concept of layers from drawing or image editing software. Layers can be used for many different purposes, for example for separating printable and non-printable items like grids, to create multiple-language versions of a document in a single file or simply to ease editing certain objects without affecting others. By default, a new document has only one layer, with the default name "Background". Newly added objects will each be at their own Level on this layer, so you may have many levels on one layer. For many documents, only one layer will be necessary, but sometimes it may be desirable to work with more than one layer. To add a new layer, open the Layers dialog under Windows > Layers or press F6: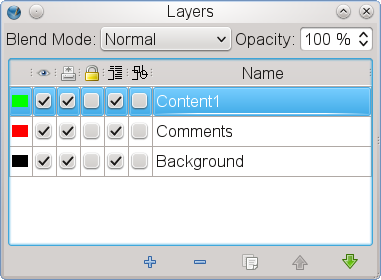 At first glance, the dialog looks simple, but it's very powerful.
At the top you can set a blend mode and layer opacity.
These will be discussed elsewhere.
At the bottom of the dialog we have the basic layer management tools available, from left to right:
Adding a new layer
Removing a selected layer
Duplicating a selected layer, including its content
Moving a selected layer one level up
Moving a selected layer one level down
The major part of the dialog is occupied by the layer list, including various layer options.
These are, from left to right:
Color of the layer indicator: Each layer has a unique color that helps identifying objects on that layer.
You can enable the color indicators for objects via View > Show Layer Indicators.
To change this color, simply click on the color for the respective layer in the dialog.
This will bring up a color selector, where you can either choose another color or create a new one.
Layer visibility: Here you can set a layer to visible or invisible.
Visibility has no impact on printing, so be careful when you use this feature, as it can easily happen that invisible content will appear in your print or an exported PDF, simply because you forgot to disable printing as well.
Layer printability: This option corresponds to the previous, and you're advised to be equally cautious, since a visible layer may be set to not to print or export to PDF.
Layer locking: This option lets you lock all objects on layer, i.e.
prevent them from being edited.
Text flow for layer objects: If enabled, this option will force text in frames on lower layers to flow around objects on the selected layer.
Outline mode for layer objects: This option comes in handily if you want to speed up the performance of Scribus, as all objects on a layer are only displayed in a "wireframe" mode.
This is especially useful when a layer contains complex vector graphics.
Layer name: Every layer has a unique name, which is shown here.
To change the name of a layer, double-click into the "Name" field and insert a new one.
At first glance, the dialog looks simple, but it's very powerful.
At the top you can set a blend mode and layer opacity.
These will be discussed elsewhere.
At the bottom of the dialog we have the basic layer management tools available, from left to right:
Adding a new layer
Removing a selected layer
Duplicating a selected layer, including its content
Moving a selected layer one level up
Moving a selected layer one level down
The major part of the dialog is occupied by the layer list, including various layer options.
These are, from left to right:
Color of the layer indicator: Each layer has a unique color that helps identifying objects on that layer.
You can enable the color indicators for objects via View > Show Layer Indicators.
To change this color, simply click on the color for the respective layer in the dialog.
This will bring up a color selector, where you can either choose another color or create a new one.
Layer visibility: Here you can set a layer to visible or invisible.
Visibility has no impact on printing, so be careful when you use this feature, as it can easily happen that invisible content will appear in your print or an exported PDF, simply because you forgot to disable printing as well.
Layer printability: This option corresponds to the previous, and you're advised to be equally cautious, since a visible layer may be set to not to print or export to PDF.
Layer locking: This option lets you lock all objects on layer, i.e.
prevent them from being edited.
Text flow for layer objects: If enabled, this option will force text in frames on lower layers to flow around objects on the selected layer.
Outline mode for layer objects: This option comes in handily if you want to speed up the performance of Scribus, as all objects on a layer are only displayed in a "wireframe" mode.
This is especially useful when a layer contains complex vector graphics.
Layer name: Every layer has a unique name, which is shown here.
To change the name of a layer, double-click into the "Name" field and insert a new one.
Switching between layers
There are two options to switch between layers. The first is to select a layer in the layer dialog, but it is a bit tedious to open a separate dialog each time you want to do nothing more than continue your work on another layer. Fortunately, the Status Bar at the bottom of the Scribus windows has a layer selector. It lists all layers in a document by name and also displays a layer's color.Moving objects between layers
If you want to move an object from one layer to another, you can use "Send to Layer" from the Context Menu or the same command from the Item menu in the menu bar. The command is also available in the Context Menu of objects in the Document Outline.Hints for working with layers
Layers always exist for the whole document, not per page. To select all items on a layer, use Edit > Advanced Select All from the Menu Bar. If you’re deleting a layer with objects on it, you will be asked if the objects on it should be removed as well. If you negate, all objects on the deleted layer will be moved to the background layer. Scribus document layers must not be confused with layers in PSD files. Both are completely independent. Scribus supports layers in Adobe Illustrator (AI) files, but only if an AI file is being opened (File > Open). If you import a layered AI file (File > Import > Get Vector File), all AI layers will be merged into one. Layers are also supported in PDF version 1.5 and later, but so far, only Adobe Reader 7 and later versions can display layered PDFs correctly. Scribus can export PDF 1.5 files with layers, but you have to check the option "Include Layers" in the "General" tab of the PDF export dialog. Adobe Reader will then read the layer content correctly: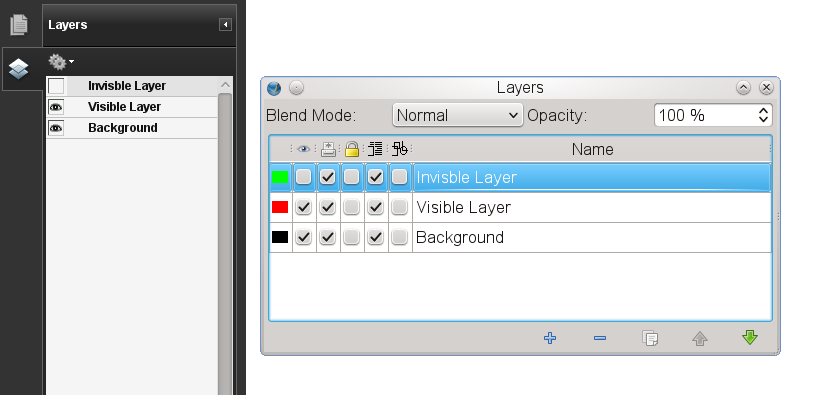 Layers and their settings in Adobe Reader (right) and Scribus (left)
Masterpages
1 Working with Master Pages 1.1 Creating Master Pages 1.2 Applying Master Pages 1.2.1 The Page Menu 1.2.2 The Page PaletteWorking with Master Pages
Master Pages are the means to add content to pages which have repeating content like page numbers, chapter names, section heads and the like. Users of other page layout applications might be familiar with this concept of static page backgrounds. Fundamental to understanding how they work is that these pages are not editable from the normal page canvas. All items except page numbers are static background items. Thoughtful creation of master pages can vastly simplify and speed up the creation of complex documents - the more complex, the more essential they are. There are several reasons to use Master Pages, among them the ability to automatically add page numbers or avoiding the hassle of inserting objects that are repeatedly used in the same place over and over again.Creating Master Pages
There are basically two ways to create a Master Page. The most obvious is to create a new one from scratch, which is actually is quite simple: Go to Edit > Master Pages. This will bring up the Master Page dialog: As you can see, Master Pages have already been automatically created when you created the new document.
How many and what kind of Master Page depends on the document layout you chose: Single-page layouts have one Master Page, double-sided layouts two etc.
It is generally a good idea not to touch the "Normal" Master Pages and create new ones instead.
The Master Page dialog shown above offers four options, from left to right:
Add new Master Page: If you click on this icon, a new dialog pops up.
Here you have to enter a name for the new Master Page.
Depending on your document layout, you also have to determine the Master Page category (e.g.
left page, right page).
Clicking OK will create your new Master Page, and you can edit this page immediately.
Duplicate Master Page: This will create a copy of the Master Page you have selected in the dialog.
Since a new Master Page is created that way, you will also see the prompt to insert a name.
Copying a Master Page is helpful if you are working with documents that use a mostly identical design and only vary in details.
Thus, you can create a basic design and create duplicates, in which only the changing details are modified.
Import Master Pages: Clicking this button brings up a file dialog, in which you need to select a Scribus file.
After selecting a file and clicking "OK", Scribus will open a new dialog that allows you to select a Master Page from the document for import into Scribus.
you have split a large project into several smaller files (which is always recommended), as you don't have to create a new Master Page for each project file.
As you can see, Master Pages have already been automatically created when you created the new document.
How many and what kind of Master Page depends on the document layout you chose: Single-page layouts have one Master Page, double-sided layouts two etc.
It is generally a good idea not to touch the "Normal" Master Pages and create new ones instead.
The Master Page dialog shown above offers four options, from left to right:
Add new Master Page: If you click on this icon, a new dialog pops up.
Here you have to enter a name for the new Master Page.
Depending on your document layout, you also have to determine the Master Page category (e.g.
left page, right page).
Clicking OK will create your new Master Page, and you can edit this page immediately.
Duplicate Master Page: This will create a copy of the Master Page you have selected in the dialog.
Since a new Master Page is created that way, you will also see the prompt to insert a name.
Copying a Master Page is helpful if you are working with documents that use a mostly identical design and only vary in details.
Thus, you can create a basic design and create duplicates, in which only the changing details are modified.
Import Master Pages: Clicking this button brings up a file dialog, in which you need to select a Scribus file.
After selecting a file and clicking "OK", Scribus will open a new dialog that allows you to select a Master Page from the document for import into Scribus.
you have split a large project into several smaller files (which is always recommended), as you don't have to create a new Master Page for each project file.
 Delete Master Page: This will delete the Master Page you have selected in the file dialog.
If the Master Page is already in use, you will be asked for a replacement.
Another way to create a new Master Page is to convert an existing page into a Master Page via Page > Convert to Master Page.
As with any new Master Page you will be asked to insert a name for the new page, as well as determining the category.
If you check the option "Copy Applied Master Page Items", the Master Page that is applied to the current page will be merged with the latter into one new Master Page.
Otherwise, only the items on the "real" page become part of the new Master Page.
Delete Master Page: This will delete the Master Page you have selected in the file dialog.
If the Master Page is already in use, you will be asked for a replacement.
Another way to create a new Master Page is to convert an existing page into a Master Page via Page > Convert to Master Page.
As with any new Master Page you will be asked to insert a name for the new page, as well as determining the category.
If you check the option "Copy Applied Master Page Items", the Master Page that is applied to the current page will be merged with the latter into one new Master Page.
Otherwise, only the items on the "real" page become part of the new Master Page.

Applying Master Pages
As with creating Master Pages, there are also several ways to apply them.The Page Menu
The most obvious way to apply a Master Page is via Page > Apply Master Page, which will bring up the following dialog: In the dropdown list at the top of the dialog you can choose the Master Page you want to apply.
The options below let you choose the range of pages to which the selected Master Page will be applied:
Current page
Even pages (i.e.
in most cases left pages)
Odd pages (i.e.
in most cases right pages)
All pages
A range of pages.
In the dropdown list at the top of the dialog you can choose the Master Page you want to apply.
The options below let you choose the range of pages to which the selected Master Page will be applied:
Current page
Even pages (i.e.
in most cases left pages)
Odd pages (i.e.
in most cases right pages)
All pages
A range of pages.
The Page Palette
The Page Palette (Windows > Arrange Pages) gives you a fast, drag-and-drop way of applying Master Pages, navigating pages, moving and inserting pages. The top half of the palette shows the available Master Pages in your document. By right-clicking on a listed Master Page item you can activate a thumbnail preview of the available Master Pages. The lower half has the actual pages within your document. Applying a Master Page is done by dragging a Master Page list item onto a page in the lower half.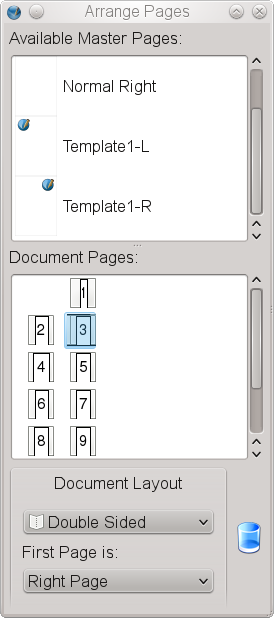 Important: Please note that Master Page items are always below any item on a regular page.
It's impossible to move a Master Page item above a real page item in the stacking order.
Important: Please note that Master Page items are always below any item on a regular page.
It's impossible to move a Master Page item above a real page item in the stacking order.
Pagenumbering
Automatic page numbering
Adding automatically incrementing page numbers is not as easy as, for example, in a word processor, but, once mastered, it's quite simple and reliable. Moreover, when it comes to mixed numbering schemes, like I, II, III for the preface, 1, 2, 3 for the main text and A, B, C for appendices, it's actually much easier to use than a word processor. As you already know, almost everything in Scribus has to happen in a frame, and page numbers are no different. Thus, to insert a page number, we need to create a text frame first. Once we have entered the editing mode of the frame, we can insert a variable for the page number, which will tell Scribus to insert the actual page number. There are two different ways to insert this variable, the first one being the keyboard shortcut Ctrl+Alt+Shift+P. If you're afraid to break your fingers, you can assign a new shortcut in the Preferences dialog or use the menu command Insert > Character > Page Number. You can now see that Scribus shows the number of the current page, but this approach may not be what you want to achieve, as it will only add the page number to the currently selected page. If you want to automate the page numbering (also called "pagination"), you should insert the variable into a text frame on a Master Page. As you will note, Scribus doesn't display a real number on a Master Page, because a Master Page isn't a real document page and thus doesn't have a position in the sequence of pages. Instead, Scribus displays # as a placeholder symbol.Changing the numbering scheme
To change the numbering scheme, you have to use File > Document Setup. Under Sections you can now create numbering sections for your document: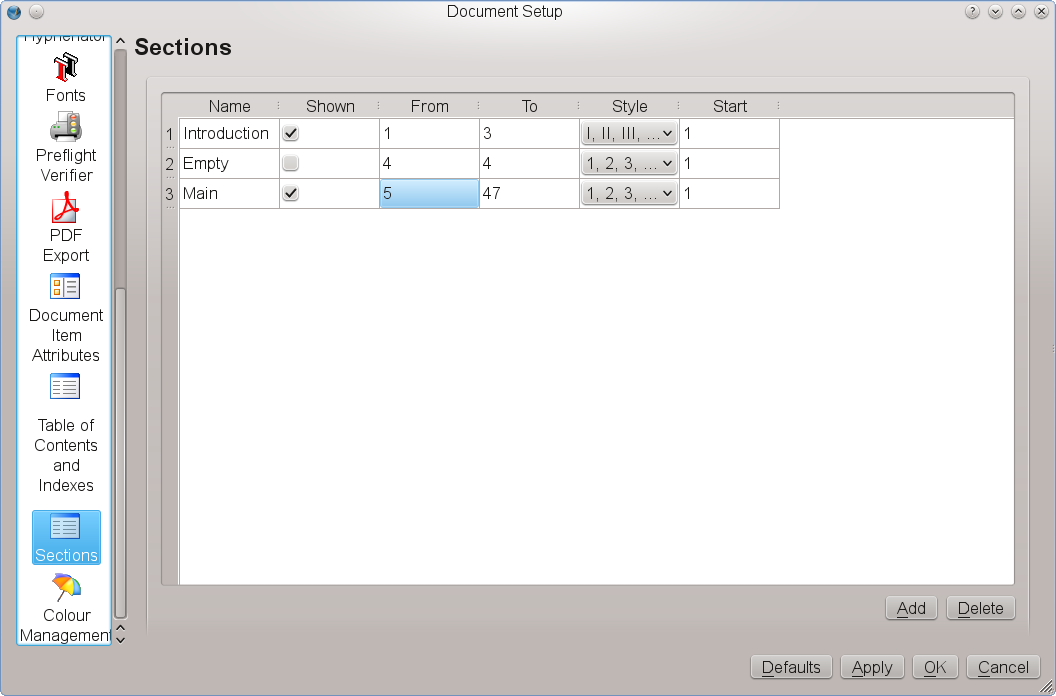 Let's assume you have an introduction that covers the first three pages, and you want it to be numbered with Roman numbers.
The main text will start at the physical page 5 with page number 1.
For aesthetical reasons, page 4 shouldn't have a number at all.
The first section is already there.
You can enter a name for it in the "Name" column.
In the "From" column enter "1" and in "To" enter "3".
Choose "I, II, III" as a numbering style and set the "Start" value to "1".
To add a new section, click on the "Add" button at the bottom of the dialog.
For page 4 in our example the values would be: "From" = 4, "To" = 4, "Style" and "Start" don't matter here, but it's important that you uncheck "Shown" in the second column, because this means there will be no visible page number on page 4.
For the main text, the values are: "From" = 5, "To" = [the number of pages you need for the main text], "Style" = 1, 2, 3, and "Start" = 1.
That's all, your document will be paginated as desired.
Let's assume you have an introduction that covers the first three pages, and you want it to be numbered with Roman numbers.
The main text will start at the physical page 5 with page number 1.
For aesthetical reasons, page 4 shouldn't have a number at all.
The first section is already there.
You can enter a name for it in the "Name" column.
In the "From" column enter "1" and in "To" enter "3".
Choose "I, II, III" as a numbering style and set the "Start" value to "1".
To add a new section, click on the "Add" button at the bottom of the dialog.
For page 4 in our example the values would be: "From" = 4, "To" = 4, "Style" and "Start" don't matter here, but it's important that you uncheck "Shown" in the second column, because this means there will be no visible page number on page 4.
For the main text, the values are: "From" = 5, "To" = [the number of pages you need for the main text], "Style" = 1, 2, 3, and "Start" = 1.
That's all, your document will be paginated as desired.
Page numbering tips
If you have more than one Master Page, you will need to add these placeholders to each Master Page that is expected to show a page number. To make sure that every page number is exactly at the same position on each Master Page, you should first create a Master Page that satifies your layout requirements and then duplicate it. If you are working with larger documents, make sure that the text frames are wide enough to display all digits. Otherwise, there will be a text overflow, and the page number remains invisible. You can apply styles and direct text formatting as you wish, just like with a normal text frame. In European language publications page counting always starts on a right page, i.e., page 1 must be a right page. It is considered good style and a sign of quality that in books, which are written in a European language, new chapters always start on a right page, i.e., a page with an odd page number.Shortwords
1 Short Words for Scribus 1.1 What the Short Words Plug-in Does: 1.2 How it Works 1.3 How to execute Short Words 1.4 Configuration 1.5 Important 1.6 Short Words CopyrightShort Words for Scribus
What the Short Words Plug-in Does:
Short Words for Scribus is a special plug-in for adding non-breaking spaces before or after, so called, short words. These short words are specific to every language's typography rules, e.g. according to Czech, Polish, and Slovak typographical standards it is not allowed to leave one letter conjunctions at line ends, if the line contains more than 25 signs. A common issue are measure and weight units, where for obvious reasons non-breaking spaces should be put in-between the preceding numbers and the units. Last but not least, there are plenty of abbreviated academic degrees, military ranks etc, which should not be separated from their owners. Although Scribus team cannot individually address every one of these national standards, one of the Scribus core team developers, Petr Vaněk, decided to provide Scribus users with a plug-in, that can be easily customized to meet their specific needs.How it Works
The screen shot below shows a sample text containing a short word before applying non-breaking spaces. Text sample before executing Short Words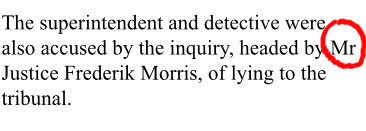 The same text after applying non-breaking spaces.
The red encircled word Mr jumped to the next line, because the normal space between Mr and Justice has been replaced by a non-breaking space.
Text sample after executing Short Words
The same text after applying non-breaking spaces.
The red encircled word Mr jumped to the next line, because the normal space between Mr and Justice has been replaced by a non-breaking space.
Text sample after executing Short Words
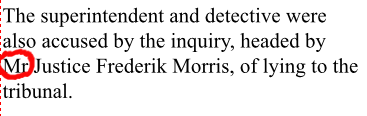
How to execute Short Words
If you successfully installed the plug-in, go to theExtras menu and choose the Short Words... option:
Calling Short Words for Scribus
<
 Short Words dialog window
 Selected frames - Apply non-breaking spaces to selected text frames
Active page - Apply non-breaking spaces to all frames of the current page.
All items - Apply non-breaking spaces to the whole document.
Replace defaults by user config - When the user config file exists you can choose if you want to append your config to the global configuration by unchecked button.
You can replace predefined values with yours with checked button too.
Selected frames - Apply non-breaking spaces to selected text frames
Active page - Apply non-breaking spaces to all frames of the current page.
All items - Apply non-breaking spaces to the whole document.
Replace defaults by user config - When the user config file exists you can choose if you want to append your config to the global configuration by unchecked button.
You can replace predefined values with yours with checked button too.
Configuration
Short Words for Scribus provides a system wide configuration filescribus-short-words.rc, which is usually located in the $prefix/lib/scribus/plugins directory (the actual directory depends on where you or your distribution installed Scribus).
This configuration file is self explanatory, basically it contains a list of short words for a given language, preceded or followed by a space and separated by commas.
The position of the space, before or after a short word, indicates to the plug-in, where the non-breaking space should be put.
Every line with configuration settings has to start with the language it is meant for, e.g.
en for English or cs for Czech:
# English stuff START here en=Dr. ,Dr ,Mr. ,Mr ,Mrs. ,Mrs ,Ms. ,Ms ,Prof. ,Prof ,Rev. ,Rev , en= Kg, kg, g, mg, oz, lb, cwt, km, Km, m, cm, mm, # Czech short words START here ## hanging conjunctions cs=K ,k ,S ,s ,V ,v ,Z ,z ,O ,o ,U ,u ,I ,i ,A , ## physics and math cs= kg, g, m, cm, mm, l, hl, s, %,If you want to use self defined short words, e.g. for a new language, create your own configuration file with your own short words, and save the file as
scribus-short-words.rc in the ~/.scribus directory.
You can choose the plugin appends your configuration into the system one or just to replace and use it only itself.
Important
The author is eager to extend the global configuration file to meet your needs, let him know about the short words and standards specific to your language.Short Words Copyright
Short Words for Scribus Copyright 2003, 2004 Petr Vaněk, <petr@yarpen.cz>Editcolors
1 Editing and Managing Solid Colors (1) 2 Why Color Sets? 2.1 Colors in Scribus Color Palettes 2.2 Editing Colors and Color PalettesEditing and Managing Solid Colors (1)
Please note that this section is not about color management, but about the editing and managing of color fills. Color management is described in a separate chapter. Within Scribus there are several methods to create, import and edit solid colors and color sets. Moreover, Scribus has a well developed tool, the Color Wheel plug-in, which helps with creating color harmonies and even testing them for people with color blindness.Why Color Sets?
The answer to the question in the headline is closely related to the answer to a more basic question, namely: "What is a color?" The truth is, there is no simple answer to that question, as a "color" can be described in hundreds of ways, for example as a combination of wavelengths, a combination of color values within a certain "color model", as a category in a framework based on aesthetical rules etc. As a result, many different so-called "color models" have been developed over the course of time, many of which have become part of a discipline called "color science", a science that is itself a "meta-science", as it requires input from many different disciplines, including physics, neuro-science, biology, mathematics, engineering, and even art, artisanry or literature. "Color" is actually one of a few cases, in which artists like Johann Wolfgang von Goethe or Albert Henry Munsell contributed significantly to scientific progress. Users of graphics-related programs like Scribus shouldn't be required to learn the ins and outs of color science, although some theoretical knowledge doesn't hurt. On a more basic level, however, some awareness of the issues mentioned above certainly helps a lot when working with colors, and the caricature below may be a first step to understand what it's all about: As is often true with good cartoons, there is some relevant truth behind it, in that there are different levels of differentiating and categorizing colors, which are often highly subjective.
Imagine two persons, one in the "Girls" column, the other in the "Boys" column, talking on the phone about a color choice for a project - it will be virtually impossible, since both the (subjective) color names and the color perception are quite different.
Thus, pre-defined color sets are actually a way to communicate about colors without referring to either a subjective color model or sophisticated color science, and using meaningful names for colors within a given color set can facilitate communication about colors even further.
Creating color sets also helps vendors or projects to define a limited set of colors that are allowed for use, which helps to maintain visual uniformity across publications
As a practical matter, the colors available in a color palette or colors you create yourself (and thus add to an existing palette) are the only ones that can be used as text, fill, line or gradient colors.
As is often true with good cartoons, there is some relevant truth behind it, in that there are different levels of differentiating and categorizing colors, which are often highly subjective.
Imagine two persons, one in the "Girls" column, the other in the "Boys" column, talking on the phone about a color choice for a project - it will be virtually impossible, since both the (subjective) color names and the color perception are quite different.
Thus, pre-defined color sets are actually a way to communicate about colors without referring to either a subjective color model or sophisticated color science, and using meaningful names for colors within a given color set can facilitate communication about colors even further.
Creating color sets also helps vendors or projects to define a limited set of colors that are allowed for use, which helps to maintain visual uniformity across publications
As a practical matter, the colors available in a color palette or colors you create yourself (and thus add to an existing palette) are the only ones that can be used as text, fill, line or gradient colors.
Colors in Scribus Color Palettes
Scribus is shipped with a huge collection of useful color sets, also called “palettes†or (somehow misleading) “swatches.†These palettes serve different purposes, most of which will be described in a separate document. There are palettes of different sizes available, ranging from "Scribus Basic", a collection of primary RGB and CMYK colors to, for instance, "Scribus X11", which includes a huge number of (RGB) Colors. Please note that "Scribus X11" used to be the default palette in earlier versions of Scribus, whereas the default set has been changed to "Scribus Basic" since 1.3.6.. Color palettes in Scribus can contain four different types of colors, each of which uses a different visual indicator in Scribus color dialogs: RGB Colors: These colours are defined in the RGB color model.
Every color is described by the three primary colors red, green and blue.
RGB Colors: These colours are defined in the RGB color model.
Every color is described by the three primary colors red, green and blue.
 CMYK Colors: These colors are defined in the CMYK color model.
Every color is described by the four ink colors used in color printing: Cyan, Magenta, Yellow and Key (=Black).
CMYK Colors: These colors are defined in the CMYK color model.
Every color is described by the four ink colors used in color printing: Cyan, Magenta, Yellow and Key (=Black).
 Spot Colors: These are also referred to as "named colors", but since other (RGB/CMYK) colors can also have a name, the term "spot color" is to be preferred for unambiguousness.
While a spot color can be either defined in the RGB or CMYK color model, its main purpose is to be stored with its name in a PDF or PostScript file (hence the term “named colorâ€).
The name does refer to a real world color reference, like a printed color fan, and a printing company can mix or buy a special ink, which will match exactly the color as specified by the reference.
Each spot color requires a separate printing plate, which is why you should use spot colors carefully, because their use makes a printing process more expensive.
Typical use cases for spot colors would be very specific hues in corporate logos.
The red dot beside a color model icon (RGB or CMYK) indicates that the respective color is a spot color.
Spot Colors: These are also referred to as "named colors", but since other (RGB/CMYK) colors can also have a name, the term "spot color" is to be preferred for unambiguousness.
While a spot color can be either defined in the RGB or CMYK color model, its main purpose is to be stored with its name in a PDF or PostScript file (hence the term “named colorâ€).
The name does refer to a real world color reference, like a printed color fan, and a printing company can mix or buy a special ink, which will match exactly the color as specified by the reference.
Each spot color requires a separate printing plate, which is why you should use spot colors carefully, because their use makes a printing process more expensive.
Typical use cases for spot colors would be very specific hues in corporate logos.
The red dot beside a color model icon (RGB or CMYK) indicates that the respective color is a spot color.
 Registration Color: This is a special case of a "color", which is used for registration marks.
The latter are used by printers to determine whether a print run has been successful.
While displayed as a CMYK color, it will actually consist of as many colors as there are color separations, one for each printing plate.
Each palette can only have one registration color, which is indicated by a "bull's eye" icon.
Registration Color: This is a special case of a "color", which is used for registration marks.
The latter are used by printers to determine whether a print run has been successful.
While displayed as a CMYK color, it will actually consist of as many colors as there are color separations, one for each printing plate.
Each palette can only have one registration color, which is indicated by a "bull's eye" icon.
 If you are working with activated color management, some or even all colors in a palette may be "out of gamut," i.e., depending on a selected ICC profile, a color can't be "translated" from one color model into another, and a color shift can occur.
In such a case you will see a warning sign placed beside the color in the list.
If you are working with activated color management, some or even all colors in a palette may be "out of gamut," i.e., depending on a selected ICC profile, a color can't be "translated" from one color model into another, and a color shift can occur.
In such a case you will see a warning sign placed beside the color in the list.
Editing Colors and Color Palettes
When you create and save a new document, all the colors that are availabe in the dialog Edit > Colors will be stored in that document. This is an important detail, because any changes to a color palette will only affect the current document. The selection or creation of a new default palette will be described in the next section. If you choose Edit > Colors from the menu bar for the first time and with a new document open, Scribus will bring up the following dialog: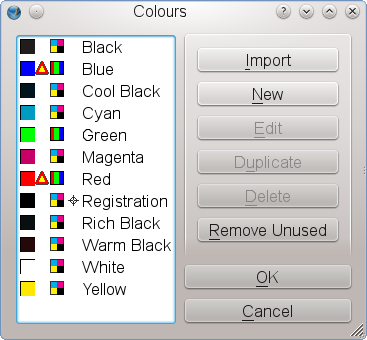 To the left you see the list of colors in the selected default color set, which is the palette "Scribus Basic".
The list view contains a preview of every color, a color model indicator, indicators for special colors (spot, registration), and finally the name of the color.
If color management is active, you may also see a warning sign between the color preview and the color model icon, indicating that a color is out of gamut.
To the right you see various editing options for your color palette, starting with the "Import" button at the top.
Clicking on it brings up a file dialog, where you can select various sources for colors.
These sources can either be existing Scribus files or color palettes in one of the following formats: Encapsulated PostScript (EPS), PostScript (PS), Adobe Illustrator (AI), OpenDocument Color Palettes (SOC) or GIMP Color Palettes (GPL).
Note that importing a color palette does not replace the existing colors.
Instead, the colors will be added to the existing palette:
To the left you see the list of colors in the selected default color set, which is the palette "Scribus Basic".
The list view contains a preview of every color, a color model indicator, indicators for special colors (spot, registration), and finally the name of the color.
If color management is active, you may also see a warning sign between the color preview and the color model icon, indicating that a color is out of gamut.
To the right you see various editing options for your color palette, starting with the "Import" button at the top.
Clicking on it brings up a file dialog, where you can select various sources for colors.
These sources can either be existing Scribus files or color palettes in one of the following formats: Encapsulated PostScript (EPS), PostScript (PS), Adobe Illustrator (AI), OpenDocument Color Palettes (SOC) or GIMP Color Palettes (GPL).
Note that importing a color palette does not replace the existing colors.
Instead, the colors will be added to the existing palette:
 You can also create a new color yourself and add it to the existing palette by clicking on the "New" button.
This will bring up the color editor:
You can also create a new color yourself and add it to the existing palette by clicking on the "New" button.
This will bring up the color editor:
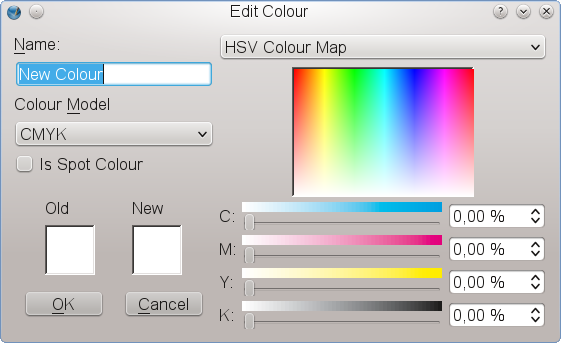 Here you can insert a name for the new color and select a color model (CMYK, RGB and web-safe RGB, the latter being almost irrelevant today, even if you are creating a PDF for the world-wide web).
In the lower right section you see three or four (depending on the selected color model) color sliders to modify the color values.
Of course you can also insert numerical color values directly.
At the top of the dialog you see a so-called "HSV Color Map", which allows for creating a color by clicking somewhere on the colored field.
"HSV" is an abbreviation for "Hue, Saturation, Value", which is another way to describe colors in the RGB color model.
If you click on the drop-down list, you will see that you can also select a color from one of the installed color palettes.
To use the "Edit" and "Duplicate" options you have to select a color from the list.
The dialog that will appear is identical to the one for new colors.
Deleting a color from the list can be risky, since the color may have already been applied to an item or text in a document.
Thus, Scribus will always ask for a replacement color, a mechanism that's similar to Edit > Replace Colors, which is described in the section on importing vector drawings:
Here you can insert a name for the new color and select a color model (CMYK, RGB and web-safe RGB, the latter being almost irrelevant today, even if you are creating a PDF for the world-wide web).
In the lower right section you see three or four (depending on the selected color model) color sliders to modify the color values.
Of course you can also insert numerical color values directly.
At the top of the dialog you see a so-called "HSV Color Map", which allows for creating a color by clicking somewhere on the colored field.
"HSV" is an abbreviation for "Hue, Saturation, Value", which is another way to describe colors in the RGB color model.
If you click on the drop-down list, you will see that you can also select a color from one of the installed color palettes.
To use the "Edit" and "Duplicate" options you have to select a color from the list.
The dialog that will appear is identical to the one for new colors.
Deleting a color from the list can be risky, since the color may have already been applied to an item or text in a document.
Thus, Scribus will always ask for a replacement color, a mechanism that's similar to Edit > Replace Colors, which is described in the section on importing vector drawings:
 The final editing option is called "Remove Unused", which is also described in the vector import section.
If you click "OK", the changes to the color list will be saved in your Scribus document, while clicking "Cancel" will leave the list untouched.
The final editing option is called "Remove Unused", which is also described in the vector import section.
If you click "OK", the changes to the color list will be saved in your Scribus document, while clicking "Cancel" will leave the list untouched.
Managecolors
1 Editing and Managing Solid Colors (2) 1.1 Changing the Default Color Palette 1.2 Installing or Importing New Color Palettes 1.2.1 Linux/UNIX 1.2.2 Mac OS X 1.2.3 OS/2 Warp 4 and eComStation 1.2.4 Haiku 1.2.5 WindowsEditing and Managing Solid Colors (2)
Changing the Default Color Palette
To change the default color palette, make sure that no Scribus document is open. Then open the Color Manager (Edit > Colors): In the dialog you can select a new default palette for new documents.
Any change you make here will not affect existing documents, as the color palette in such a document has been stored in the document itself.
Some of the color palettes shipped with Scribus have been created for special purposes, so before you select another default palette, you should learn something about the color sets from the descriptions provided in subsequent sections.
In some cases, your printer or a client may insist on the use of certain colors.
What you will notice immediately when you open the dialog is that you can't edit any color in one of the palettes that are shipped with Scribus.
This is a feature, not a bug, as the very purpose of standardized colors is to work across documents, computers or platforms with identical colors, which in turn have unique color values and color names.
Thus, all color palettes that have been installed to directories to which you have read-only access are "locked", i.e.
prevented from editing.
Sometimes, however, there are good reasons to edit a locked palette anyway, for example, if you need to reduce the number of colors in a palette for a certain project, i.e.
if you need to create a "project palette".
In such a case you can click on the "Save Color Set" button in the Color Manager.
This will save the palette to the folder
In the dialog you can select a new default palette for new documents.
Any change you make here will not affect existing documents, as the color palette in such a document has been stored in the document itself.
Some of the color palettes shipped with Scribus have been created for special purposes, so before you select another default palette, you should learn something about the color sets from the descriptions provided in subsequent sections.
In some cases, your printer or a client may insist on the use of certain colors.
What you will notice immediately when you open the dialog is that you can't edit any color in one of the palettes that are shipped with Scribus.
This is a feature, not a bug, as the very purpose of standardized colors is to work across documents, computers or platforms with identical colors, which in turn have unique color values and color names.
Thus, all color palettes that have been installed to directories to which you have read-only access are "locked", i.e.
prevented from editing.
Sometimes, however, there are good reasons to edit a locked palette anyway, for example, if you need to reduce the number of colors in a palette for a certain project, i.e.
if you need to create a "project palette".
In such a case you can click on the "Save Color Set" button in the Color Manager.
This will save the palette to the folder ~/swatches in your Scribus settings directory (e.g.
~.scribus/swatches on Linux/UNIX) and will add the copy to the list of available color sets.
If you select the copy of the palette, you will notice that the editing options are now available.
Be aware, though, that clicking "OK" will make all changes to the copy permanent!
Installing or Importing New Color Palettes
If you have bought or downloaded standardized palettes from a third party vendor and you can't acquire root/Administrator priviliges on the system you are working on, you are advised to copy the palette files into a special folder in your home directory. If you have root/Administrator permissions, you can also copy the sets into a folder in the install directory. Please read the licensing conditions for the files you wish to install, as they may limit the number of permitted users per palette. Here are the relevant paths for the supported operating systems:Linux/UNIX
If you have installed Scribus with a package management system like RPM, DEB or BSD Ports, the palette files need to be copied to either/usr/lib/scribus/swatches or /usr/local/lib/scribus/swatches.
On 64 Bit systems they may be found in /usr/lib64/scribus/swatches or /usr/local/lib64/scribus/swatches respectively if a 64 Bit version has been installed.
The actual location depends on the configuration of a distribution’s package manager.
Those who compiled Scribus themselves need to copy the palette files to installation_directory/share/scribus/swatches.
If you don’t have root permissions, you can also copy the files to /home/user_name/.scribus/swatches/locked.
You have to create the folder locked if it doesn’t exist.
Mac OS X
Copy the palettes into the directory/Library/Preferences/Scribus/swatches/locked in your Home directory.
Note that on Mac OS 10.7 the /Library directory is hidden by default.
To make it visible, use Go > Go to Folder in Finder, then type ~/Library.
Alternatively you can also press the Option key while clicking on Go in Finder.
If you want to make the directory permanently visible, open a Terminal and type the following command: chflags nohidden /Users/[username]/Library/
If the folder locked doesn’t exist, you have to create it.
OS/2 Warp 4 and eComStation
Copy the palettes to the directoryC:\Scribus-{version}\scribus\lib\swatches\locked.
If the folder locked doesn’t exist, you have to create it.
Haiku
Copy the palettes to the directory/boot/apps/Scribus/share/scribus/swatches or /boot/home/config/settings/Qt/.scribus/swatches/locked.
Windows
Copy the files to the folderC:\Program Files\Scribus {version}\share\swatches.
If you don’t have Administrator permissions, you can copy the files to your user directory.
On Windows 2000, XP and 2003 this is
C:\Documents and Settings\username\Application Data\Scribus\swatches\locked, and on Windows Vista, 7 and 8 it’s
C:\Users\username\AppData\Roaming\Scribus\swatches\locked.
If the folder locked doesn’t exist, you have to create it.
Colorsets
Color Palettes in Scribus (1): Open Source Palettes
Note that all color palettes described here and in subsequent sections include three basic colors: 100% CMYK Black (C: 100, M: 100, Y: 100, K: 100), 100% CMYK White (C: 0, M: 0, Y: 0, K: 0), and the Registration Color. These will not be counted as separate colors in the tables. It is also important to note that no physical reference (color fan, color chips) exists for the colors in the palettes listed on this page, so that verification of color correctness is impossible.| Name | Description | Number of Colors | Color Model | Spot |
| Scribus Small | A set of primary CMYK colors. These are based on a mix of percentages of the standard CMYK inks. | 6 | CMYK | No |
| Scribus Basic | A set of primary CMYK and RGB colors, as well as three variants of black, namely "Cool Black", "Rich Black" and "Warm Black". The latter consist of a mix of C, M, Y and K colors instead of just 100% K (K=Black) and the values are the result of intensive discussions between the Scribus Team and commercial printers. The "Rich Black" variants may not meet every printer's needs, but they can serve as a basis when it comes to printing a rich black. | 9 | RGB and CMYK | No |
| Scribus Gnome | A set of named RGB colors, which are standard on recent Gnome Desktops. | 32 | RGB | No |
| Scribus OpenOffice | A set of CMYK colors which are based on the "CMYK" palette found in OpenOffice.org. | 94 | CMYK | No |
| Scribus Splash | A set of the colours in the Scribus logo and the splashscreen. Its main purpose is to guarantee a consistent use of colors in Scribus-related publications. | 19 | CMYK | No |
| Scribus SVG | A set of RGB colors based on the named colors from the SVG specification. | 149 | RGB | No |
| Scribus X11 | A set of RGB colors based on the named colors from X-Window. | 550 | RGB | No |
| Scribus X11 Grey | A set of grayscale shades based on the named shades from X-Window. | 110 | RGB | No |
| Scribus Xfig | A set of the RGB colors used by Xfig. | 32 | RGB | No |
| Tango | A set of the RGB colors used in the Tango icon project for Free desktops. Since Scribus uses the Tango icon set, this color set may also be interesting for Scribus-related projects. | 68 | RGB | No |
Colorstandards
Color Palettes in Scribus (2): National/Government Standards
In some countries the national standard bodies or governments themselves created standardized color sets, i.e., color standards that bidders/tenderers in calls for tenders must comply with. While some of these standards have niche applications, like military vessels or cables, others are considered to be "general purpose" color standards. The Scribus Team has collected and will continue to collect as many of those standards as possible, at least if they aren't defined as a subset of other color "standards" like Pantone. We hope that this feature will facilitate the use of Scribus in government agencies. To use one of the standards reliably, you are advised to contact the respective government agency or standards organization, as they are selling reference materials like color fans or color chips. In many cases, the reference materials can also be bought from vendors of printing accessories. The colors in the Scribus palettes are only approximations!| Name | Country | Issued by | Number of Colors | Color Model | Spot |
| AFNOR X 08-002 | France | AFNOR | 91 | RGB | Yes |
| AS 2007S-1996 | Australia | [www.standards.org.au Standards Australia] | 208 | RGB | Yes |
| BS 381C | United Kingdom | British Standards Institution | 121 | RGB | Yes |
| BS 4800 | United Kingdom | British Standards Institution | 102 | RGB | Yes |
| JIS 8721 | Japan | Japanese Standards Association | 148 | RGB | Yes |
| Munsell Soil Colors | United States | United States Department of Agriculture | 324 | RGB | Yes |
| NBS/ISCC Colors | United States | National Institute of Standards and Technology and Inter-Society Color Council | 277 | RGB | Yes |
| US FS 595 | United States | General Services Administration | 211 | RGB | Yes |
Specialcolors
Color Palettes in Scribus (6): Special Purpose Colors
| Name | Description | Number of Colors | Color Model | Spot |
| Crayola® Crayon Colors | A set that contains the standard crayon colors of the American paint supplier Crayola®. These colors are widely used in American schools and other educational institutions. | 137 | RGB | No |
| Japanese Traditional Colors | A set that contains the traditional Japanese colors. The traditional Japanese color system has historical origins in their cultural and social framework, with connections to various ceremonies. Some background knowledge about the system is recommended to utilize the color palette efficiently. | 470 | RGB | No |
| Standardised Rock Colours | This is a color set that is often used as a reference for rock colors in geography and geology. It should only be used in geological or similar publications. | 26 | RGB | No |
| GCMI Colors | This is a color set that was first released in 1949 by the former Glass Container Manufacturers Institute (GCMI). Since then it has seen numerous updates and is known as the "FLEXO Color Guide". The guide is mainly used in the packaging industry, and you are advised to use it only in conjunction with a current version of the FLEXO Color Guide, which can be obtained from GCMI's successor, the Glass Packaging Institute. The color set contains three kinds of colors. Simple numbers refer to the colors available in all recent versions of the FLEXO fan. Those starting with the Roman number "VIII" are only available in version VIII, while those starting with "IX" are only available in version IX. | 58 | CMYK | Yes
ConfigintroScribus ConfigurationA complex and feature-rich program like Scribus can't suit everybody's needs with a single configuration, especially if one considers that it also works on many different platforms. As Scribus grew over time, it was inevitable that users asked for more and more options to customize Scribus to suit their personal preferences/requirements. As a result, Scribus has become one of the most configurable DTP programs. Nevertheless, there will always be users for whom Scribus isn't configurable enough and others who don't want to be bothered with dozens of adjustable screws. This part of the Online Help is intended to describe what you can adjust, but also to show what can be safely ignored in most cases. Please note that editorial decisions had to be made in cases of overlaps between "setup" and "usage" (e.g. color palette managament) or a special case like color management, which is complex enough to justify a separate chapter. The chapter will also attempt to help you set up other parts of your system to get the most out of Scribus.Configprefs1 Document Settings and Preferences 1.1 General (not present in Document Setup) 1.2 Document 1.3 Guides 1.4 Typography 1.5 Tools 1.6 Hyphenation 1.7 Fonts 1.8 Preflight Verifier 1.9 Color Management 1.10 PDF Export 1.11 Documents Item Attributes 1.12 Table of Contents and Indexes 1.13 Keyboard Shortcuts 1.14 Scrapbook 1.15 Display (not all of these available in Document Settings) 1.16 External Tools 1.17 Miscellaneous 1.18 Plugins 1.19 Short Words 1.20 Scripter 1.21 Document Information (available in Document Settings but not in Preferences) 1.21.1 Where Are the Preferences Files ?Document Settings and PreferencesUnder the File heading on the menu bar, you will find two related selections, Document Setup and Preferences. Each of these produces a dialog used for changing various default settings and other behavior in Scribus. Document Setup will refer to the document being edited, and changes made for that document will be saved with the document and apply when it is reopened. If you have no document open, you cannot select this dialog. Preferences in general changes settings for any future documents. It will be available whether or not you have any documents open. The following descriptions will primarily apply to Preferences, but we will point out differences compared with Document Setup as we go. General Document Guides Typography Tools Hyphenation Fonts Preflight Verifier Color Management PDF Export Document Item Attributes Table of Contents and Indexes Keyboard Shortcuts Scrapbook Display External Tools Miscellaneous Plugins Short Words Scripter Document InformationGeneral (not present in Document Setup)You may have started up Scribus in a particular Language - here we expect to see the system default language, but you can override that setting, which will remain on future startups until you change again. The Theme will be whatever your main system theme is when none is selected, but otherwise your choices depend on your operating system and its themes. You can also change Scribus fonts as seen here. The various other settings are straightforward, and experimentation will be your guide. The various Paths are the default locations Scribus will use for these operations. The path for Scripts is where Scribus looks when you choose Scripts > Execute Script from the menu.
DocumentIn Preferences, the various settings here will be those that you see when you open a new document (File > New). In Document Settings, they will change the current document. The Page Size section should be easily understandable, with a large selection of standard sizes to choose from, in addition to Custom. The Document Layout choices have been the source of confusion for some. These simply apply to the relative placement of pages on your screen, and each will have the size as indicated, not some subdivision of it. Double Sided would typically be chosen for a book-like layout, and thus the First Page selector at the bottom allows the initial page to be Right or Left. This helps you use the appropriate Master Page layout (covered elsewhere).
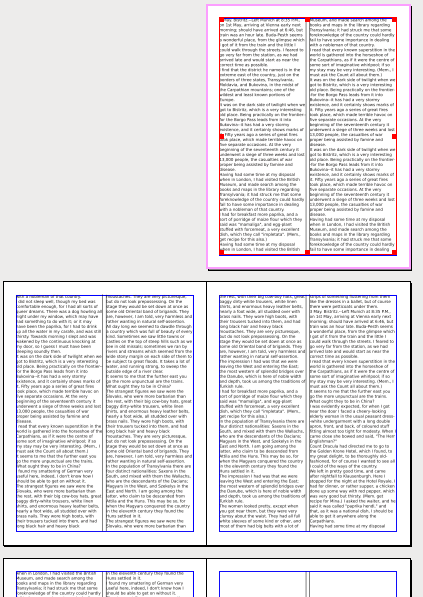 Here is an example of Double Sided, Right Page as the first (also happens to be two-column).
If you print these on a local printer, they will print as individual pages.
Preset Layouts will be available for anything other than Single Page layout.
What these represent are some time-honored ways to set the margins of the page, many based on some mathematical approach related to the dimensions of the page.
Below we see the contrast of these various methods - these are all right pages of a double-sided layout.
Here is an example of Double Sided, Right Page as the first (also happens to be two-column).
If you print these on a local printer, they will print as individual pages.
Preset Layouts will be available for anything other than Single Page layout.
What these represent are some time-honored ways to set the margins of the page, many based on some mathematical approach related to the dimensions of the page.
Below we see the contrast of these various methods - these are all right pages of a double-sided layout.
 Gutenberg
 Magazine
 Fibonacci
 Golden Mean
 Nine Parts
GuidesAlthough labeled Guides, there are many other settings here, mostly related. Guides can either show above or below your content. Snapping: Snap Distance applies when Page > Snap to Guides or Page > Snap to Grid has been selected. Grab Radius has to do with the size of the virtual space for grabbing and dragging a frame's handles. As the tooltips indicate, you must shut down and restart Scribus for these to take effect when they are changed. This panel sets the default distances and colors, as well as the snap to settings. Baseline Grids is the set of horizontal guides which forces text in multiple columns to align horizontally, as shown below. Settings for the distances for baselines are in Paragraph Styles, as well as the next panel Typography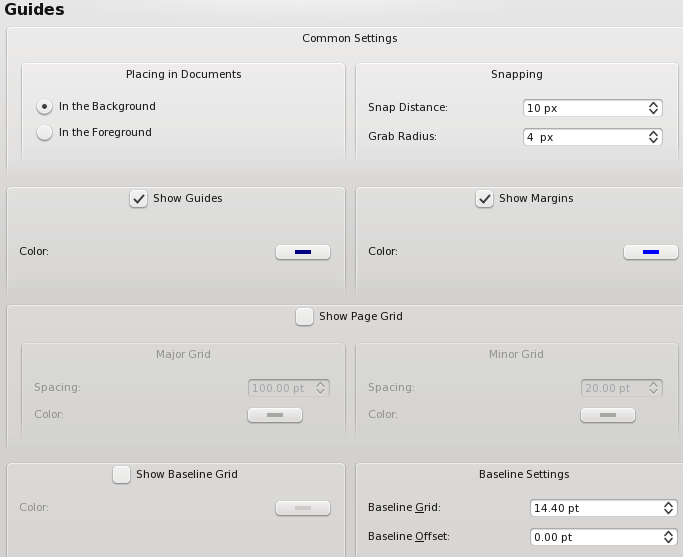 By default, Guides and Margins will show, but can be changed here, along with the color of each.
Major and Minor Grids do not show by default - here we have changed the default colors so you can easily see the difference in the screenshot to the right, with page edges shown in red, margins in blue, major grid light green, and minor grid in light magenta.
Finally, at the bottom of the dialog we can choose to show the Baseline Grid by default, and adjust its default settings.
Find out more about the baseline grid in Working with Text.
By default, Guides and Margins will show, but can be changed here, along with the color of each.
Major and Minor Grids do not show by default - here we have changed the default colors so you can easily see the difference in the screenshot to the right, with page edges shown in red, margins in blue, major grid light green, and minor grid in light magenta.
Finally, at the bottom of the dialog we can choose to show the Baseline Grid by default, and adjust its default settings.
Find out more about the baseline grid in Working with Text.
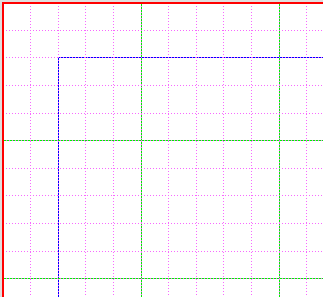
TypographyHere are the default settings for various typographic features - subscript, superscript, automatic line spacing and scaling of small capitals. In addition, the amount of automatic linespacing can be adjusted relative to the size of the font. Note that the 20% is in addition to the space required for the next line of text, so that the total space from one baseline to the next would be 120% of the font size.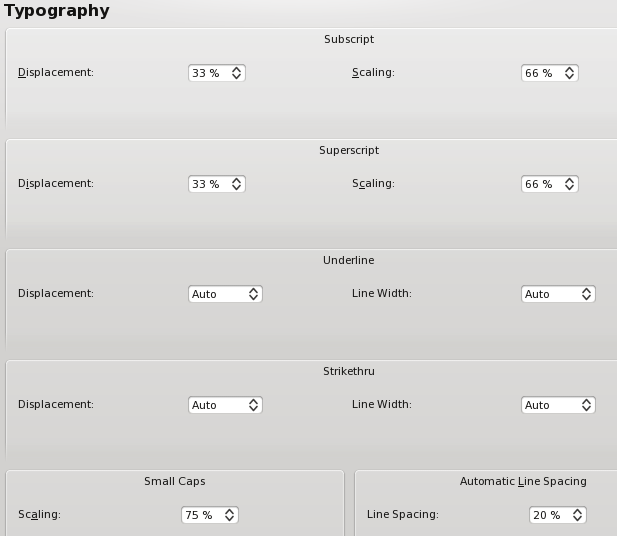
ToolsIn the Tools tab you can change the defaults for text and image frames, shapes and polygons, and lines. In addition, there are page magnification settings, plus the defaults for duplication and rotation of objects.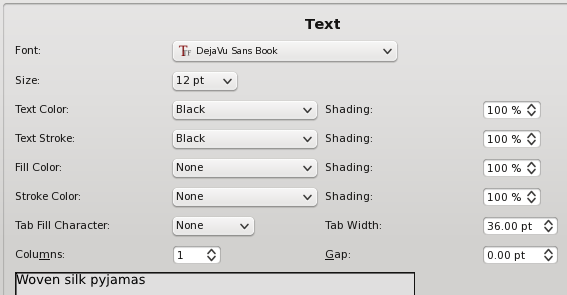
 |
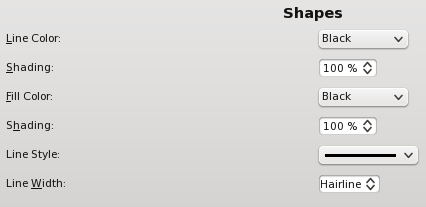
 | ||||
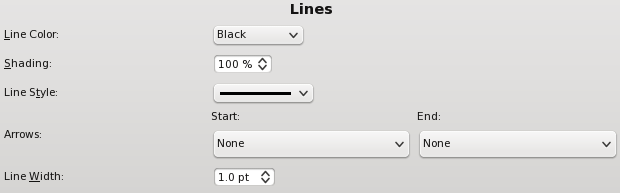 | ||||
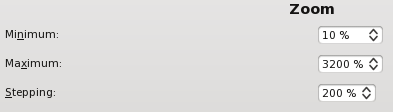 |

HyphenationHyphenation details are described here: Hyphenation in Scribus.FontsSelecting and installing fonts correctly is one of the most important configuration items with Scribus and an extensive set of notes is here: Fonts and Scribus. If there is one part of the documentation you really must read, it is this one.Preflight VerifierPreflight verification (checking for errors) is automatic when exporting to PDF, and also can be chosen separately from the toolbar. Here are the default settings for various items you wish to have checked. You would be ill-advised to check Ignore all errors - an error discovered after commercial printing could prove to be costly.
Color ManagementThere are detailed notes on Color Management under Scribus and Creating a Monitor Profile with Littlecms. MacOSX and Windows users can use commercially available tools like Monaco's Color Tools, Eye-One, Adobe Gamma and Scribus can use them along side other color savvy applications. MacOSX users can use any of the profiles available to Color Sync. Scribus will automatically discover any system profiles installed.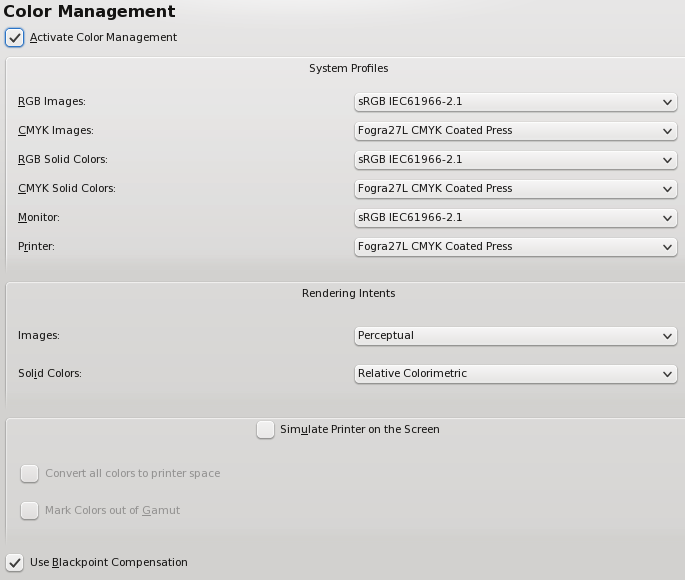 Note: You will not be able to export to PDF/X-3 if color management is not enabled, and the Preferences settings for this format will likewise not be available.
PDF ExportRemember that the settings here simply change the default values for PDF Export. You can still override any settings with the PDF Export dialog. For more info on PDF look at PDF Export Options and PDF/X-3 and Scribus.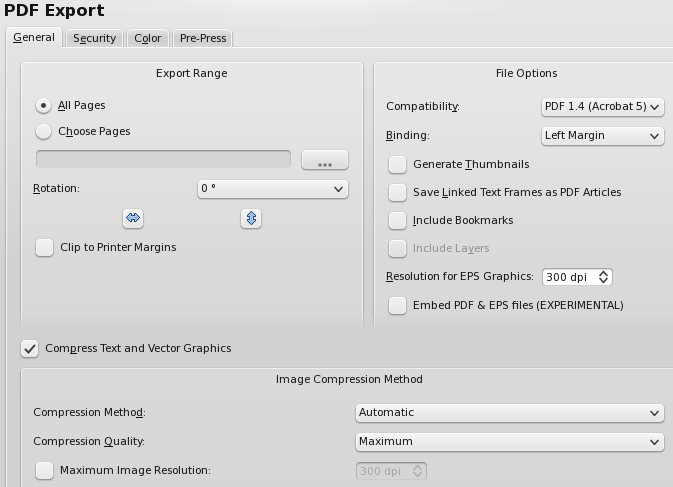 New to 1.3.5+ versions is the inclusion of the ability to create bleeds, crop marks, and other printer marks as you export to PDF.
Any bleed width is added to the page dimensions you selected when you created your document.
Note here an example of what you see when you do not have ICC profiles installed - PDF/X-3 Output Intent is not available.
New to 1.3.5+ versions is the inclusion of the ability to create bleeds, crop marks, and other printer marks as you export to PDF.
Any bleed width is added to the page dimensions you selected when you created your document.
Note here an example of what you see when you do not have ICC profiles installed - PDF/X-3 Output Intent is not available.

Documents Item AttributesTable of Contents and IndexesThese two subdialogs relate to each other. One use of these features is explained here: http://wiki.scribus.net/index.php/Creating_a_Table_of_Contents Here you see the various default keyboard shortcuts, which are editable, and many others can be assigned.
These are stored in the .scribus/scribus135.rc file.
Moreover, once customized, you can export them into a separate XML file which can be exported and saved separately, along with making it portable to other machines.
The default file suffix is .ksxml.
The XML is a unicode file and should not have issues being transported across platforms, with the only caveat that Macs have an option and command meta key, where Linux and Windows share common keyboards.
Here you see the various default keyboard shortcuts, which are editable, and many others can be assigned.
These are stored in the .scribus/scribus135.rc file.
Moreover, once customized, you can export them into a separate XML file which can be exported and saved separately, along with making it portable to other machines.
The default file suffix is .ksxml.
The XML is a unicode file and should not have issues being transported across platforms, with the only caveat that Macs have an option and command meta key, where Linux and Windows share common keyboards.
ScrapbookWith scrapbooks, you can right button drag and drop frequently used items, including pictures, images and text files for quick placement. Scrapbooks can be saved with a file or independently of a document, as a separate scrapbook which can be loaded use with many different Documents. Separate scrapbooks are kept with a.scs designation.
This panel sets the defaults for the thumbnail size in the scrapbook palette and if scrapbooks should be saved automatically when changed.
Display (not all of these available in Document Settings)Most of these are pretty straightforward. Depending on the size of your screen, you can use this to adjust the rescale and rearrange your workspace. If you have plenty of space, you may want to adjust the display to accurately reflect your document size by default. Remember, you can adjust the magnification settings in Tools > Zoom. The Colors tab allows for customization of the colors used for various screen features, such as marking the margins, grids, and guides.
In Document Settings only Fill Color is available.
It's also worth mentioning here that the Fill Color only has to do with the appearance of the document background and is not printed or exported to PDF.
The Colors tab allows for customization of the colors used for various screen features, such as marking the margins, grids, and guides.
In Document Settings only Fill Color is available.
It's also worth mentioning here that the Fill Color only has to do with the appearance of the document background and is not printed or exported to PDF.
External ToolsThis panel enables you to change the default settings for the location of Ghostscript and your preferred image editing tool. If you have installed Ghostscript on Windows before installing Scribus, it is usually automatically detected.If you receive an error message on Windows indicating EPS files cannot be used. This is where the settings can be changed to allow Scribus to find the correct location of Ghostscript. On Linux and Windows: This particular screenshot comes from Linux, but Windows will have all of these same settings.
If you do need to search for Ghostscript in Windows, the particular executable you need (for 32-bit) is named gswin32c.exe not gswin32.exe.
Some additional information about Ghostscript can be found in [[Help:Manual_Advancedgs|toolbox7.html-Advanced Ghostscript.
You are not restricted to using Gimp for image editing, and could use any available image editor such as Cinepaint, Krita, or even Photoshop.
Although it was formerly necessary to close Gimp after editing, this is no longer necessary.
If Gimp is already running, you will either need to close it to have the image file automatically loaded to Gimp, or get the file using Gimp's Open dialog.
On MacOSX
This particular screenshot comes from Linux, but Windows will have all of these same settings.
If you do need to search for Ghostscript in Windows, the particular executable you need (for 32-bit) is named gswin32c.exe not gswin32.exe.
Some additional information about Ghostscript can be found in [[Help:Manual_Advancedgs|toolbox7.html-Advanced Ghostscript.
You are not restricted to using Gimp for image editing, and could use any available image editor such as Cinepaint, Krita, or even Photoshop.
Although it was formerly necessary to close Gimp after editing, this is no longer necessary.
If Gimp is already running, you will either need to close it to have the image file automatically loaded to Gimp, or get the file using Gimp's Open dialog.
On MacOSX
 Above are the recommended settings, provided you are using GIMP and/or if you have installed the Ghostscript.framework from http://aqua.scribus.net].
tr>
Above are the recommended settings, provided you are using GIMP and/or if you have installed the Ghostscript.framework from http://aqua.scribus.net].
tr> |

PluginsThis is an informational display about the various plugins you have at your disposal, how to activate them, and where their libraries are located.Short Words Short Words is a plug-in to assist adding non breaking spaces to short words like Mr.
and measurements like km.
It may not be immediately obvious, but there to two kinds of these spaces, placed either before (for something like kg) or after (for something like Mr.).
Directly edit in this panel and save.
Details on configuration and use are here: Short Words in Scribus.
Short Words is a plug-in to assist adding non breaking spaces to short words like Mr.
and measurements like km.
It may not be immediately obvious, but there to two kinds of these spaces, placed either before (for something like kg) or after (for something like Mr.).
Directly edit in this panel and save.
Details on configuration and use are here: Short Words in Scribus.
ScripterIf the Scripter plugin is activated at startup, you will not need to make any changes here to use the included Python scripts. Scripter Extensions are special scripter module or scripts which are loaded at startup to modify the abilities of the python scripter plug-in within Scribus. Details are here: Scripter Extensions Howto. The console tab is for choosing syntax highlighting colors within the scripter console.Document Information (available in Document Settings but not in Preferences)There are a number of informational elements which can be saved with your file. Those that will be accessible and display in Properties in Adobe Reader (9.x) are Title, Author, and Keywords.Where Are the Preferences Files ?Scribus' preferences are kept in a hidden directory.scribus.
The location of which is as follows:
Linux: Under your $home directory, %username/.scribus
MacOSX: Under User/%username/.scribus
Windows: Documents and Settings/%username/.scribus
Within the directory is a .scribus13.rc file, a scribusfont.rc file which preserves your font preferences and a prefs13.xml.
These files are stored in XML format, so you can inspect its contents with a text editor.
If you have installed the scripter plug-in, there will also be a scripter.rc file which lists most recently used scripts.
There might also be several directories, which are configuration or history files.
If you are troubleshooting starting Scribus, rename, do not delete these files and directories.
If you rename the directory, on re-starting Scribus, the launch time will be somewhat longer, as Scribus creates a cache of installed fonts.
On the second re-start of Scribus, it will be much quicker.
Configkeyboard1 Keyboard Shortcut Settings 1.1 Default Keyboard Shortcuts for Scribus 1.3.x 1.2 Function Keys 1.3 Control, Shift, Alt Keys 1.4 Normal Keys 1.5 Story Editor 1.6 Moving and Re-sizing using Arrow Keys 1.7 Resizing Images in Edit Mode 1.8 Selection/Navigation KeysKeyboard Shortcut SettingsIn Scribus 1.3.x, the keyboard shortcuts are completely revised. There is still some ongoing work, so the most updated information is here: Keyboard Shortcuts by Key See also: Mouse Usage Hints Note: Keyboard Short Cuts are completely customizable and can be exported for use on other machines under the Keyboard Preferences.Default Keyboard Shortcuts for Scribus 1.3.xFunction KeysFunction | Shortcut | |
| Show Help Manual | F1 | |||
| Show Properties Palette | F2 | |||
| Show Layers Palette | F6 | |||
| Toggle All Palettes | F10 | |||
| Toggle All Guides | F11 | |||
| Insert Unicode Character | F12 + 4 digit hex value
Control, Shift, Alt KeysFunction | Shortcut | ||
| Select All | Control-A | |||
| Deselect All | Control-Shift-A | |||
| Copy | Control-C | |||
| Copy Contents (Images Only) | Control +Shift+C | |||
| Paste Contents (Images Only) | Control +Shift+P | |||
| Absolute Paste Contents (Images Only) | Control +Alt+Shift+P | |||
| Get Text or Image depending on selection | Control-D | |||
| Item Duplicate | Control+Alt+Shift+D | |||
| Image Effects | Control-E | |||
| Search and Replace | Control-F | |||
| Lock Item | Control-L | |||
| Lock Item Size | Control-Shift-L | |||
| Group Items | Control-G | |||
| Ungroup Item | Control+Shift+G | |||
| Document Information | Control-I | |||
| Delete Item | Control-K | |||
| New File | Control-N | |||
| Open File | Control-O | |||
| Control-P | ||||
| Quit | Control-Q | |||
| Save | Control-S | |||
| Save As | Control-Shift-S | |||
| Paste | Control-V | |||
| Close File | Control-W | |||
| Cut | Control-X | |||
| Edit with Story Editor | Control-Y | |||
| Undo | Control-Z | |||
| Redo | Control-Shift-Z | |||
| Select All | Control-A | |||
| DeSelect All | Control-Shift-A | |||
| Zoom to fit | Control-0 | |||
| Zoom to 100% | Control-1 | |||
| Zoom In | Control-Plus | |||
| Zoom Out | Control-Minus | |||
| Smart Hyphen | Control-Shift-Minus | |||
| Non Breaking Space | Control-Space | |||
| Insert Page Number | Control-Alt-Shift-P | |||
| Raise | Control-Home | |||
| Lower | Control-End | |||
| Raise to top | Home | |||
| Lower to bottom | End | |||
| New Line | Shift-Return | |||
| Frame Break | Control-Return | |||
| Column Break | Control-Shift-Return | |||
| Stacked Objects, next in Z-order | Control-Shift-LMouse | |||
| Resizing object when other object on top | Control-drag | |||
| Resize proportionally | Control-drag | |||
| Move image in image frame without entering frame edit mode | Control-Alt-drag | |||
| Move frame/group with X/Y constrained | Control-drag | |||
| Rotate a line or when creating a line, constrain the angle of rotation | Control-drag and rotate | |||
| Rotate an existing item on the page other than a line and constrain the angle of rotation | Control-drag and rotate | |||
| Resize to a square | Shift-drag
You can constrain objects when re-sizing them with Ctrl-drag.
Constraining keeps the aspect ratio the same as the original shape.
Normal KeysFunction | Shortcut | ||
| A | Insert Table Frame | |||
| B | Insert Bezier Curve | |||
| C | Select (Temporary until the rest are sorted out) | |||
| E | Edit Contents (text in a text frame, or image location in an image frame) | |||
| F | Insert Freehand Line | |||
| I | Insert Image Frame | |||
| N | Link Text Frame | |||
| L | Insert Line | |||
| P | Insert Polygon | |||
| R | Rotate | |||
| S | Insert Shape | |||
| T | Insert Text Frame | |||
| U | Unlink Text Frame | |||
| Z | Zoom
Story EditorEsc | Closes Story Editor | ||
| Ctrl +W | Save Changes and Close Story Editor | |||
| Ctrl +S | Save File While Editing in Story Editor
Moving and Re-sizing using Arrow KeysMove item 1 unit (current: pt,mm,in,c,p,cm) Arrow key up/down/left/right Move item 10 units (current: pt,mm,in,c,p,cm) Ctrl+Arrow keys Move item 0.1 units (current: pt,mm,in,c,p,cm) Shift+Arrow keys Move item 0.01 units (current: pt,mm,in,c,p,cm) Control+Shift+Arrow keys Resize item 1 unit outwards (current: pt,mm,in,c,p,cm) Alt+Arrow keys Resize item 1 unit inwards(current: pt,mm,in,c,p,cm) Shift+Alt+Arrow keys Resize item 10 units outwards (current: pt,mm,in,c,p,cm) Control+Alt+Arrow keys Resize item 10 units inwards(current: pt,mm,in,c,p,cm) Control+Shift+Alt+Arrow keysResizing Images in Edit ModeAlt right arrow, move right side outwards (expand) Alt left arrow, move left side outwards (expand) Alt Shift right arrow, move left side inwards (shrink) Alt Shift left arrow, move right side inwards (shrink)Selection/Navigation KeysShift + Left Click = Selecting more than one object. Shift+Cursor Key selects Characters Ctrl+Shift+Cursor Key selects Words Ctrl+Cursor Up/Down selects Lines Ctrl+Home selects Text from the Start to the Cursor Position Ctrl+End selects Text from the Cursor Position to the End Ctrl+Cursor Key moves to the next Word Home moves to the beginning of the line End moves to the end of the line Ctrl+Shift+Click selects the Object beneath another Shift+Click adds an Object to the Selection Ctrl+Alt+Click selects a single Object out of a Groups Overlapping objects - Control shift select any frame on any level on one layer to select it. Then to move or resize the frame you have selected, hold down control. You can constrain objects when re-sizing them with Ctrl+ Constraining keeps the aspect ratio the same as the original shape.Configmouse1 Mouse Usage Hints 1.1 View 1.2 Items 1.3 Text Frames 1.4 The Color Eye Dropper 1.5 In the Properties PaletteMouse Usage HintsViewMouse usage in Scribus has some subtle, but once learned, very useful shortcuts with the mouse. Space Bar + Left Click - toggles panning mode for the mouse Click third button, or on two button mice ("chord" them by click left and right together), refreshes the view Ctrl > Wheel - zooms the view in and out. Ctrl > Right Button Drag - allows you to pan the document up or down and/or left to right depending on the zoom factor. Right Click - brings up the Context Menu for the document canvas as shown below.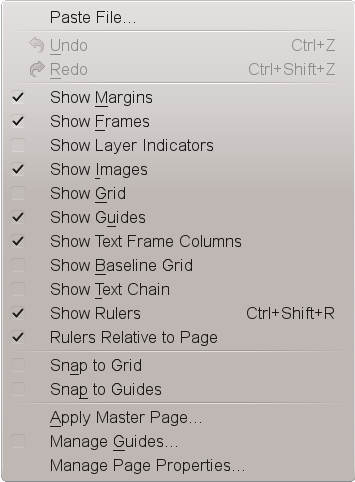
ItemsShift + Left Click - dont clear the selection but add to it Alt + Left Click - allow selection of objects within groups Hence, Ctrl + Shift + Left Click extends the selection with the item below the currently selected one beneath the cursor Ctrl + Left Click cycles through all objects at the position from top to bottom, finally deselecting all and then starting with the top again Ctrl+ Alt + Left Click will include group members in the cycle Control + Left Click resize/move for lower objects. Release + drag resizes. Hold down Control + Drag moves. Left Click > Drag resizes Frames Right Click > Drag copies or moves Frames - a context menu will pop up asking your choiceText FramesShift + Left Click - selects the text between cursor position and the click. Ctrl + Double Left Click - selects the current paragraph. Ctrl + Shift + Double Left Click - selects the current paragraph first, and subsequent clicks will add text between the selected paragraph and the click position to the selection.The Color Eye DropperSelect a: fill color with Left Click text color with Ctrl + Left Click line color with Alt + Left Click.In the Properties PaletteCtrl + Wheel - increases/decreases units 10 at a time. Shift + Wheel - increases/decreases units 1/10 at a time. Ctrl + Shift + Wheel - increases/decreases units 1/100 at a time. Alternatively: Shift + Arrow Key increases/decreases units 10 at a time. Crtl + Arrow Key increases/decreases units 1/10 at a time.Hyphenation1 Hyphenation 1.1 Introduction 1.2 Configuration 1.3 UsageHyphenationIntroductionOne of the reasons for ugly text layout is "white holes" between words, which in turn are the result of unhyphenated text. A general rule is that the shorter the a line of text, the more likely those gaps are. Hence the strong recommendation to use the hyphenator for continuous text.ConfigurationTo get the best hyphenation results, you are advised to configure the hyphenator properly. This can be done via File > Document Setup > Hyphenator for the current document and File > Preferences > Hyphenator for new documents. The dialog consists of four parts.
In the upper left section (General Options) you can determine the general behavior of the hyphenator:
Hyphenation Suggestions: If you check this option, Scribus will suggest the hyphenation for every word in a text frame.
If applied to a long text, this can be time-consuming, and you may want to correct hyphenations on a case-by-case instead.
Hyphenate Text Automatically During Typing: If checked, Scribus will automatically hyphenate text in every text frame that's being added to your document.
This includes imported text.
In the upper right corner you can see the most important typographical options, namely:
Language: There are huge differences between the hyphenation rules in different languages, so you have to make sure to select the correct one.
If you use more than one language in a document, you can set up separate character styles for every language.
Smallest word determines the length required to trigger a hyphen.
The default is 3, which means that a word needs to consist at least of four characters to be hyphenated.
Consecutive Hyphenations Allowed: determines in how many consecutive lines hyphenation is permitted.
It is recommended to limit the number of lines, because otherwise the right border of a text looks like a "ladder".
The default is 2, which is common in typography.
In the lower part of the dialog there are two fields that allow you to specify words that you want to be treated differently.
The left field is called Exceptions.
Here you can add words that aren't hyphenated correctly by the hyphenator.
In the example above, the word "manuscript" has been inserted, including the desired positions for line breaks, which are specified by inserting "-" via the keyboard.
To the right there is a second field called Ignore List.
Any word that has been added to this list won't be hyphenated.
The dialog consists of four parts.
In the upper left section (General Options) you can determine the general behavior of the hyphenator:
Hyphenation Suggestions: If you check this option, Scribus will suggest the hyphenation for every word in a text frame.
If applied to a long text, this can be time-consuming, and you may want to correct hyphenations on a case-by-case instead.
Hyphenate Text Automatically During Typing: If checked, Scribus will automatically hyphenate text in every text frame that's being added to your document.
This includes imported text.
In the upper right corner you can see the most important typographical options, namely:
Language: There are huge differences between the hyphenation rules in different languages, so you have to make sure to select the correct one.
If you use more than one language in a document, you can set up separate character styles for every language.
Smallest word determines the length required to trigger a hyphen.
The default is 3, which means that a word needs to consist at least of four characters to be hyphenated.
Consecutive Hyphenations Allowed: determines in how many consecutive lines hyphenation is permitted.
It is recommended to limit the number of lines, because otherwise the right border of a text looks like a "ladder".
The default is 2, which is common in typography.
In the lower part of the dialog there are two fields that allow you to specify words that you want to be treated differently.
The left field is called Exceptions.
Here you can add words that aren't hyphenated correctly by the hyphenator.
In the example above, the word "manuscript" has been inserted, including the desired positions for line breaks, which are specified by inserting "-" via the keyboard.
To the right there is a second field called Ignore List.
Any word that has been added to this list won't be hyphenated.
UsageSelect a text frame, adjust the text alignment to your liking and then select Extras > Hyphenate Text from the menu. Note that this will only hyphenate text in a selected frame. In the Extras menu there is also the opposite feature, called Dehyphenate Text. It is used to dehyphenate text in a selected frame, but it can also be used to dehyphenate a single word. To do the latter, you have to select a hyphenated word in a text frame and then use the menu command. Not every possible or reasonable hyphenation can be detected by the hyphenation algorithm. In such a case you can insert a so-called "soft hyphen" into a word. "Soft hyphen" essentially tells the hyphenator: "Hyphenate here, if possible", where "possible" means that hyphenation is not prevented by other settings, like Consecutive Hyphenations Allowed. To insert a soft hyphen, you need to place the cursor in a word at the desired break position and then use Insert > Character > Soft Hyphen.FontsconfigTable of Contents 1 Font Preferences and Managing Fonts with Scribus Linux/Unix 1.1 Overview 1.2 Adding additional font paths: 1.3 Font Substitutions 1.3.1 Available Fonts 1.4 Other notes about fonts and font management:Font Preferences and Managing Fonts with Scribus Linux/UnixOverviewNote: Windows users are also recommended to review the notes Windows Fonts and Scribus Scribus, has a couple of helpful and easy to use panels for managing fonts to use with Scribus, as well as, methods to make your own global font preferences and substitutions for Scribus easy. Within the new font preferences, you can: Set additional user defined font paths, which do not need root permissions, nor the need to manually adjust font paths on Linux or *nix based OS's. Set user preferences for font usage and font embedding within Scribus documents. Adjust settings for on the fly substitutions for missing or unavailable fonts. On MacOSX, you can optionally add additional folders without the need to use third party font managers. There is no need to restart Scribus after adding a new font folder. At first appearance, it might seem a bit confusing at first, as some options are grayed out initially. However, this does have some logic as we will see. One of the historical challenges in font handling with Xfree86 or X.org is when some applications start adding font paths to the default font path setup by Xfree86 or X.org. The newer fontconfig mechanism and Freetype2 have greatly made brought sanity to one of the long standing end user problems with Linux on the desktop.Adding additional font paths:Open Scribus without any documents open. Then Edit > Preferences > Fonts, which will bring up a tabbed panel. Select the Additional Paths tab: Here you can add font paths, which are not part of your system's defaults.
In the example here, we have added three user defined paths where there are fonts we wish to use within Scribus.
On X-Windows, the directory
Here you can add font paths, which are not part of your system's defaults.
In the example here, we have added three user defined paths where there are fonts we wish to use within Scribus.
On X-Windows, the directory .fonts is the default directory for use with the new fontconfig mechanism with Xft2 included with newer distributions.
After clicking OK, Scribus will add these font paths and any correctly installed fonts will be available immediately to new or existing documents you open.
Font SubstitutionsWhen opening a Scribus document, Scribus runs a check to see if all fonts specified in a document are available. In the case a given font is not available on your workstation, you are given a choice upon opening the doc to make a substitution. You can can further adjust this preference with the Font Substitutions tab. This allows you to change the default substitution pattern. In this example, we are substituting Timmons Bold, included with StarOffice 5.2+, with a TrueType version of Time New Roman.
Available FontsThis tab shows available system-wide fonts, including user specified paths. You can also change which fonts are used within Scribus on a font by font basis, as well as which fonts are embedded within PostScript output. Scribus will also search the current document path for fonts as well.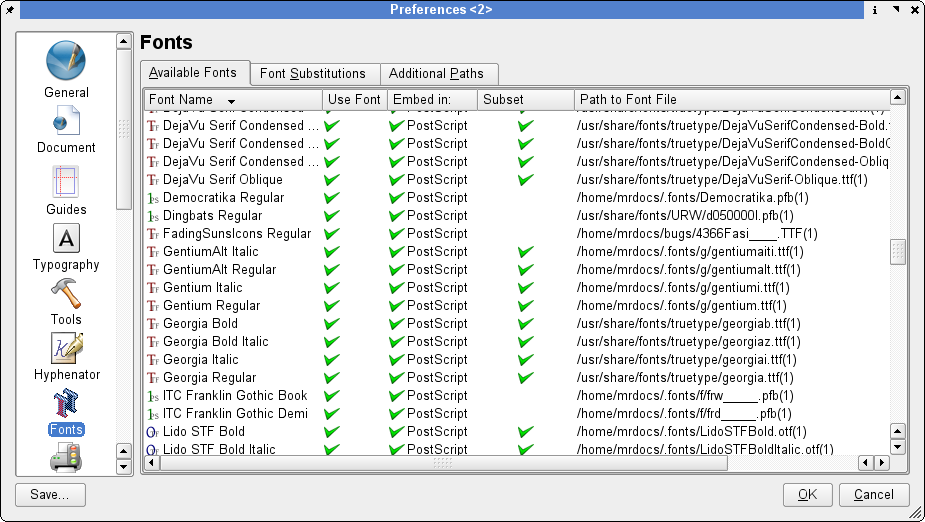 In this example, Nimbus Roman (a Times or Times Roman lookalike) has been disabled, as we find on occasion, it does not display optimally on other platforms, as Acrobat Reader will substitute its own Multi Master fonts.
Other notes about fonts and font management:Sub-Setting fonts is including only the glyphs in the font which are used in the document when exporting a PostScript stream or a PDF. This allows smaller PDFs, at the expense of making it difficult to make minor edits in pre-press tools like Pit Stop. Unless you are sending PDF to commerical printer, you can sub-set fonts fairly reliably. This is important when you are trying to keep a downloadable PDF to the smallest size. OpenType Fonts - Unicode True Type Fonts cannot be fully embedded by default. This greatly simplifies handling them in other applications. OpenType Fonts and Unicode TrueType Fonts can be quite large, some larger than 10 Mb... OpenType Fonts/Unicode True Type Fonts are exported as outlines in PDF. This allows them to be used in PDF, where often other applications cannot use them. Moreover, embedding Open Type fonts is only supported in PDF 1.6+ (Acrobat 7.0.x) and this technology is quite new. Converting to outlines. Scribus can optionally convert text to PostScript outlines. This can be a valuable option when your printer might not have a new enough RIP or imagesetter to accept PDF 1.4. This is also sometimes a good option before exporting SVG or EPS files. When you are certain EPS files will be imported into other applications or across platforms this is recommended. Scribus does not create so called "faux" bold or italic fonts. These are the bane of pre-press folks and has been known to cause issues when printing commercially and can result in degraded text quality. Thus, Scribus will not create an Italic version of a font if you really do not have an Italic font file for a given font family. Some page layout applications and word processors have chosen to offer this as a "feature". The Scribus development team has made a conscious decision not to enable this.FontsadvancedFonts in DepthFonts are often where the trouble starts and often ends in page layout. They are in my experience one of the leading troubles in pre-press in general and one of the sources of constant questions on the mailing list and IRC. A rough guess is 50% of the bug reports which are font related are problems with the fonts themselves. A typical question or complaint on IRC is: "Scribus won't use font X, but application blah and blahblah use it just fine. Why is this?" Fundamentally, Scribus is really really fussy about fonts. This is a feature and not a bug. Certainly, on Linux no other application is less tolerant of fonts with defects than Scribus. This is a Good Thing ™! Preventing the use of possibly defective fonts is without question essential for reliable output. This has caused some minor annoyance or confusion for end users. Rest assured, this avoids many potential problems down the road. Like a PDF which crashes when you are printing 200,000 magazine covers because the imagesetting machine crashes or refuses to output a file. That, in the real world can cost thousands or millions in your local currency. Scribus uses the freetype2 libraries for accessing font internals. Scribus also does some error checking upon loading to verify the quality of the fonts. Not all fonts are up to the task for use in DTP. Why ? High quality fonts are essential for reliable output, no matter which platform. Call me a font snob, but I never ever use freely downloaded shareware fonts. Experience has shown us some freeware fonts do not follow normal font specifications for things like having a proper encoding, a missing or incorrectly formatted PostScript name, broken curves in individual glyphs and other defects. Scribus does an initial "self-defense" test when starting to see if the available fonts have usable encodings, is scalable and has a correctly embedded PostScript name. Then, loading a document, Scribus uses freetype2 to do a more extensive check of the requested fonts to ensure freetype2 can access all the glyphs within the font. If freetype2 cannot read the glyphs correctly, then usage of that particular font is disabled by Scribus.Trustworthy FontsThe the fonts I use and trust below: (in no particular order) : The latest Ghostscript fonts. Preferably, if you have no need for non-Latin, You can get an alternative set of these in TrueType form, from the Artifex site. These alternatives also come with some extra font families and are good usable fonts. Any of the Adobe or Bitstream fonts from Xfree86 or X.org: Charter, Luxi and Utopia are excellent fonts from this package. The PDF version of this doc is set using Utopia for the main body text. Any of the Lucida fonts from the Sun Java Packages. MS Web fonts - the exception: Wingdings can cause problems in DTP, not just for Scribus (fixed in 1.2.2). This particular font has a unusual encoding scheme unlike most other fonts. Lido CE family is an alternative to Times Roman and is a very well made font, by a highly regarded foundry. Gentium - an ambitious effort to create a freely available Unicode font which works well with most Latin scripts. Bitstream Vera Family - These were donated to the Gnome foundation and are packaged by most distributions. The Vera Serif is in particular a rarity, a really easy to read on screen serifed font. Any of the Bitstream Fonts from Corel Draw. People have used these for years in professional pre-press without a single problem. Any Adobe font. Adobe fonts are some of the best and if you have them, the new OpenType fonts are terrific. Scribus is one of the rare applications to support them well, including making them work well with PDF so they print properly from PDF. Any of the fonts packaged with StarOffice 6.0+. These are replacements for the default Windows fonts in some cases and include other font faces. These are all high quality fonts licensed from Agfa Monotype and should work fine in Scribus. You can find links for all the downloadable fonts noted above on the Scribus web site under Web Links > Fonts. Some Linux distributions package some free fonts and shareware fonts under various package names. I avoid them and have removed them from some installs without missing them. Windows users should be equally suspect downloading any site which has "free" and "font" in the domain name. Do not be surprised when shareware or clone TrueType fonts downloaded from the Internet disappoint when printed. Sometimes shareware TrueType fonts do not follow proper the proper encoding specs, so they are unreliable in a PostScript environment. Making good reliable fonts in the PostScript sense is not easy and requires extensive QA testing. An example: Verdana from the MS web font collection took almost a year to create. Also, do not be put off by the lack of a great screen preview with the URW fonts - they are excellent printer fonts. Font faces like Palladio and Utopia for example, are not really attractive on screen, but they are excellent fonts for easy to read printed documents. There is a reason service bureaus and printers spend literally thousands of dollars for high quality font libraries. On Linux, installation, if you use$home/.fonts directory for adding fonts, Scribus should find them just fine.
For those leery of messing around with the command line tools for font installation, KDE 3.2+ includes an improved version of Keith Drummond's kfontinstaller program.
The one in KDE 3.3+ works superbly and you can even preview fonts within Konqueror.
In my opinion, it is one of the most user friendly font installers I have seen on any platform.
It also automatically will create Ghostscript Fontmap files for use with GSview and Ghostscript.
Highly recommended.
Scribus also makes it easy to add additional font paths.
Simply, close all documents, then select Settings > Fonts > Additional Paths.
Select the new path and click OK.
If fonts, still do not show up, you may need to add these to either your $home/.fonts.conf file or other method depending on your distribution.
If some still fail to show up, it is possibly Scribus's font checking mechanism has disabled them.
You can make some basic checks by following the hints in: Basic Font Tests
Fontsgs1 Ghostscript Font Hints for Linux, Unix and MacOSX. 1.1 Creating a Fontmap File 1.2 Adding User Added TrueType Fonts 1.3 Ghostscript Fonts and EPS ImportGhostscript Font Hints for Linux, Unix and MacOSX.These notes thanks to Craig Ringer and Russell Lang, maintainer of GSview. One of the most common causes of Ghostscript failure to render/import/convert a file is when Ghostscript can't find the fonts it needs to either display an EPS or PS. This not a weakness or flaw in Ghostscript, as all EPS/PS interpreters need to be able access the correct fonts listed within the PostScript. This can most definitely affect EPS/PS files you are trying to import into Scribus. Some applications do not properly embed the fonts, so they must be supplied externally. When Ghostcript can't find a font usually an error message from the console will be something like:gs -h AFPL Ghostscript 8.50 (2004-12-10) Copyright (C) 2004 artofcode LLC, Benicia, CA. All rights reserved. blah blah bah... invalidfont Current allocation mode is local Last OS error: No such file or directory and so on...The invalidfont error means a: Ghostscript can't find the font or fonts. b: Ghostscript can't find any fonts c: There is a broken or malformed font on your system. The fix: Creating a Fontmap FileThere's a secret gem in the GS source distribution,$GS_SRC_DIR/toolbin/genfontmap.psThis can be used to generate a Fontmap file - the same files you see frightening perl scripts for on the 'net. This file may or may not be shipped by your distro, so for this example, we are mentioning the un-tarred source directory for building a parallel GS install. You should use the genfontmap.ps from the version of Ghostscript you are using. Others may not work correctly. This is another good reason to get a recent version of Ghostscript. $ gs -q -sFONTPATH=/usr/local/share/fonts/TrueType ${HOME}/build/ghostscript-8.31/toolbin/genfontmap.ps % This Fontmap generated by genfontmap.ps (AndaleMono) (/usr/local/share/fonts/TrueType/AndaleMo.TTF) ; (Arial-Black) (/usr/local/share/fonts/TrueType/AriBlk.TTF) ; (Arial-BoldItalicMT) (/usr/local/share/fonts/TrueType/Arialbi.TTF) ; (Arial-BoldMT) (/usr/local/share/fonts/TrueType/Arialbd.TTF) ; ...
blah blah blah ...
(Utopia-Regular) (putr.pfa) ; (Verdana) (/usr/local/share/fonts/TrueType/Verdana.TTF) ; (Verdana-Bold) (/usr/local/share/fonts/TrueType/Verdanab.TTF) ; (Verdana-BoldItalic) (/usr/local/share/fonts/TrueType/Verdanaz.TTF) ; (Verdana-Italic) (/usr/local/share/fonts/TrueType/Verdanai.TTF) ; (Webdings) (/usr/local/share/fonts/TrueType/Webdings.TTF) ; (ZapfChancery-MediumItalic) /URWChanceryL-MediItal ; (ZapfDingbats) /Dingbats ; genfontmap completed OK.
42 new fonts added.
So you redirect stdout or copy paste everything from the % This Fontmap.. line to a text editor to save the Fontmap, copy the generated FontMap into the font directory, then add the directory to your GS_LIB env var:
The exact path may vary.
$ gs -q -sFONTPATH=/usr/local/share/fonts/TrueType ${HOME}/build/ghostscript-8.50/toolbin/genfontmap.ps > /tmp/Fontmap $ sudo cp /tmp/Fontmap /usr/local/share/fonts/Truetype $ export GS_LIB=/usr/local/share/fonts/TrueType:$GS_LIB
Then you can launch Scribus from the same console and GS will find them and will import EPS/PS files without issues.
Alternately, you can edit your GS lib/Fontmap to source the new fontmap or append the new fontmap entries to your main lib/Fontmap.
Adding User Added TrueType FontsDespite the very best efforts of the Ghostscript documentation to make it appear otherwise, TrueType fonts are well supported in Ghostscript and quite easy to use with it. Most importantly, the GS_FONTPATH environment var and the -sFONTPATH argument may specify directories containing any supported type of font - not just PostScript fonts as described in the documentation.$ export GS_FONTPATH=$MY_FONT_DIR:$HOME/.fonts $ scribus Ghostscript Fonts and EPS ImportEPS import in Scribus is affected by the Ghostscript font path. If GS can't find the fonts, they'll be silently substituted. You really, really want GS to be able to find your fonts. You are recommend to create Fontmap files for your font directories then add them to the GS_LIB env var, as this will cause GS to load fonts quickly in future. Testing confirms that once GS has been told where to find the fonts, the EPS import in Scribus happily pulls in local fonts where there is a suitable one to use for a font requested by the EPS, but not embedded. Note in all of the above, the creation and updating of Fontmap.gs is usually handled automagically, by using Kfontinstaller, as noted here: Font Installation with KDEFontsnonlatinCJK, Indic Script and Other non-Latin FontsCJK (Chinese, Japanese, Korean) usage in Scribus is possible. Actually, except for adding KOIR-8 encodings, not much has been done to support CJK fonts (yet). However, some users have reported some success, including using exported PDFs for commercial print jobs. Thanks to QT's excellent Unicode support, already some of the work is done. Major work is underway on the next generation of Scribus to vastly expand support for non-Latin scripts. Stay tuned.So, what Scribus can do now ?Almost any good Unicode font will display individual glyphs in Scribus. Testing with large Unicode fonts such as Bitsream Cyberbit font shows no issues in display or printing, except for loading speed. Arabic script can be written and imported, but the special features of glyph combination in line endings are not yet enabled. Hebrew is well supported and right to left text is already enabled in Scribus. There are some issue with some accents. Indic Scripts are a much more difficult task, however, we have strong interest in supporting them. One developer has been working with Scribus developers to modify the display canvas to fully support the special features needed to display and print them properly. Glyph combining in these languages is not supported (yet). Scribus supports both Unicode TrueType fonts and OpenType Fonts, even if you export PDF 1.3. Exported EPS or PostScript works fine with most CJK or Unicode fonts. Cyrillic works perfectly and Scribus has active translators for Russian and Ukrainian.Hints:To reduce the size of your exported PDF and PostScript files either: Convert all fonts in text frames to PostScript outlines. Enable sub-setting of any Unicode or CJK TrueType font in Settings > Fonts. When viewing in Acrobat Reader, enable the preference for smooth artwork display. See the <a href="toolbox1.html">Acrobat Reader section</a>. If you are exporting to SVG, conversion of text to PostScript outlines is almost always more satisfactory. Some Unicode fonts are quite large and will slow launching Scribus significantly. You should expect higher memory usage as well. Scribus does some very needed sanity checks on fonts upon loading.FontsselectionBasic Fonts Tests - Part 1How does one decide which fonts are good, bad or indifferent?So, you have down-loaded and installed a selection of fonts. All through the docs, on the mailing list in IRC, everyone talks about using good fonts, How do I know ? How can I tell? Below is a simple checklist you can use. It is not 100% fool proof. It comes with no guarantee: One very useful feature in KDE 3.3+ is the kio-fonts slave which can pickup metadata about fonts and browse this data in konqueror. It is my first tool for assessing a font. Enabling this is as simple as opening konqueror, browsing to a directory of fonts and click icon view and let the previews build in the back ground. Then, simply hover your mouse over a single font icon for more data. This will generate a mouseover preview. You can alternatively, right click and choose Open With... Kfontview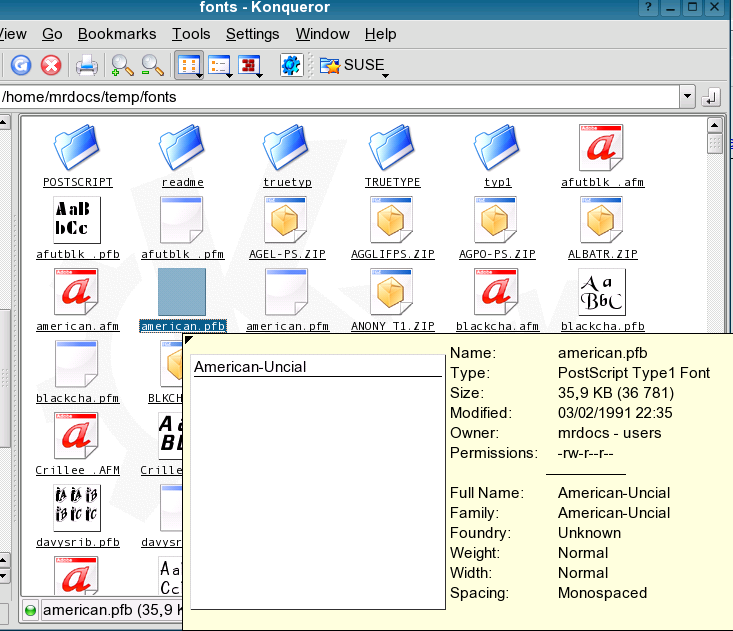 In the example above, there are a couple of hints for a potentially troublesome font.
First is no preview, indicating some internal problems.
In more than two dozen fonts which showed with no preview, most everyone had printing/exporting issues in Scribus.
Second is the lack of a foundry, indicating it might be a poorly made clone of a higher quality original.
Check the file dates: Type 1 fonts before 1991, can cause problems.
When checking Type 1 fonts, the .pfb file will create the preview.
.afm and .pfm files have the font metrics useful for ligatures and kern pairing info.
Check the size, there is no absolute, but smaller sizes, especially with True Type fonts, can indicate missing glyphs.
This is not the case with special fonts such as symbols or other fonts.
Note, Scribus 1.3+ will automatically show missing glyphs in a font right on the canvas.
Does the font come from a well known foundry ? If the foundry is marked unknown use with caution and you should not be surprised if it causes troubles in Scribus.
This again is not an absolute.
Some excellent special purpose fonts do not have this info embedded for some reason.
Does the font's foundry name Altsys or Macromedia? Macromedia sells Fontographer, a type creation/editing software which used to be sold by Altsys.
Some clones are actually fonts edited with Fontographer if the default settings are not changed, the foundry will be listed as Macromedia or Altsys.
Most often well known type designers embed their name or foundry name in the font.
If you acquire a font attributed to Altsys or Macromedia - use caution..
Fontographer itself, in the right hands, a superb tool.
Below, a good font from a well known reliable foundry with correct meta data displayed.
In the example above, there are a couple of hints for a potentially troublesome font.
First is no preview, indicating some internal problems.
In more than two dozen fonts which showed with no preview, most everyone had printing/exporting issues in Scribus.
Second is the lack of a foundry, indicating it might be a poorly made clone of a higher quality original.
Check the file dates: Type 1 fonts before 1991, can cause problems.
When checking Type 1 fonts, the .pfb file will create the preview.
.afm and .pfm files have the font metrics useful for ligatures and kern pairing info.
Check the size, there is no absolute, but smaller sizes, especially with True Type fonts, can indicate missing glyphs.
This is not the case with special fonts such as symbols or other fonts.
Note, Scribus 1.3+ will automatically show missing glyphs in a font right on the canvas.
Does the font come from a well known foundry ? If the foundry is marked unknown use with caution and you should not be surprised if it causes troubles in Scribus.
This again is not an absolute.
Some excellent special purpose fonts do not have this info embedded for some reason.
Does the font's foundry name Altsys or Macromedia? Macromedia sells Fontographer, a type creation/editing software which used to be sold by Altsys.
Some clones are actually fonts edited with Fontographer if the default settings are not changed, the foundry will be listed as Macromedia or Altsys.
Most often well known type designers embed their name or foundry name in the font.
If you acquire a font attributed to Altsys or Macromedia - use caution..
Fontographer itself, in the right hands, a superb tool.
Below, a good font from a well known reliable foundry with correct meta data displayed.
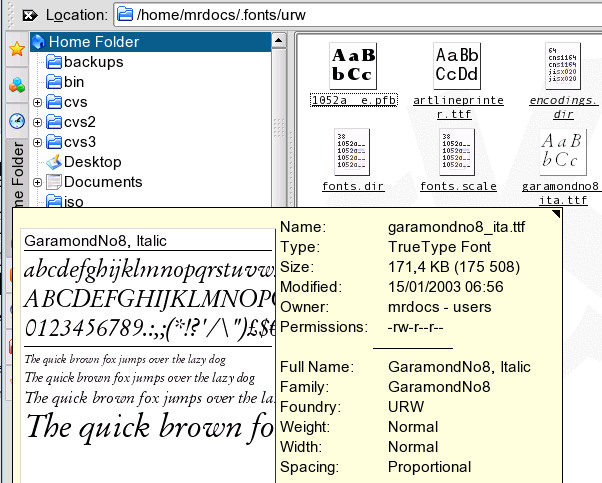
Fontsquality1 Basic Fonts Tests - Part 2 1.1 A second quality check for fonts. 1.2 Results: 1.3 Looking in the consoleBasic Fonts Tests - Part 2A second quality check for fonts.Included with Scribus is a wonderful and very powerful example of what the python scripter in Scribus can do. The font sampler script, written by Steve Callcott, is a tool to create a nicely laid out catalog of your existing font, which you can print and bind, as well as make a PDF for reference. It also happens to make it easy to spot broken fonts or fonts which are missing needed glyphs which might pose a problem when printing, especially high end or commercial printing. Using this scripter module requires:
tkinter - which provides the Graphical UI for Python Scripts
Optionally, python-imaging, which is a set of python libraries for image handling and provides the nice preview above.
Obviously, python support built in Scribus.
Running is easy enough:
Using this scripter module requires:
tkinter - which provides the Graphical UI for Python Scripts
Optionally, python-imaging, which is a set of python libraries for image handling and provides the nice preview above.
Obviously, python support built in Scribus.
Running is easy enough:
 Now, depending on the number of fonts, kinds of fonts and speed/memory of your machine, it might take a while for the script to run.
Approximately, 700 plus fonts on a P4 might will take a few minutes, but also remember the script is not only scanning all your fonts, but also automagically adding pages and laying them out too.
If memory is short or you have lots of fonts, in the order of 1000 plus, you might want to split the job in parts.
td align="center">
Now, depending on the number of fonts, kinds of fonts and speed/memory of your machine, it might take a while for the script to run.
Approximately, 700 plus fonts on a P4 might will take a few minutes, but also remember the script is not only scanning all your fonts, but also automagically adding pages and laying them out too.
If memory is short or you have lots of fonts, in the order of 1000 plus, you might want to split the job in parts.
td align="center">
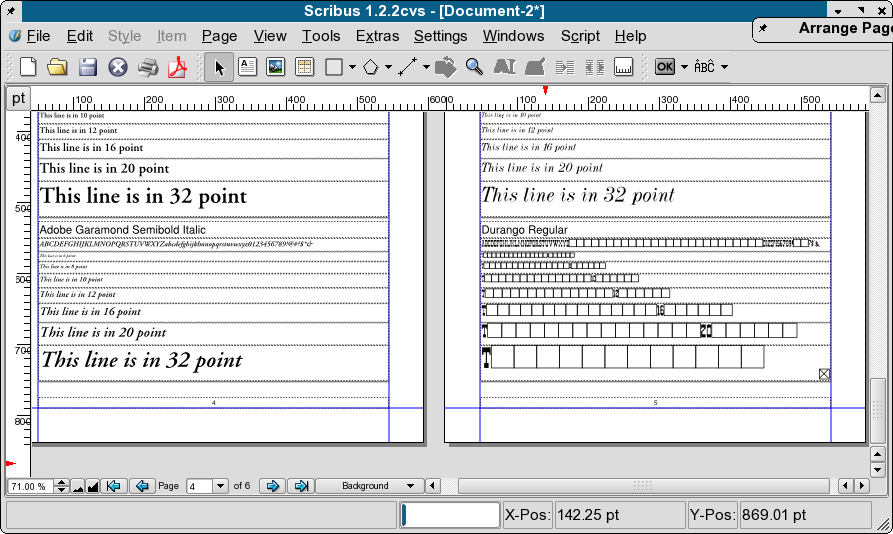 Note the output on the left and the right.
The left side is a known high quality Type 1 font.
The right side shows a freeware font from a bug report.
Note, the lack of glyphs above, does not always indicate a broken font.
Some specialty fonts like symbol fonts, dingbats and some non-Latin fonts may show the same results, but for a normal font, the results above are usually an indication of possible trouble.
Note the output on the left and the right.
The left side is a known high quality Type 1 font.
The right side shows a freeware font from a bug report.
Note, the lack of glyphs above, does not always indicate a broken font.
Some specialty fonts like symbol fonts, dingbats and some non-Latin fonts may show the same results, but for a normal font, the results above are usually an indication of possible trouble.
Looking in the consoleWhen running the console, Scribus will indicate fonts which are dropped on loading and then again when used if specific glyphs are missing or broken. The same font might be listed several times as Scribus is using freetype to scan for available glyphs. This is a Good Thing ™ Bad fonts cause crashes in Scribus and other nastiness down the line when you export or print.Font /usr/X11R6/lib/X11/fonts/URW/p052023l.pfb is broken, discarding it Font /usr/X11R6/lib/X11/fonts/URW/p052023l.pfb is broken, discarding it Font /usr/X11R6/lib/X11/fonts/URW/p052023l.pfb is broken, discarding it.... Fontswin321 Font Preferences and Managing Fonts with Scribus - Windows 1.1 Overview 1.2 Adding additional font paths: 1.3 Font Substitutions 1.3.1 Available Fonts 1.4 Other notes about fonts and font management:Font Preferences and Managing Fonts with Scribus - WindowsOverviewScribus has a couple of helpful and easy to use panels for managing fonts to use with Scribus, as well as, methods to make your own global font preferences and substitutions for Scribus easy. Within the new font preferences, you can: Set additional user defined font paths, which do not need administrator permissions, nor the need to manually install fonts system wide. Set user preferences for font usage and font embedding within Scribus documents. Adjust settings for on the fly substitutions for missing or unavailable fonts. At first appearance, it might seem a bit confusing as some options are initially grayed out. However, this does have some logic as we will see. One of the main reasons is to not remove fonts which might be used while editing a document.Adding additional font paths:Open Scribus without any documents open. Then Edit > Preferences > Fonts, which will bring up a tabbed panel. Select the Additional Paths tab: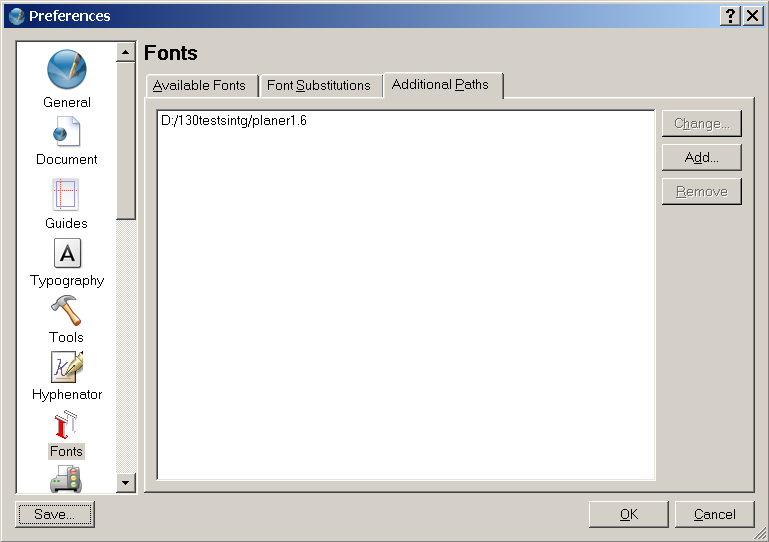 In the picture above you can add font paths, which are not in the system defaults.
In the example here, we have added a directory which is only used for a project.
After clicking OK, Scribus will add these font paths and any correctly installed fonts will be available immediately to new or existing documents you open.
Note also, Scribus will automatically search in the current document's path for additional fonts as well.
In the picture above you can add font paths, which are not in the system defaults.
In the example here, we have added a directory which is only used for a project.
After clicking OK, Scribus will add these font paths and any correctly installed fonts will be available immediately to new or existing documents you open.
Note also, Scribus will automatically search in the current document's path for additional fonts as well.
Font SubstitutionsWhen opening a Scribus document, Scribus runs a check to see if all fonts specified in a document are available. In the case a given font is not available on your workstation, you are given a choice upon opening the doc to make a substitution. You can can further adjust this preference with the Font Substitutions tab. This allows you to change the default substitution pattern.Available FontsThis tab shows available system-wide fonts, including user specified paths. You can also change which fonts are used within Scribus on a font by font basis, as well as which fonts are embedded within PostScript output.Other notes about fonts and font management:Sub-Setting fonts is including all the glyphs in the font in the PostScript stream or a PDF. This allows smaller PDFs, at the expense of making it difficult to make minor edits in pre-press tools like Pit Stop. Unless you are sending PDF to commerical printer, you can sub-set fonts fairly reliably. This is important when you are trying to keep a downloadable PDF to the smallest size. OpenType Fonts cannot be fully embedded by default. This greatly simplifies handling them in other applications. OpenType Fonts and Unicode TrueType Fonts can be quite large. OpenType Fonts are exported as outlines in PDF. This allows them to be used in PDF, where often other applications cannot use them. Converting to outlines. Scribus can optionally convert text to PostScript outlines. This can be a valuable option when your printer might not have a new enough RIP or imagesetter to accept PDF 1.4. This is also sometimes a good option before exporting SVG or EPS files. When you are certain EPS files will be imported into other applications or across platforms this is recommended. Scribus does not create so called "faux" bold or italic fonts. These are the bane of pre-press folks and has been known to cause issues when printing commercially and can result in degraded text quality. Thus, Scribus will not create an Italic version of a font if you really do not have an Italic font file for a given font family. Some page layout applications and word processors have chosen to offer this as a "feature". The Scribus development team has made a conscious decision not to enable this.ImportingTable of Contents 1 Notes on importing issues with Scribus 1.1 TIFF, JPEG, GIF, PNG what is the difference? 1.2 If it looks good on screen it will look good on paper 1.3 Why TIFF? 1.4 Caveats 1.5 If it looks bad on screen, it will print terribly 1.6 A vector format for the future 1.7 Other vector formatsNotes on importing issues with ScribusAlthough Scribus imports most common DTP image formats like TIFF and EPS, over time one of the more difficult tasks in DTP is getting stuff from different resources into your layout. Unlike some other DTP programs where printing can be finicky, Scribus print and PDF export has always been very reliable, and with correctly prepared images and files, the output from Scribus will be of excellent quality. One key to this is using the right format for the right type of image. Whenever possible, import your images as vector (e.g. SVG, EPS or AI). Another key to successful layout is fonts. When you are working with high-end DTP tools like Scribus, font quality matters. In professional DTP, it matters a lot. Probably the number one reason PostScript output fails, whether to a printer or PDF export, is a dodgy or corrupted font.TIFF, JPEG, GIF, PNG what is the difference?If it looks good on screen it will look good on paperThis is, unfortunately, an error that may cost real money. One of the most common beginner mistakes is to assume a nice looking JPEG from a website will print nicely on paper. Most websites use JPEGs, GIFs or - still less commonly - PNGs. JPEGs, by their design, use lossy compression. In the process of compressing a JPEG, data is discarded and permanently lost. Moreover, there is a type of JPEG called progressive which is pure poison in a PostScript workflow. A progressive JPEG is the type that partially displays as it is downloading in a web browser. Avoid these at all costs. Scribus will not load, nor export progressive jpegs. Also remember that most web page graphics have a resolution of 72-96 DPI, which is far too low for a print workflow. Scribus can generate PDFs with 4000 dpi, but for most purposes 300 dpi is a reasonable resolution. Another issue with JPEG files is that every time you open and edit them in an image editing program you will lose image data. So if you need to edit a JPEG file, save it in another format, like TIFF, before you start applying any changes. Scribus supports a few other formats, but you should avoid them for serious print jobs. These are: GIF: The GIF format has been created for the early days of the world wide web. It uses compression and only permits a limited number of 256 colors. While it's possible to load a GIF image into an image frame, the format really has no place in professional page layout. This can get really ugly when you try to import a so-called "Animated GIF". These GIFs work like a flip-book and are comprised of several images that will be subsequently displayed by a broswer. They have no place in professional printing. XPM: This is an old bitmap format used for icons in the X Window System. Like GIF, it only supports up to 256 colors. BMP: A bitmap format used by Windows and OS/2 for graphical user faces. Unlike GIF or XPM it can contain up to 32 bit per pixel and supports transparency. Due to its simplicity, the BMP format is wide-spread and can be read/written by most image editors. Unfortunately, the lack of a compression algorithm leads to comparatively huge file sizes, and BMP data may cause problems with commercial RIPs (Raster Image Processors). If you are preparing a PDF or PostScript file for commercial printing, convert any of these file types to a more reliable format, like TIFF or PNG. For high-level PostScript printing there are three kinds of file formats that work well for images like photos and anything that is made up of pixels and have been time tested: TIFF, tif and Tiff. No matter which way you spell it, the Tagged Image File Format is the file format for bitmap images.Why TIFF?It is a lossless format. The compression scheme does not reduce quality. For your purpose of working with Scribus, the GIMP or Krita do a fine job of exporting or saving to TIFF. It handles ICC profiles without problems. You can "tag" it with the LittleCMS utilitytifficc or embed an ICC profile in many bitmap editors.
It supports CMYK colors better than almost any other bitmap format.
Every high-end DTP application can support them, including Scribus.
TIFF files, if they are prepared properly in an image editor are extremely reliable when printed commercially.
Rarely do PostScript devices have problems with them.
CaveatsThere are more than fifty different flavors of TIFF. Not every image editor saves them with the same fidelity to the standards. GIMP, through its use of libtiff, shared with Scribus, does a fine job of supporting TIFFs. One way to work with files from GIMP is to save the original file in the native GIMP XCF format and then, once edited to your satisfaction, export as a TIFF or, with screen shots meant for the web, PNG. The latter, PNG, is an exception to the aforementioned rule, especially for application screenshots. PNG has a lot of advanced features, like ICC color support and real alpha transparency, which are often not supported well by some applications (a certain leading browser comes to mind). PNG also compresses very well. The only time JPEG may be preferrable over PNG is for photos with high dynamic range, mostly for reasons of size on a web page. For creating PDFs with screenshots, PNG is superb and will print well, as long as you do not make any scaling adjustments which reduce the image size. So if you have a screenshot which is typically at 72-96dpi, but you need to shrink it, do so by scaling the image in the GIMP or within Scribus. Whenever you are scaling screenshots, disable re-sampling in any image editor. With screenshots you should never reduce the number of pixels or you will lose sharpness quickly.If it looks bad on screen, it will print terriblyThis not necessarily true. EPS (Encapsulated PostScript) files need not have a screen preview at all. EPS files are really a special subset of PostScript instructions. They sometimes look just plain awful on screen if they have a TIFF or PICT preview embedded or are just a simple gray box. EPS files have two important virtues: They deliver excellent results on both high-resolution printers and when creating PDFs. EPS files can be resolution independent and are the only file you can (sometimes) safely scale larger than 100% than its native size without degrading image sharpness. The major issue you might find with EPS files is that while a lot of applications can generate EPS files, not all do so with the same fidelity to high-quality printing, nor do all apps follow the EPS specs properly. One way to test an EPS for use with Scribus, is to open the EPS in <a href="toolbox6.html">GSview</a> and look in the message box, by pressing Shift M. This will show the output messages from Ghostscript. Ghostscript is correctly quite fussy about EPS files. So, if you are trying to import EPS files that do not work properly in Scribus and GSview/Ghostscript is spitting lots of error messages, try using a different application to generate them. One reason for the ubiquity of EPS files in DTP is the existence of another DTP application which historically had poor support for TIFF and other bitmap image files, but does have good support for EPS import. So, many DTP users habitually create EPS files from bitmap images from Photoshop or others. Unfortunately, this can have the side effect of receiving image files which may need adjustment, which is impossible without the original image file. EPS is also great for receiving vector artwork like maps, mixed with text. The caveat is that the fonts should be correctly embedded in the EPS to print properly from Scribus. When importing an EPS, Scribus generates a 72 dpi PNG preview of the EPS, so do not be concerned if it does not look sharp right away. Printing or exporting a PDF will generate the high resolution image in the file. If you're still skeptical about the difference between a vector and a bitmap image file, here is an example that you can see for yourself. Go to: http://www.isc.tamu.edu/~lewing/linux, get the linked PostScript, which is an EPS version of Tux and then right click and download one of the GIFs. They are about the same in file size. Now create a new document in Scribus with 2 regular size pages. Place the GIF on one page and then the EPS file on another and export a PDF at 600+dpi. Now open the PDF in Adobe Reader. Zoom in 200-400 %. Now you see the difference ... Why the difference? Scribus creates and Acrobat Reader renders something called PostScript operators - another fancy name for using math in drawing curves on screen and when printed. A GIF or JPEG file is just a bunch of pixels, literally dots to create the image.A vector format for the futureWith the addition of SVG import users have one more excellent way of importing images and artwork. SVG is an abbreviation of "Scalable Vector Graphics", an open specification, which is developed by the World Wide Web Consortium. Scalable means that you can in theory enlarge the the graphic to the size of the side of a house and it would retain its sharpness. Vector is how it does it, vectors meaning the shapes are drawn by mathematical commands instead of pixels. The leading Open Source vector drawing program, Inkscape, uses SVG as its native file format, which is yet another reason for its importance to Scribus users.Other vector formatsOver time, import filters for other vector formats have been added, and there are many more to follow. See Importing Vector Drawings for more details.Importvectors1 Importing Vector Drawings 1.1 Supported formats 1.2 How it works 1.3 Editing imported vector drawings 1.4 Solid colors in imported vector drawingsImporting Vector DrawingsSupported formatsHere's a short description of the vector formats currently supported by Scribus: AI (Adobe Illustrator): The native format of Illustrator, or, more precisely, formats. Older versions of AI are basically EPS files that contain some additional features only used by Illustrator. As of Illustrator 9, AI is based on PDF, and, like its predecessor, adds some Illustrator-only information. AI import is still experimental but works very well in most cases. One of the major advantages of the AI import filter (and the EPS filter as well) is that Scribus will load spot colors in AI and EPS files correctly. If PDF-based AI files are opened directly (via File > Open), Scribus will also import AI/PDF layers. EPS (Encapsulated PostScript): Probably the most wide-spread graphics format in pre-press and a subset of the PostScript standard. See the section about EPS import for more information. PS (PostScript): A page description language created by Adobe Systems and the foundation of almost all modern print workflows. The PDF format is also derived from PostScript. Since PostScript files can contain more than one page, import may not deliver the expected result. FIG (Xfig): This is the native format of the UNIX drawing veteran Xfig. While rarely used by designers, it's ubiquitous in scientific environments like universities for technical drawings or diagrams. The format is well-documented, and import into Scribus works flawlessly. Scalable Vector Graphics (SVG): An open and widely used standard for two-dimensional vector graphics. See the section about <a href="scribus-svg.html">SVG import</a> for more information. SXD (OpenOffice.org Draw 1) and ODG (OpenDocument Graphics): These are the vector file formats used by OpenOffice.org and other Open Source Office Suites. Since "Office Drawing" is quite different from working with a typical vector drawing program, the formats use a lot of features, like automatic connectors, that aren't well-suited for a print workflow. As a result, import will only work with limited success. See Scribus and OpenOffice.org/OpenDocument for possible workarounds. WMF (Windows Metafile): A vector format used by many Office Suites and also the Windows clipboard. While WMF files are usually rejected by creative professionals, most collections of "Office Clipart" use this format. The WMF filter has been added to enable users to import these simple vector drawings. PICT (Macintosh Picture): The graphics file format used by Mac OS, similar to WMF on Windows. It can contain bitmap or vector data. CVG (Calamus Vector Graphic): A simple vector format used by the DTP veteran Calamus. It only supports grayscale colors. SHAPE (Dia Shapes) and SML (Kivio Shape): Basic vector shapes used by the diagram programs Dia and Kivio. Grayscale/RGB only.How it worksImporting vector drawings into Scribus is rather different if compared to most other DTP programs, and it's also an exception to the "frame paradigm" used for almost everything else in Scribus. When you import a vector drawing via File > Import > Get Vector File, the vector data of the original file will be converted into native Scribus vector objects. The major advantage of this approach is that imported vector graphics remain fully editable in Scribus, which is useful even if you don't intend to use Scribus as a vector editor. For example, the conformance to published specifications like EPS or SVG can vary enormously between programs or different versions of the same program. Importing files as native vector objects allows for easy and quick corrections like closing paths etc. It also enables Scribus to easily change or modify the colors of imported vector graphics (see below). The Scribus approach to vector import comes at a cost, though, and you need to consider carefully whether you are willing to pay this price or rather export your drawing as a bitmap image and import it into an image frame. First, as you will notice when you try to load a complex vector file, importing can take very long, as Scribus may have to create hundreds or even thousands of Scribus vector objects. Moreover, the creation of that amount of objects also results in an Undo/Redo event for each object. You can speed up import a little bit by disabling Undo/Redo before you import a complex drawing. Likewise, scaling or moving a complex drawing means changing the properties of all objects within this drawing, and if you don't have enough memory on your computer, Scribus may even crash. A similar problem may be the number of colors in your color list. Since Scribus imports the colors of all objects in a drawing (see below), you may end up with a seemingly endless list of colors. Again, you need to decide whether you need the advantages of this approach. Finally, every drawing that consists of more than one vector object (i.e., almost every drawing) is imported as a group of objects, and text flow around groups doesn't work. This means you have to draw a separate shape around the drawing to let text flow around it.Editing imported vector drawingsWorking with the built-in vector tools is described in Editing Shapes. But as you will notice after importing a vector drawing, the tools are not availabe immediately, the reason being the import of a drawing as a group of vector objects. Thus, you need to ungroup the graphic first. This can be achieved via the "Ungroup" command in the "Item" menu, the Context Menu of the drawing or by using the shortcut Ctrl+Shift+G: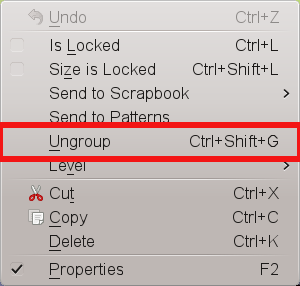 The more complex an imported drawing, the more likely the necessity to apply "Ungroup" several times, as the drawing will probably consist of many sub-groups.
The drawback of this approach is that it decomposes the whole drawing, even if you only want to edit a small part of it.
If you later want to move or resize the whole graphic, you have to regroup all parts again.
Fortunately, Scribus comes with a powerful tool that comes to the rescue in this situation, namely the Document Outline (Windows > Outline).
This dialog lists all elements in a Scribus document, sorted per page.
Here you can select single parts of the imported group, and if you're lucky, the creator of the drawing assigned meaningful names to the respective elements, although not all programs and file formats provide this feature.
Scribus will jump to each selected element and indicate the selection by showing the frame border of the item in red:
The more complex an imported drawing, the more likely the necessity to apply "Ungroup" several times, as the drawing will probably consist of many sub-groups.
The drawback of this approach is that it decomposes the whole drawing, even if you only want to edit a small part of it.
If you later want to move or resize the whole graphic, you have to regroup all parts again.
Fortunately, Scribus comes with a powerful tool that comes to the rescue in this situation, namely the Document Outline (Windows > Outline).
This dialog lists all elements in a Scribus document, sorted per page.
Here you can select single parts of the imported group, and if you're lucky, the creator of the drawing assigned meaningful names to the respective elements, although not all programs and file formats provide this feature.
Scribus will jump to each selected element and indicate the selection by showing the frame border of the item in red:
 You can now use the Context Menu in the Document Outline to detach the selected item from the rest of the group by using the "Ungroup" command.
As described above, you may have to use the command several times, depending on how deeply nested the groups in the drawing are.
At the end of the process, you can see the item as a separate entry in the Document Outline:
You can now use the Context Menu in the Document Outline to detach the selected item from the rest of the group by using the "Ungroup" command.
As described above, you may have to use the command several times, depending on how deeply nested the groups in the drawing are.
At the end of the process, you can see the item as a separate entry in the Document Outline:
 The item "path13122" has been detached from the group "svg1061", an imported SVG file."
Solid colors in imported vector drawingsA consequence of the way Scribus imports vector files is that all colors in a drawing will be added the list of available colors. Depending on the complexity of a drawing and the number of imported files, the list can become quite long, and depending on the source format and the used color spaces, the color names may not be very meaningful: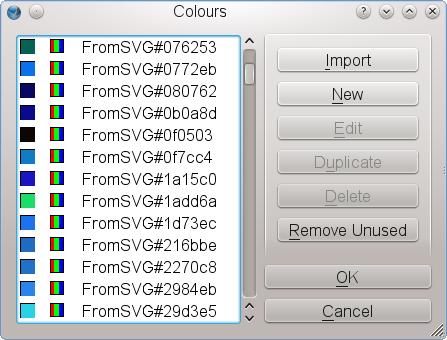 This may initially be confusing to some users, but there are ways to make life easier for you.
First of all, Scribus does not duplicate colors, i.e., if an imported drawing uses a color whose color values match those of an already existing color, the imported color will be "mapped" to the list of colors.
This works even with spot colors.
Second, Scribus supports <a href="color1.html">named colors</a>, so if a vector program and the file format can save color names, those will be imported:
This may initially be confusing to some users, but there are ways to make life easier for you.
First of all, Scribus does not duplicate colors, i.e., if an imported drawing uses a color whose color values match those of an already existing color, the imported color will be "mapped" to the list of colors.
This works even with spot colors.
Second, Scribus supports <a href="color1.html">named colors</a>, so if a vector program and the file format can save color names, those will be imported:
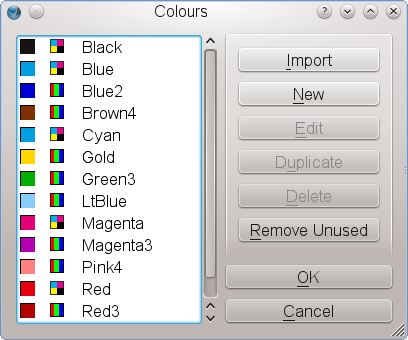 Xfig uses a name for every color, and Scribus will import the named colors.
If you delete an imported drawing, its colors won't disappear from the color list automatically, as it's difficult to determine whether they have been "mapped" or are being used by other objects.
This is not a problem, because after deleting the drawing, you can open the color manager (Edit > Colors) and click "Remove Unused", which will remove all colors that aren't used by any item in your document.
An example for the usefulness of the color import is the "Replace Colors" feature.
Imagine you are working with a vector logo that is supposed to appear in different colors in different documents.
By using "Replace Colors", you can work with one single source file.
Import the logo into your document and replace one or more logo colors just as your specific document requires.
And speaking of logos: These are often required to use a spot color.
If you created or edited the logo in a program that doesn't support spot colors, you can load the graphic into Scribus and use "Replace Colors" to replace a CMYK or RGB color with a spot color:
Xfig uses a name for every color, and Scribus will import the named colors.
If you delete an imported drawing, its colors won't disappear from the color list automatically, as it's difficult to determine whether they have been "mapped" or are being used by other objects.
This is not a problem, because after deleting the drawing, you can open the color manager (Edit > Colors) and click "Remove Unused", which will remove all colors that aren't used by any item in your document.
An example for the usefulness of the color import is the "Replace Colors" feature.
Imagine you are working with a vector logo that is supposed to appear in different colors in different documents.
By using "Replace Colors", you can work with one single source file.
Import the logo into your document and replace one or more logo colors just as your specific document requires.
And speaking of logos: These are often required to use a spot color.
If you created or edited the logo in a program that doesn't support spot colors, you can load the graphic into Scribus and use "Replace Colors" to replace a CMYK or RGB color with a spot color:
Importeps1 Importing EPS 1.1 What is EPS? 1.2 Why EPS? 1.3 EPS Import 1.3.1 EPS Previews 1.3.2 Importing into an image frame 1.3.2.1 Caveats 1.3.3 Importing as a vector drawing 1.3.3.1 Caveats 1.4 Special EPS filesImporting EPSWhat is EPS?EPS (Encapsulated PostScript) is a subset of the page description language PostScript. While PostScript is used to describe the graphical elements of one or more pages in a device-independent manner, an EPS file contains PostScript elements for a single image, and, importantly, must include a so-called Bounding Box, a rectangular which is necessary to describe the dimensions of the image. Like PostScript, an EPS file can contain bitmap images (pixels), vector data and text. Also, most, if not all EPS files are not meant to be edited, since EPS, like PDF, is designed as an exchange format.Why EPS?Perhaps the main reason to use EPS is its ubiquity in most professional print workflows. If in doubt, most graphics professionals will ask for or send you an EPS file, which is sometimes seen as the lowest common denominator for high-quality graphics files. Also, the EPS format is well-documented, and the specification is publicly available. When it comes to vector graphics, EPS (or a successor format like AI or PDF) is unsurpassed in terms of quality. While relatively unimportant with small graphics in a flier, it's safe to say that for large output media like posters, EPS may be the only reliable choice for vector graphics if superior print quality is important. Finally, the EPS format provides some features that are important in professional printing, like font embedding or support for CMYK and spot colors.EPS ImportThere are two basic methods of importing EPS files, and both have pluses and minuses. For some files you can choose which method suits your needs best, while other files can only be imported one way.EPS PreviewsOne of the idiosyncracies of the EPS format that frequently causes confusion with inexperienced users is the EPS preview. The PostScript language had been designed to describe pages for a printing device, and at the time the format was introduced, computers weren't capable of rendering the highly complex content of a PS file on screen. The same was, of course, true for EPS, and to provide users some visual indication of a file's content, preview images were embedded in an EPS file. Unfortunately, there is no uniform standard for the format of the preview image, and the preview isn't even required. As a result, applications on Macs used the Mac's PICT format for previews, Windows applications Windows Metafiles, and UNIX programs ASCII-encoded bitmaps, which made the preview unworkable across platforms. For those who previously avoided using EPS files because of their lacking preview and/or poor support by programs like word processors, there is some good news: Scribus will always create a useable preview in its file dialogs, either based on the embedded preview, or, if the latter doesn't work, by using Ghostscript to create a low-resolution PNG that displays the content of an EPS file. Likewise, no matter how you import an EPS, what you see in Scribus is always the orginal content, not a preview. Be aware, though, that a Scribus file dialog always indicates the color space and the resolution of the preview image, not the ones in the EPS itself. Also note that creating the preview for a large and complex EPS file in a file dialog may take some time to render: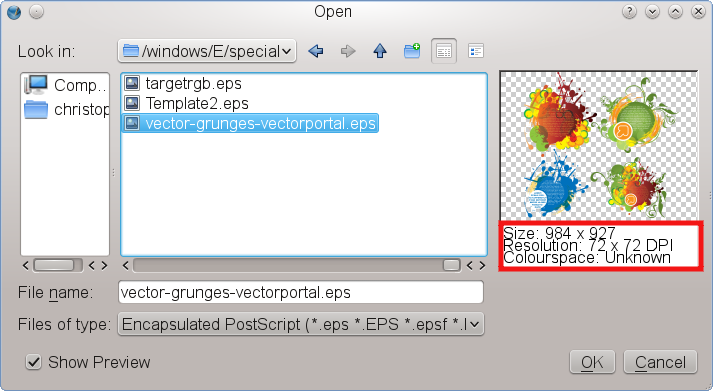
Importing into an image frameThis is usually the safest way to import an EPS. Provided Ghostscript is installed and properly configured, it works just like with any other bitmap image. However, since Scribus uses Ghostscript to rasterize the EPS, loading and rendering may take some time, depending on the complexity of the file.CaveatsPhotoshop can export EPS natively, but these are mostly raster objects within the EPS, with some Photoshop-specific features like layers and blend modes. Photoshop also can export a special type of EPS called DCS (Desktop Color Separations). This flavor of EPS is best imported into an image frame, where Scribus will detect and enable extended image editing/displaying capabilities. See the section about <a href="psd.html">PSD import</a> for more information. Image mask doesn't work correctly. Clipping paths are ignored.Importing as a vector drawingImporting EPS like any other importhints2.html">vector file via File > Import >Get Vector File, if possible, does have some advantages. Since you are working with vector data, file size and exported PDF size are relatively small. It makes the exported files resolution-independent, so they can be re-scaled without losing crispness in printing, independent of the size of the output medium. One of the major advantages of EPS vector import is that some important publishing features will be preserved, for example CMYK and spot colors in EPS files. Scribus will add these to the color list of your document: Likewise, if fonts are embedded in the EPS file, Scribus will use them, if installed on your system.
You can then edit text in the imported drawing.
If the embedded font is missing, you will be asked for a substitution:
Likewise, if fonts are embedded in the EPS file, Scribus will use them, if installed on your system.
You can then edit text in the imported drawing.
If the embedded font is missing, you will be asked for a substitution:

CaveatsImporting an EPS file as a vector drawing may take very long, depending on the complexity of the source file. If you choose this import method, Scribus displays a progress dialog, which can give you an impression of the work that's going on in the background, e.g. g native Scribus objects: Many EPS files that contain beautiful artwork look like they consist exclusively of vector data.
However, if you take a closer look, you will notice that more often than not a "vector" drawing actually contains bitmap files as well.
There can be many reasons for the inclusion of bitmap files in EPS "drawings".
For example, an artist using Illustrator may have worked with bitmap design elements for performance reasons (using hundreds of vector elements requires much more computing power).
Another reason may be that the program that created the EPS has some artistic features that cannot be "translated" into PostScript, so certain vector elements had to be converted to bitmaps.
Also note that many design templates for fliers or postcards combine vector data, bitmaps and fonts into a single file, simply because EPS files can be read by many drawing and page layout programs. If you are working with this kind of "mixed" EPS, you need to be very careful! First, when such a file is being imported into Scribus, Ghostscript will convert every single bitmap in the source file into a format that can be read by Scribus.
This may take quite some time, but more importantly, Ghostscript will save every converted bitmap on your hard disk in your home directory, and depending on the content of the source EPS, you may run out of disk space faster than you can imagine! Since Scribus files are plain text and do not store any bitmap data, you will also have to distribute all the converted bitmap files with your SLA file if you want to edit or output the file on another computer.
To find the required files, look for files with the name of the original EPS and the file extensions PNG, TIF(F), PSD and DAT (the DAT files are so-called "raw" bitmaps).
This can be quite cumbersome, and you can make your life easier by using File > Collect for Output.
A special note for LaTeX users: If your LaTeX file uses bitmap fonts and you create an EPS or PostScript file from your LaTeX source, Ghostscript will create a bitmap for each glyph during import into Scribus, which may result in hundreds or even thousands of tiny bitmaps.
If you really need to use a bitmap font, you should either consider using a Scribus Render Frame or loading the EPS/PS file into an image frame.
Many EPS files that contain beautiful artwork look like they consist exclusively of vector data.
However, if you take a closer look, you will notice that more often than not a "vector" drawing actually contains bitmap files as well.
There can be many reasons for the inclusion of bitmap files in EPS "drawings".
For example, an artist using Illustrator may have worked with bitmap design elements for performance reasons (using hundreds of vector elements requires much more computing power).
Another reason may be that the program that created the EPS has some artistic features that cannot be "translated" into PostScript, so certain vector elements had to be converted to bitmaps.
Also note that many design templates for fliers or postcards combine vector data, bitmaps and fonts into a single file, simply because EPS files can be read by many drawing and page layout programs. If you are working with this kind of "mixed" EPS, you need to be very careful! First, when such a file is being imported into Scribus, Ghostscript will convert every single bitmap in the source file into a format that can be read by Scribus.
This may take quite some time, but more importantly, Ghostscript will save every converted bitmap on your hard disk in your home directory, and depending on the content of the source EPS, you may run out of disk space faster than you can imagine! Since Scribus files are plain text and do not store any bitmap data, you will also have to distribute all the converted bitmap files with your SLA file if you want to edit or output the file on another computer.
To find the required files, look for files with the name of the original EPS and the file extensions PNG, TIF(F), PSD and DAT (the DAT files are so-called "raw" bitmaps).
This can be quite cumbersome, and you can make your life easier by using File > Collect for Output.
A special note for LaTeX users: If your LaTeX file uses bitmap fonts and you create an EPS or PostScript file from your LaTeX source, Ghostscript will create a bitmap for each glyph during import into Scribus, which may result in hundreds or even thousands of tiny bitmaps.
If you really need to use a bitmap font, you should either consider using a Scribus Render Frame or loading the EPS/PS file into an image frame. | |||
 EPS export quality from other applications can vary widely.
Some applications unfortunately like to add their own ingredients to the sauce.
The first step for testing a failed import is to open the file in toolbox6.html GSview, then press M to watch the messages from Ghostscript while it attempts to open the file.
When you have a failure in GSview, the messages can be cryptic sometimes, but they may be a helpful pointer to see what is the problem.
The message itself may not be helpful at all to non-developers, but using a search engine like Google can help to find a solution.
Users saving from Adobe Illustrator 9.0 or later are urged to either export to EPS versions compatible with Illustrator version 7 or less or use Illustrator's native AI format for import into Scribus.
Why? Illustrator 9+ actually uses PDF as a native format and embeds quite a bit of Adobe-specific data in an EPS, which can cause issues when importing.
Scribus is not alone with this issue.
EPS export quality from other applications can vary widely.
Some applications unfortunately like to add their own ingredients to the sauce.
The first step for testing a failed import is to open the file in toolbox6.html GSview, then press M to watch the messages from Ghostscript while it attempts to open the file.
When you have a failure in GSview, the messages can be cryptic sometimes, but they may be a helpful pointer to see what is the problem.
The message itself may not be helpful at all to non-developers, but using a search engine like Google can help to find a solution.
Users saving from Adobe Illustrator 9.0 or later are urged to either export to EPS versions compatible with Illustrator version 7 or less or use Illustrator's native AI format for import into Scribus.
Why? Illustrator 9+ actually uses PDF as a native format and embeds quite a bit of Adobe-specific data in an EPS, which can cause issues when importing.
Scribus is not alone with this issue.
Special EPS files
Some EPS files cannot be opened by Scribus at all, despite being 100% compliant to the specification. These files serve special purposes and may not have any image contents at all. For example, colour palette files from commercial vendors are often shipped as EPS files, because these palettes can be read by most graphics programs, including Scribus. Their only content is a list of colors. Other examples are symbol or pattern libraries for Adobe Illustrator. The content of these files will be loaded into the respective resource dialogs in Illustrator, but it can't be accessed directly by most other programs, including Scribus.Importsvg
1 Importing SVG 1.1 What is SVG? 1.2 Why SVG? 1.3 Importing SVG 1.3.1 CaveatsImporting SVG
What is SVG?
SVG (Scalable Vector Graphics) is an open standard, or, since version 1.1, a family of open standars for two-dimensional vector graphics. It is based on XML and maintained by the World Wide Web Consortium (W3C). Since the orginal (primary) purpose of SVG was usage for static and dynamic vector graphics for the web, only a subset of the specification(s) is relevant for use in Scribus. The huge success of SVG resulted in considerations to expand its scope to a universal 2D vector format, and "universal" includes support for professional printing, which is all the more interesting for Scribus. The broadened scope of the standard, however, made it necessary to define subsets of SVG, called "profiles". As of version 1.1, two profiles have been defined, SVG Tiny for devices like mobile phones and SVG Basic for devices like PDAs. The W3C Working Draft for SVG 1.2 also includes a profile called SVG::Print, which provides the features required by professional printers. The SVG 1.2 draft also included support for other color spaces than sRGB, like CMYK or even spot colors. However, 1.2 will probably be skipped in favor of SVG 2.0, which may take some time to develop.Why SVG?
The major advantage of SVG is its openness and the availabilty of the full specification with no strings attached. As a result, SVGs have become ubiquitous in many areas like cartography or geo services. Most vector graphics available via Wikimedia are also SVG files. Another advantage of SVG is its XML base. In other words, SVG files, like Scribus SLA files, consist of plain text, which can be easily read by other programs or even human beings. SVG is also more or less well-supported by many vector drawing programs, including Adobe Illustrator or CorelDraw. The leading Open Source vector drawing program [www.inkscape.org Inkscape] is even primarily designed as an SVG editor. Unlike many other graphics formats, SVG supports color management by referencing an ICC profile in its XML code.Importing SVG
As with other vector formats, SVG files can either be opened directly via File > Open or imported into an existing Scribus document via File > Import > Get Vector File. Scribus will often display a warning, which tells you that not all SVG features in the file are supported by Scribus. In most cases you need not worry about the warning, as many SVG features are irrelevant for import into Scribus. For example, the SVG specification allows for the inclusion of metadata. Since an SVG file will be converted into native Scribus vector curves, this information will be discarded, but it nevertheless triggers the warning. More serious issues may arise if an SVG files uses so-called "proprietary" tags, i.e., features that are missing in the SVG specification, but were deemed necessary by the creator of the program that writes the SVG. Based on experience, though, almost all SVGs will be imported at a reasonably good quality.Caveats
Although Scribus supports most of the relevant features of the SVG 1.0 and 1.1 specifications, there are a few limitations, some of which are the result of SVG itself, while others are based on Scribus internals. Dimensions: As you may have noticed when you tried to import an SVG file, the imported drawing often has huge dimensions. This is a result of SVG's original purpose as a graphics markup language (in contrast to a page description language like PostScript or PDF). Just like the creator of a web page doesn't know anything about the screen size or the browser that renders the page, the authors of the SVG specification considered the dimensions of an SVG drawing as a result of "negotiations" between a server that provides the graphic and a client (a web browser, a mobile phone), who is supposed to tell the server what the required dimensions are. In plain English: The dimensions of the drawing are whatever a client says they are. For a page layout program like Scribus, this information is useless, and as a result, the SVG importer is trying a "best guess" when it comes to the dimensions of an SVG drawing. This may or may not work to everyone's satisfaction, but you can easily re-scale an imported SVG by using the the X, Y, Z tab of the Properties Palette. Layers: The SVG specification doesn't support layers per se. Inkscape and Illustrator use groups with special attributes to function as layers, but these aren't recognized by Scribus yet. Thus, SVG files are always opened/imported as single-layer graphics. Fonts: In contrast to formats like PostScript, EPS or AI, SVG files cannot embed any font format that's required in commercial printing, i.e., Type 1, TrueType and OpenType. Instead, an SVG file includes references to a used font. SVGs can, however, embed fonts that use the SVG format themselves - those fonts are most commonly referred to as "SVG fonts" -, but the SVG import filter of Scribus doesn't recognize them, and they play no role in professional printing. As a result, text will probably not import or at least not correctly. If you have any control over the creation of the SVG file, you should insist on converting all text to outlines before importing a file into Scribus. In case you need to edit the text, it's easier to add it in Scribus and use the built-in typographic tools. Filters/Effects: The SVG specification defines a set of so-called "Filter Effects" for SVG drawings, but they aren't supported by Scribus yet. If you use one ore more of these filters in a drawing, you might consider exporting your SVG as a high-resolution bitmap, which will preserve the effects. Solid colors: The SVG 1.0 and 1.1 specifications define solid colors exclusively in the RGBA color space (RGB + transparency). Thus, most SVGs "in the wild" contain only RGB colors. The SVG 1.2 Working Draft also allows CMYK and spot colors, and some applications, like Inkscape or Illustrator, already create files that contain those colors. Scribus uses the SVGicc-color tag to detect CMYK colors, but it imports those colors "as is", without taking into account a referenced color profile.
Spot colors in SVG files are not supported, as the SVG specification requires the use of named color profiles.
Color management: While the SVG specification supports the use of ICC color profiles, but just like fonts, profiles can't be embedded.
The Scribus SVG import filter will ignore referenced color profiles and assume that RGB colors use the sRGB color space instead.
Importbitmap
Importing Bitmap Images
Importpsd
1 Importing Photoshop® Files 1.1 Overview 1.2 PSD Import 1.3 Specialties 1.4 RecommendationsImporting Photoshop® Files
Overview
Adobe Photoshop is one of the world's best known software applications and widely used in professional graphics, both in print and for web work. While there are some great open source graphics applications like GIMP or Krita, sometimes Photoshop is still the only application which can be used in certain cases - especially in the pre-press world. One of the sources of its power is the native PSD file format. A PSD file can not only hold image data, but is more of a large container which can include metadata, camera info, text, vector artwork and more. Most other programs only handle a small subset of its capabilities.PSD Import
Scribus does have its own native capabilities to import PSD files from version 6 and earlier - the latest version of the PSD format which is publicly documented. The Scribus Team has also been able to worm some features out of files created with later PS versions, so most PSD files can at least be loaded into Scribus, but they may have file format features which are not supported. In general, PSD support is quite extensive, including: The ability to manipulate and adjust layer settings. The option to enable and use masking along with the paths embedded in the file. In almost all cases, provided they are not defective, ICC color profiles which are embedded into a PSD are detected and used when color management is enabled. Scribus generally will import 8-bit Greyscale, RGB and CMYK PSD files without issue. Alpha transparency is supported. Scribus will import PSD files with normal layers and will display the individual layers in the Extended Image Properties dialog, which is avialable from the Context Menu. Clipping paths in PSD files will be recognized and can be used for text flow. Blending modes which are in the image file can be used to affect the way the image displays and prints. It's also possible to modify blending or to apply other modes between PSD layers. This won't affect the original file. In almost all cases Scribus will automatically detect the file encoding, whether it is ASCII, Binary or Binary with JPEG. Potential Issues Adjustment layers and effect layers are not yet supported. In such a case, Scribus will fall back to using a "flattened" version of the file. Layered TIFFs saved from Photoshop are often not handled well by other TIFF readers and importing applications. This is because Photoshop actually embeds PSD type layers in a private tag. Scribus will attempt to read the PSD layers info and, if successful, make it accessible to the Extended Image Properties dialog. Text and vector layers within this private tag are not yet supported.Specialties
DCS (Desktop Color Separations) 1.x/2.0 files are a special flavor of EPS saved in Photoshop and are imported natively - much like a PSD file - and complete with ICC profile support. Image quality should be close to or equivalent to the native PSD file. Vector masks are also detected and can be used to control the display within Extended Image Properties. DCS files can also be saved from Quark XPress®, but this flavor will be imported using Ghostscript as a filter for the time being. This is partly because the way Quark X-Press® exports them does not conform to the DCS specifications properly. Scribus can detect Duotones, Tritones and Quadtones in PSD and Photoshop EPS files and import them. The difference between both formats is that you need to import the spot colors from the EPS separately via Edit > Colors > Import. If you import a PSD file, you can directly manipulate each of the spot colors within it via the Image Effects dialog, which is available from the Context Menu. In most cases, Scribus will detect the image as Duo, Tri or Quadtone and automatically import the colors from the PSD file.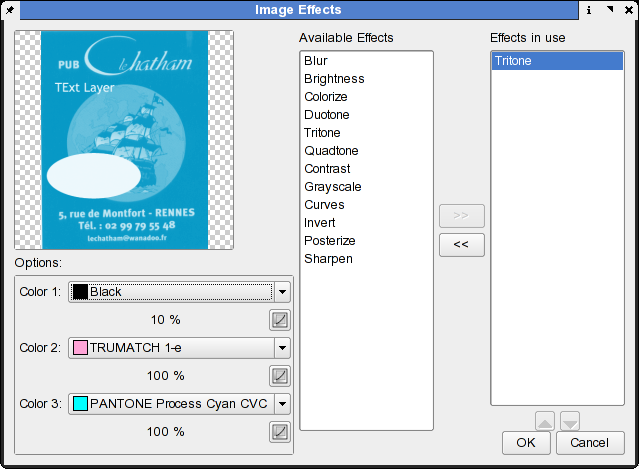
Recommendations
If you do have the original PSD file of an image, by all means use it. Enable embedding the correct ICC profile within Photoshop. This is done via Image > Mode > Convert to Profile . Avoid using text layers. Scribus has very powerful text effect tools of its own and will export them as vectors, not as a bitmap, resulting in higher print quality. This advice is good for any bitmap editing application. Similarly, avoid vector artwork in bitmap files. Scribus has versatile vector drawing tools and will give you more reliable results in printing. Scribus can handle CMYK JPEGs from Photoshop, complete with ICC profile support, but in general, it is preferable to use PSD or TIFF, as few other applications understand CMYK JPEG. Likewise, Scribus supports clipping paths in JPEGs stored by Photoshop. If you are using adjustment layers or effects layers, save a copy of your PSD and flatten the layers before importing the file into Scribus. This will not only shrink the file, but ensure that there are no issues with import into Scribus.Importtext
Importing Text
Importodt
1 Scribus and OpenOffice.org/OpenDocument 1.1 Overview 1.2 Importing OpenOffice.org Writer and OpenDocument files 1.3 SXW/ODT import step by step 1.4 Let Scribus create text frames for you 1.5 SXW/ODT import options 1.6 Importing Tables from Calc 1.7 Importing SXD and ODG graphics files 1.8 Importing SXM and ODF formulasScribus and OpenOffice.org/OpenDocument
Overview
When SUN Microsystems started the OpenOffice.org project, it also introduced a new type of file format. While OpenOffice.org's predecessor StarOffice used a binary format to store its data, OpenOffice.org's file format consisted of several XML files that were combined into a ZIP archive. Later, OpenOffice.org's file formats provided the basis for a new international standard for office documents, such as text documents, spreadsheet or presentations. The standard has been developed by the Organization for the Advancement of Structured Information Standards (OASIS), and it's called OpenDocument (ODT). OpenDocument has become an ISO standard in 2006 (ISO/IEC 26300:2006). The clear documentation and specs have helped the Scribus Team to create some useful import features, which will be enhanced in the future.Importing OpenOffice.org Writer and OpenDocument files
The importer for Writer (SXW) and ODT documents works per text frame and imports only the text contained in your document. Images and drawings need to be saved separately outside of the Writer document and then each drawing or image can be imported individually. Thus, a compound Writer document with tables or charts will not import the latter. Tables, charts or other embedded objects, need to be placed into their own Draw file and exported as described below. The single most important issue to take into consideration for hassle-free SXW/ODT import is well chosen usage of styles in Writer or any other ODT-compliant word processor. Doing so will greatly reduce the amount of time needed within Scribus to format and style text. Any special paragraph styles in your Writer or ODT file will automatically be imported into your existing Scribus document.SXW/ODT import step by step
Select the text frame. Right-click > Get Text ... Select your SXW/ODT document. This will import all the text from the source document, so ensure there is enough space in your frame or link extra text frames to the one you are importing into. You can comfortably import 10, 20 or even 50 pages of text in one go. However, the practical limit is probably not more than a chapter's (15-30 pages) worth of text for performance reasons.Let Scribus create text frames for you
If you have an idea how many text frames you will need for the imported text, you can use an advanced import option. You can find it in the "Insert" menu, and it's called Frame .... The "Insert Frame" dialog consists of four tabs. In the first one you have to select "Text Frame" in this context. In the second tab, "Location", you can determine the pages, on which the new frames will be placed, as well as their position on a page. In the third tab, "Size", you can set the size of the frames that are being inserted, and in the "Options" tab you determine what's inside the frame and how it will look:
 Columns: The number of text columns in the frame.
Gap: The gap between the text columns.
Link inserted frames does exactly what it says.
Links to existing frame lets you link the first of the newly created frames to an already existing frame.
You can choose the latter from a drop down list that contains all existing frames, sorted by their name.
Source Document: Here can you choose the text document whose content will fill the new frames.
Columns: The number of text columns in the frame.
Gap: The gap between the text columns.
Link inserted frames does exactly what it says.
Links to existing frame lets you link the first of the newly created frames to an already existing frame.
You can choose the latter from a drop down list that contains all existing frames, sorted by their name.
Source Document: Here can you choose the text document whose content will fill the new frames.
SXW/ODT import options
When importing text from OO.org there are three important options which need to be carefully considered: Overwrite Paragraph Styles This option will tell Scribus to change the formatting of any created styles in your Scribus document to follow those in the imported document.
Merge Paragraph Styles This option looks at the actual attributes (fonts, size) of the imported document and merges styles which have identical attributes.
This can help to eliminate differently named, but otherwise identical styles.
Use Document Name as a prefix for paragraph styles is self-explanatory.
This can be useful for sorting styles when importing from several documents.
Do Not Ask Again Caution! This last option will make your choices above permanent.
The only way to undo this is to open the file
Overwrite Paragraph Styles This option will tell Scribus to change the formatting of any created styles in your Scribus document to follow those in the imported document.
Merge Paragraph Styles This option looks at the actual attributes (fonts, size) of the imported document and merges styles which have identical attributes.
This can help to eliminate differently named, but otherwise identical styles.
Use Document Name as a prefix for paragraph styles is self-explanatory.
This can be useful for sorting styles when importing from several documents.
Do Not Ask Again Caution! This last option will make your choices above permanent.
The only way to undo this is to open the file prefs135.xml in the hidden folder ./scribus in your home directory with a text editor, then search for the text string attribute key"=ask-Again" value=0 and replace the 0 with 1.
Importing Tables from Calc
Since Scribus's table implementation is rather simple, it may be more convenient to create a table in a dedicated spreadsheet application like OpenOffice.org Calc. Here's a step-by-step instruction for successful table import from Calc: 1. Create your table in either OpenOffice.org Calc: 2.
Copy the table items you need in Scribus (i.e., not the whole spreadheet) to the clipboard, create a new OpenOffice.org Draw document, and use Edit > Paste Special > GDI Metafile to insert the table as a vector file into Draw:
2.
Copy the table items you need in Scribus (i.e., not the whole spreadheet) to the clipboard, create a new OpenOffice.org Draw document, and use Edit > Paste Special > GDI Metafile to insert the table as a vector file into Draw:
 3.
Use File > Export to export the table as an EPS file.
Make sure that "Selection" is checked in the export dialog, because otherwise the whole page will be exported.
4.
Now import the EPS file as a vector drawing into Scribus via File > Import > Get Vector File.
The result will be a nicely formatted table in Scribus that can be edited using Scribus's vector tools:
3.
Use File > Export to export the table as an EPS file.
Make sure that "Selection" is checked in the export dialog, because otherwise the whole page will be exported.
4.
Now import the EPS file as a vector drawing into Scribus via File > Import > Get Vector File.
The result will be a nicely formatted table in Scribus that can be edited using Scribus's vector tools:

Importing SXD and ODG graphics files
There are two methods: The first is to use the native importer. For many drawings this works very well. In some cases, especially with gradients, it may be preferable to test exporting as EPS or SVG. It is important to note that Draw 3D objects do not export well, as they are limited to screen resolution. They also do not print well in most cases and will appear pixellated at print resolutions. Moreover, not all shapes and certain kinds of lines, like, for instance, connectors, are supported by the Scribus import filter. In case you need any of the above, there's a reliable workaround: Like almost any program that allows for printing, OpenOffice.org provides an option to print to a file instead of sending the data to a printer. Simply go to File > Print in OpenOffice.org and check the "Print to File" option. On Linux/UNIX and Mac OS X this will create a PostScript file. On Windows and OS/2 you have to install a PostScript printer driver (e.g. Apple Color Laser Writer) first. When you are asked to insert a name for the file you will print to, make sure you select or add "ps" as the file extension. Next you can open the file or import it as a vector file into Scribus. This time, the content looks almost if not 100 % like the original. Even low-resolution 3D graphics have smooth edges now.Importing SXM and ODF formulas
The most reliable way is to create a formula In OpenOffice.org Math and save it as SXM or ODF. Then open OpenOffice.org Draw and create a new file. Use Insert Object > Formula. You will have a tiny embedded square on Draw's canvas. Next, open Edit Object from the context menu. Draw will now launch Math. In Math, select Tools > Import Formula, browse to your saved formula and save to close the file. The embedded formula is now editable as a vector object. Save this Draw file, then export as EPS and import into Scribus. The formulas and text will import as scalable vector items. This will result in formulas which will print with very high quality and no worries when exported as PDF. Saving the Draw file and attempting to import the Draw file with embedded objects will fail, as Scribus cannot access those objects directly.Notes on Importing HTML into Scribus
Scribus has an HTML importer which can import clean, well formed HTML and retain much of the layout and and formatting, provided the formatting or styling is basic HTML in the HTML markup, not via css style sheets. CSS support will come in the future.So what kind of HTML is supported and how does it work ?
Upon import, the importer will create paragraph styles which correspond to the html markup. Bold, Italics and monospace text and alignment are also supported. Below is a listing of the HTML markup supported - both upper and lower case tags. body, div, a - Text must be within the <body> tags. p and br - Corresponding to paragraph and line breaks. H1 to H4 - Correspond to Heading Sizes 1 to 4. ol,ul,li - Corresponding to ordered or unordered lists. pre and code - Corresponding to preformatted text and source code listings. These will be converted to text using the fixed pitch font Courier. www. style web links are converted to text with blue coloring to highlight them in the same manner as most web browsers do in their default settings. b, u, i, em, strong,sub.sup,del,u - Text formatting is converted to the corresponding font styles. Note, your default font should have all of these variants available to Scribus. Hence the following section of html will display and create paragraph styles in Scribus as demonstrated below.<?xml version="1.0" encoding="utf-8"?> <!DOCTYPE html PUBLIC "-//W3C//DTD XHTML 1.0 Transitional//EN" "http://www.w3.org/TR/xhtml1/DTD/xhtml1-transitional.dtd"> <html xmlns="http://www.w3.org/1999/xhtml"> <head> <title></title> <meta http-equiv="Content-Type" content="text/html; charset=utf-8" /> </head> <body> <h1>H1 Text</h1> <h2>H2 Text</h2> <h3>H3 Text</h3> <h4>H4 Text</h4> <ol> <li>Ordered List Item 1 </li> <li>Ordered List Item 2 </li> </ol> <ul> <li>Un-Ordered List Item 1 </li> <li>Un-Ordered List Item 2 </li> </ul> <code>code listings</code> <p><b>Bold Paragraph Style</b></p> <p><i>Italic Paragraph Style</i></p> <p align="center">Centered Text</p> </body> </html>Below the imported styles from the file above.
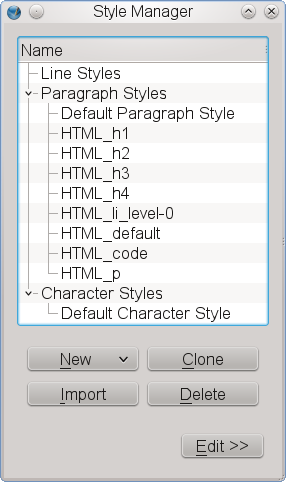 Below is the imported text displayed on the canvas:
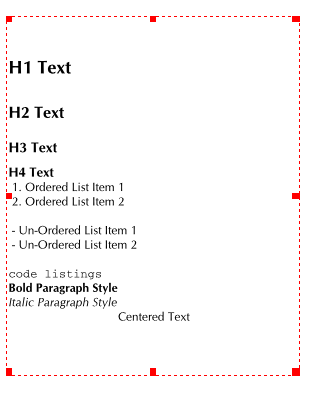 Not all applications export HTML with high fidelity to the W3C specifications.
You can use htmltidy to clean up and make conformant HTML text you need to import.
See : http://w3c.org
Not all applications export HTML with high fidelity to the W3C specifications.
You can use htmltidy to clean up and make conformant HTML text you need to import.
See : http://w3c.org
PDFintro
PDF Exporting from Scribus
Overview
The power and versatility with the PDF Export in Scribus is one of its notable features. Documenting all its features requires almost a chapter by itself. I encourage you to read this introductory part thoroughly to become familiar with all the PDF features and options, along with viewing some of the PDFs created with Scribus on-line at www.scribus.net in the download section. The platform neutral nature of PDF enables Scribus users to overcome a number of potential barriers to Linux and DTP. Scribus reliably exports high quality, "press-ready" PDF including advanced PDF 1.4 features, ISO compliant PDF/X-3 and ICC color managed PDFs, thanks to little cms. If your printer is skeptical, point them to Scribus Pre Press. This is a downloadable PDF which outlines pre-press tests on Scribus, along with other supplementary info. If Scribus only created high resolution commercial grade PDFs, that alone would make Scribus a great application. The bonus is all the easy to use versatility such as: creating presentations á la Powerpoint or creating web-enabled PDF interactive forms which can be used with electronic document exchange, the ability to use JavaScript to control elements within the PDF. Scribus provides other user friendly touches like annotations, bookmarks and optionally, document security, if needed. While PDF in one sense is a proprietary standard, it is also widely available on most every computing platform. It is also extremely well documented. The PDF 1.5 reference manual is a mere 1100 pages. The PDF abilities in Scribus enables for repurposing a document. One document can be produced for printing, web download or for presentation like StarOffice Impress or MS Power point. That this is a future trend in publishing is indicated by the same strategy in Adobe's InDesign 2.0+ and the new PDF capabilities in Quark Xpress 6 and Adobe Illustrator 10+. In electronic publishing and pre-press production, both have seen many enhancements to PDF, which often overcome the limitations of HTML and traditional PostScript, respectively. Your best viewing / printing results will be with the newest version of Acrobat Reader 5.0.10 or Adobe Reader 7.0.8 for Linux and version 6.0+ on other platforms, where it is available. Please also note, gv and derivatives are not suitable viewers for Scribus EPS or PDFs. Similarly, Adobe Reader on MacOSX is given preference over the built-in Preview app. One of the challenges with PDF and EPS viewers on Linux, is that Scribus creates high end PS level 3 and PDF 1.4, with capabilities beyond most of the open source viewers. Some of these features are only supported in commercial pre-press or DTP tools. Moreover, none of the open source viewers are capable of correctly interpreting color managed PDF. Two plus years of working with Scribus has led me to the current conclusion that the following three viewers are the most reliable at displaying PS/EPS/PDF created by Scribus: Adobe Reader 5.0.10+ for Linux - The best and sometimes the only choice for PDF viewing. Detailed notes and hints: Adobe Reader. GSview 4.8+ - with the latest version of Ghostscript available. This combination is your best choice for viewing EPS files, PS files and most PDFs. In addition, GSview has many other very useful capabilities with add-ons likepstoedit and epstool.
For more detailed notes and hints: GSview.
I consider it an essential tool for DTP on Linux.
Kpdf 3.5+ - This updated PDF viewer from KDE 3.5 has a new rendering engine and is capable of viewing PDF 1.5 files.
If any other PDF or EPS viewer you choose cannot display PDFs from Scribus, but they do view properly in Acrobat Reader, file a bug with the upstream author.
In virtually all cases I have tested, it is a limitation of the viewing application.
Scribus PDFs are tested daily with specialist pre-press software to validate their adherence to the published PDF specifications.
PDFworkflow
PDF Exporting from Scribus
Scribus PDF Export Workflow
Aside from interactive PDF creation explained later, for a given document, there are basically four paths to follow in creating your PDF: Web download - Screen Reading - Interactive Forms - Follow this work flow when you want the smallest file size and high resolution printing is not required. Presentation Effects - the recommended settings are down-sample all images to 72, 96 or 120 dpi, depending on the resolution of the display screen. Embed all fonts and landscape page layouts will give you maximum image area on the screen if you plan on using a display projector. More hints on Presentation PDFs further on. Press Optimized - Clear all down-sampling or compression of images where image quality is of utmost importance. All images brought into to Scribus as placed images should be a minimum of 200 dpi and preferably 300 dpi or more for photos or TIFFs. Line art or vector graphics converted to an EPS in a program like Illustrator should have a minimum of 800 dpi for best results. Most vector EPS can be imported directly as native Scribus objects and recommended where possible. If your printer supports color managed PDF/X-3, This is the recommended method for optimal results. However, only the latest printing technology can support PDF/X-3. You should only enable this when your printer advises. . Print Optimized - This would mean targeting the PDF for printing on an office laser jet or ink jet. Recommended settings: down-sample all images to 300 dpi or less, embed fonts and keep your page margins with enough tolerance for margin limits on desktop and common office laser printers (approx. 6/10th of an inch or 1.5 cm.)PDFflavors
PDF Flavor - Which one is best for you ?
Answering that question, brings up many questions and bears some discussion of what are the differences. A higher version does not presume a "better" PDF and in some cases works against you.What is the difference between versions PDF 1.2 to PDF 1.7 ?
Each version roughly parallels the release of a major version of Adobe Acrobat. The short overly simple answers: PDF 1.2 = Acrobat 3.0 - relatively obsolete now PDF 1.3 = Acrobat 4.0 - The first version of PDF which truly had all the needed features to support "press-ready" PDF's including color management, ICC profiles etc. It also added javascript, interactive and multimedia capabilities. This standard is probably the safest to send if you are unsure of the capabilities of the receiver of your file. PDF/X-3 and a number of commercial print work flows are based on PDF 1.3. PDF 1.4 = Acrobat 5.0 - Actually, introduced with Illustrator 9. The main difference to concern Scribus users is both transparency and alpha transparency capabilites. This makes a major difference in where a PDF with these features can be printed. It takes either the latest commercial RIPs or certain Level 3 PostScript printers to use these features properly. Moreover, not all Level 3 PostScript printers will handle transparency. The latest versions of Ghostscript support the advanced PDF 1.4 features Scribus can create when exporting PDF.The most distinguishing feature of PDF 1.4 for Scribus is the ability to export true transparency in PDF. Note: Often, the only way you will be able to print exactly the transparency features viewed on-screen is to export PDF 1.4 and print from Acrobat Reader 5.x or newer. PDF 1.5 = Acrobat 6.0 - Among the most interesting for Scribus users: many improvements for "press-ready" PDF, the capability to have true layering within the PDF, PDF-X "pre-flight" capability, more security and interactive features, like the ability to add comments which are separate from the original doc. Scribus can support many PDF 1.5 features in the 1.3.x development version. PDF 1.5 can also support more sophisticated compression options for images using JPEG 2000. PDF 1.6 = Acrobat 7.0 - Refinements of the 1.5 features and more extensive use of PKI and digital signing for document control, as well as, extended commenting for group collaboration. Where it concerns Scribus, nothing of importance, except the release of Adobe Reader 7.0 for Linux. PDF 1.7 = Acrobat 8.x - Added 3D capabilities In deciding which version you choose for export, you need to consider the following: Where am I ultimately printing ? - If you are planning to have your files printed commercially, always try to ask the printer first. Does my document have transparency features ? - See above and ensure the rest of your equipment or workflow can support PDF 1.4. I am exporting PDF forms. How do I know end receivers of my file can use it ? - Do you know the version of Acro Reader your users will have ? The safest is to use PDF 1.3 or 1.4. Do I need layers ? - Only PDF 1.5 supports this and only in the 1.3.x version of Scribus. Be aware support for PDF 1.5 is not complete in most open source viewers. Ghostscript 8.5x does support some, but not all PDF 1.5 features.What about other kinds of PDF I have read about, like PDF-X and PDF-A ?
PDF marked as any of the following: PDF/X-1:2001, X-1a:2001 and 2003; X-2:2003; X-3:2002 and 2003 are all different flavors of PDF-X, which is a way of creating a PDF with certain criteria for pre-press. Scribus supports the latest PDF-X-2:2003. Support for other versions of PDF/X is planned. PDF-A is an ISO standard based on PDF 1.4 for long term storage of public documents in an open format.PDFx3
1 Scribus PDF/X-3 Overview 1.1 Quick Start to Creating a PDF/X-3 Conformant PDF 1.2 How has Scribus been able to do this? 1.3 When should I use PDF/X-3? 1.4 Do I really need color management? 1.5 What are the differences between PDF-X versions? 1.6 How do I test and really certify Scribus PDF files are truly PDF/X-3 compliant? 1.7 PDF/X Links:Scribus PDF/X-3 Overview
Support for PDF/X-3 was a major milestone in the development of Scribus. Scribus was the first page layout application to support a demanding, but open ISO standard: ISO 15930-3:2002. This type of support for high quality PDF creation had been exclusively the realm of expensive proprietary applications. Creating commercial press ready PDFs has historically been fraught with errors, especially for users unfamiliar with the nuances of PostScript, PDF distilling and varying capabilities of plate-setters or digital presses. The saying "It is hard to create a good PDF, but really easy to mess up", has a great deal of truth. The more common usage of the Adobe Acrobat Distiller family of applications for PDF creation has typically needed knowledge of at least some of the close to 100 Distiller parameters. In European countries the concept of PDF/X has been more widely accepted earlier than in North America. Much of the push for these standards has come primarily from Germany and German pre-press companies, a worldwide leader in press and high end digital imaging technology. The creation of PDF/X, currently with 3 defined ISO standards, is in part, an attempt to provide end users and creators with a vendor neutral measuring stick to vet files as suitable for professional printing or exchange with service bureaus. Scribus now has easy to understand and use options which enable end users to create 100% PDF/X-3 compliant files. By judicious use of PDF options, end users can be assured their files, if they require, to be 100% standards compliant. As always, be certain any PDFs you create can be used in the work-flow of your printer's equipment or pre-press service bureau. Not all are equipped to handle the latest in PDF technology. For example, the latest Prinergy and Harlequin image-setting work-flows are capable of supporting PDF/X-3 even with all RGB images. However, the print provider's work flow also must be able to handle this. Always consult with the commercial printer you are working with early into your production work. This almost always good advice when working with commercial printers. This avoids trouble and makes for a much less stressful situation when deadlines approach.Quick Start to Creating a PDF/X-3 Conformant PDF
Make sure color management is installed and working properly. You need at least one CMYK ICC printer profile installed. Then in Edit > Preferences >Color Management make sure color management is enabled and your preferred defaults for color profiles are chosen. Ideally, the color print profile matches either and ISO printing condition or is a custom profile from your print provider. Select File > Export...> Save as PDF.. or select the PDF icon from the tool bar. This panel will open first and select PDF/X-3 in the compatibility drop down box as shown below. This will change the default settings, as needed, automatically. You might notice that certain options will be greyed out. More about this below.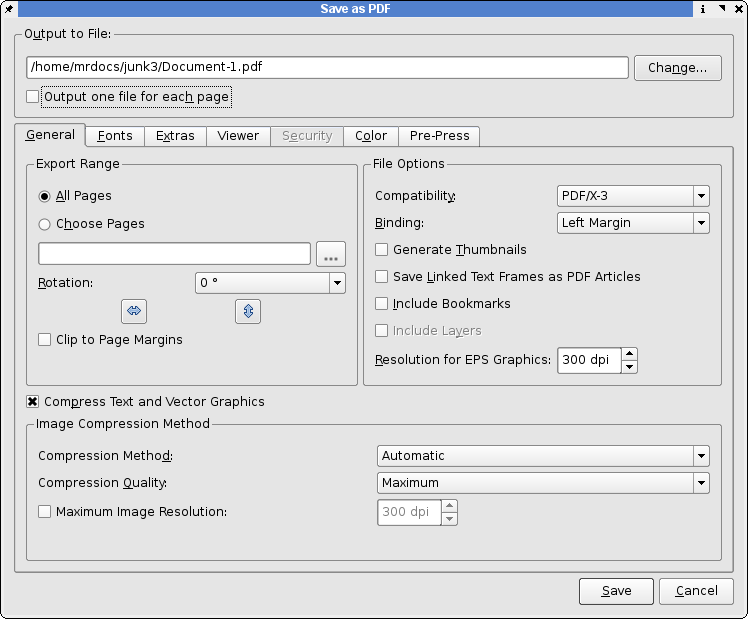 Next, select the Color tab, as shown below:
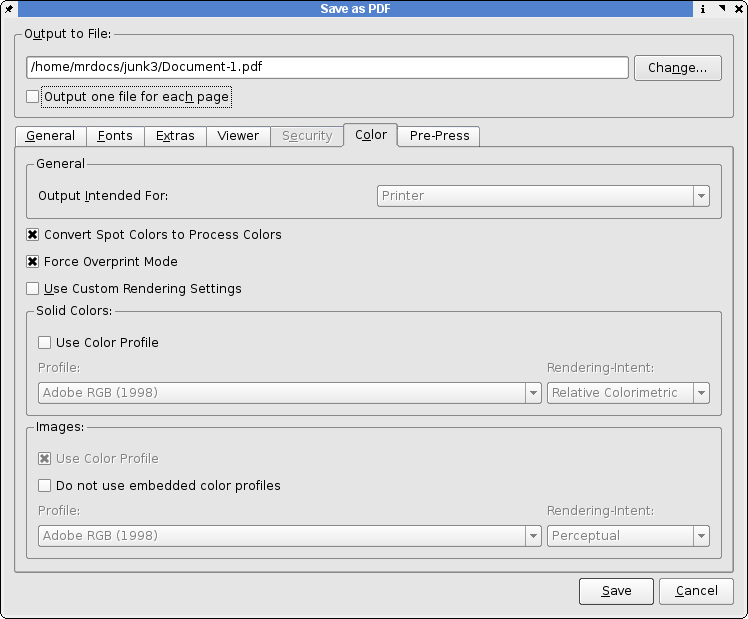 Here is where you select color profile choices to embed in the PDF.
By not selecting or embedding an ICC profile for solid colors, CMYK is automatically assigned as the color space.
Next, select the Pre-Press tab, as shown below:
Here is where you select color profile choices to embed in the PDF.
By not selecting or embedding an ICC profile for solid colors, CMYK is automatically assigned as the color space.
Next, select the Pre-Press tab, as shown below:
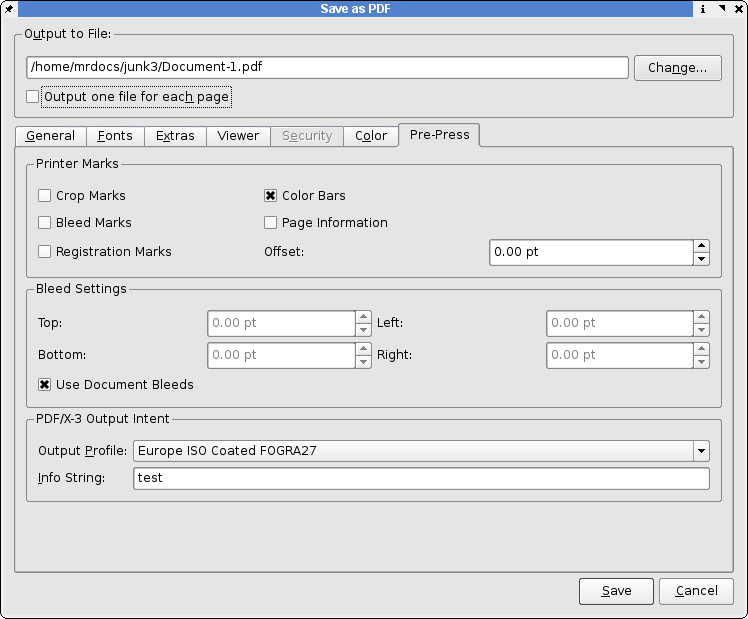 This is where you can adjust the PDF trim box which is a setting which defines the actual paper size in the PDF.
This is a setting which defines how much space to add to the physical page for bleeds.
PDF "Boxes" defined This is also where you embed in the PDF the intended press condition, which is defined by the ICC printing profile.
This is probably the most important choice in terms of color profiles, as it affects color throughout the whole document.
You can also put in a short note about the document, which is useful later on.
This cannot be left blank - as PDF/X-3 requires it.
Scribus thus disables the Save button.
Note: Because of the exacting standards of PDF/X-3, some PDF features are disabled including encryption, presentation effects and all fonts are automatically embedded.
Likewise, annotations and transparency is disabled.
You should carefully follow the advice given in PDF Export Options for file preparation and choice of image formats.
This is where you can adjust the PDF trim box which is a setting which defines the actual paper size in the PDF.
This is a setting which defines how much space to add to the physical page for bleeds.
PDF "Boxes" defined This is also where you embed in the PDF the intended press condition, which is defined by the ICC printing profile.
This is probably the most important choice in terms of color profiles, as it affects color throughout the whole document.
You can also put in a short note about the document, which is useful later on.
This cannot be left blank - as PDF/X-3 requires it.
Scribus thus disables the Save button.
Note: Because of the exacting standards of PDF/X-3, some PDF features are disabled including encryption, presentation effects and all fonts are automatically embedded.
Likewise, annotations and transparency is disabled.
You should carefully follow the advice given in PDF Export Options for file preparation and choice of image formats.
How has Scribus been able to do this?
By carefully refining the code both PDF exporting and color management for maximum quality output, Scribus created PDFs can be used with confidence for output to service bureaus that can use a PDF work-flow. Many magazines, newspapers and other publications now prefer PDF/X for advertiser created files. See the notes in Scribus and Pre-Press Considerations. Credit must be given to Marti Maria for creating and actively maintaining little cms which is the color management system which Scribus uses. littlecms is not an end user application per se, but gives Scribus the color management tools, which were previously only available in proprietary systems.When should I use PDF/X-3?
When you require very precise color reproduction and your printer can accept PDF/X-3 files. Without support from your printer, you are likely to have adverse color changes compared to more traditional PDF export.Do I really need color management?
Yes, the design of PDF/X-3 is intended to provide a fully color managed PDF work-flow, without detailed knowledge of actual printing technologies.What are the differences between PDF-X versions?
In brief, PDF/X-1a requires the following: The color space to be CMYK/greyscale, all the fonts are embedded and the settings within PDF indicate whether it is either pre-trapped = true or not-trapped = false. Think of this as a blind hand-off, as there is no certainty of how it will output. PDF/X-2 is a looser standard - but with the requirement for more knowledge between the supplier and receiver of the file. Fonts are not required to be embedded and it is possible to use OPI (Open Press Initiative). PDF/X-2 also allows device independent color spaces, like CieL*a*b*, to be used. PDF/X-3 allows for color profiles to be resident in the PDF, as well as different output intents and 'DeviceN' (spot color) color space - now supported in the any version of Ghostscript 8.0+. This also allows overprinting colors.How do I test and really certify Scribus PDF files are truly PDF/X-3 compliant?
Callas Software has provided a free of charge PDF Inspektor plug-in for Adobe Acrobat. This plug-in, checks the PDF and produces a detailed report on every fact of the PDF file, including meta informations on the file and a detailed listing of images and other PDF objects. Some specialist PDF software including Enfocus Pit Stop Pro and the full version of PDF Inspektor can perform detailed pre-flight checks on PDF. Acrobat 6 Professional can also verify and pre-flight PDF/X-3 files.PDF/X Links:
http://pdfx.info http://www.ddap.org/resource_center/article_index.php http://www.ipa.org/PDFS/pdfxguide.zip http://www.pdf-x.com/downloads/pdf/application_notes_pdfx3.pdfPDFforms
PDF Exporting from Scribus
Screen Display and On-line PDF Forms
Choose these settings when downloading speed or small size is important. Recommended Settings and Hints: Down-sample all images to 72-96DPI. Reduce the number of font faces to the minimum needed. Choose the lowest quality setting for compression which has acceptable on-screen viewing results. You can often substitute Arial for Helvetica, as later viewers will often have this as an included font. Avoid importing EPS or PDFs into your document - instead convert them to a low resolution PNG with GSview, then place in your Scribus document. Why? They will render faster on your screen and often make for a smaller file size. Avoid using the Nimbus fonts, if they are not at least sub-set. Acrobat Reader on other platforms does a poor job of substitution using its included fonts. One other issue which can trip you up is Helvetica is often aliased to Nimbus Sans L on many distributions. Unless transparency in artwork is needed, select PDF 1.3 output for the greatest compatibility with other users. Where possible replace bitmap images with vector artwork. Vector artwork is far more compact in terms of size in PDF.When addressing PDF optimization for web sites there are two issues:
Global size of the file. Which can partly be reduced by carefully choosing fonts and not using too many font faces. You can if space is really an issue not embedding fonts and using only the 'base 14" fonts which all PDF readers should have. Those fonts include bold and italic variants of Courier, Helvetica or ArialMT, and Times. The second is the perceived download times when the PDF is visible in the viewer. Ghostscript has a command line utility, pdfopt, which can 'linearize' a PDF and allow a PDF reader to display the first page of the PDF, then subsequent pages to load in the background. This is very useful for longer documents. Note this tool does not shrink the PDF, but actually may increase the size as it undoes the non-linear way objects are stored in PDF. The use.html in the Ghostscript documentation for details. Note also that the apache web server needs to be set up with a feature which is call 'byte-serving'.PDFjavascript
Enhancing Scribus PDF with JavaScript
Scribus has very complete support for adding interactive features to PDF. With the exception of Acrobat Pro, perhaps no other application can offer more in the area of PDF forms, presentations or other interactive elements than Scribus. This is enabled via dialog boxes in the field properties and by adding JavaScript based functions attached to PDF buttons and text fields. There is an article on the wiki: How to enhance your PDF Forms with JavaScript which shows some basic examples. There are more comprehensive resources as well. At Adobe's site: JavaScript for Acrobat look for links under Acrobat 8: JavaScript for Acrobat API Reference and Developing Acrobat Applications Using JavaScript, which are downloadable PDFs which have more than enough documentation to get you started. If you go to the above Scribus wiki link you see that in Scribus you enter your JavaScript commands in a dialog.PDFphpforms
How To Create Your First PDF Web Form with Scribus
With many thanks to Maciej Hanski, who kindly translated this from the Polish original, licenced under the FDL. The sample files,scribusformphp.tar.gz, a tarball of a php file and a sample doc, are available from [1]
One of the biggest advantages of Scribus is the possibility to create PDF forms with embedded JavaScript scripts (in Adobe's own version, as described in the Adobe JavaScript Reference at [2]
Its rather simple to create a new form with Scribus.
We start with clicking on the "New Document" icon or choosing New from the File menu.
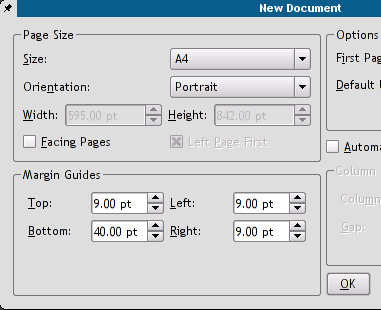 Let us activate the grid then (menu View -> Show Grid), it will help us to correctly locate our form fields on the page.
We need some text frames to make a nice title and field descriptions - a few clicks on the [ab] icon and all the text frames are there in no time.
Let us activate the grid then (menu View -> Show Grid), it will help us to correctly locate our form fields on the page.
We need some text frames to make a nice title and field descriptions - a few clicks on the [ab] icon and all the text frames are there in no time.
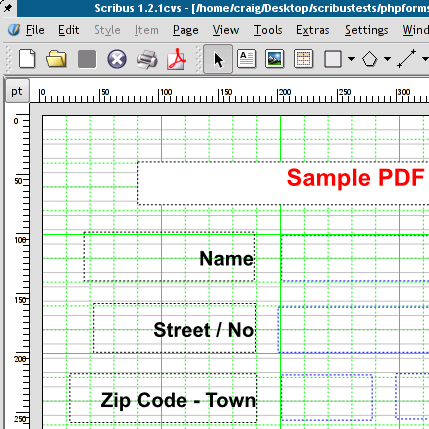 Having filled our frames with text, we can change their properties with the Properties palette, which can be found in the Tools menu.
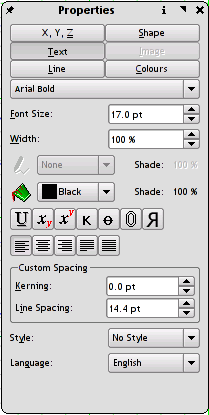 Now we can start adding form elements: some text fields and one button for submitting our form to an URL.
To add a field simply click on the arrow on the right side of the OK icon and select a type from the displayed options: button, text field, check box, combo box, and list box.
Now we can start adding form elements: some text fields and one button for submitting our form to an URL.
To add a field simply click on the arrow on the right side of the OK icon and select a type from the displayed options: button, text field, check box, combo box, and list box.
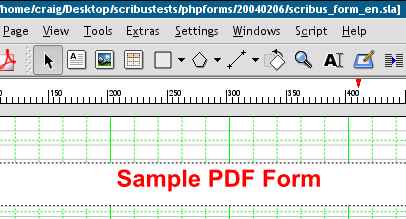 The current active element of the form has a red frame border; you can activate an element in choosing the "Select" icon (the one with crossed arrows) and clicking on the item to be chosen.
 The right click on an element activates a new menu.
We choose Field Properties and define field names (we will need the field names in our PHP script, to which we'll send the form), types (e.g., number, time, date), and actions to be performed on different events (Mouse Enter, Mouse Exit, On Blur, and so on).
The right click on an element activates a new menu.
We choose Field Properties and define field names (we will need the field names in our PHP script, to which we'll send the form), types (e.g., number, time, date), and actions to be performed on different events (Mouse Enter, Mouse Exit, On Blur, and so on).
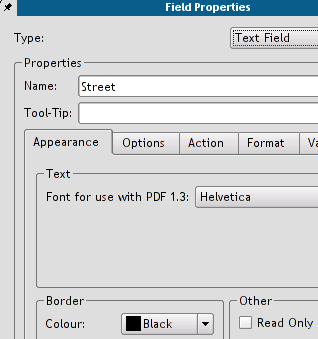 Here we are defining the No field as a number.
Acrobat Reader won't accept anything else as a valid entry, then.
Here we are defining the No field as a number.
Acrobat Reader won't accept anything else as a valid entry, then.
 Here, we are defining a custom validation script for the Name field - after changing the field contents there will be a beep sound and an alert will be showed (not very sophisticated, I know, but it still demonstrates the possibilities of PDF).
Scribus has its own simple text editor, which enables us to save the script to a separate file.
Custom scripts can be defined not only on the form field level, but as global scripts as well (Edit -> JavaScripts).
Here, we are defining a custom validation script for the Name field - after changing the field contents there will be a beep sound and an alert will be showed (not very sophisticated, I know, but it still demonstrates the possibilities of PDF).
Scribus has its own simple text editor, which enables us to save the script to a separate file.
Custom scripts can be defined not only on the form field level, but as global scripts as well (Edit -> JavaScripts).
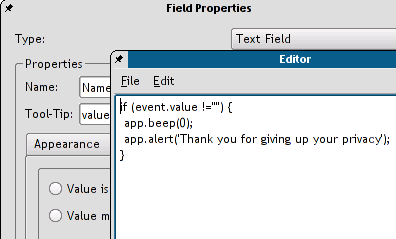 After saving the script and closing the editor, the script contents is shown in the Field Properties.
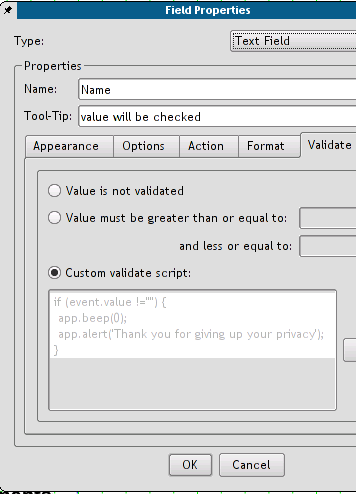 We have still to define, to which URL the form contents will be sent (there is a simple PHP script at the destination address, which will format and display the received form data).
We choose in the button properties as the action type Submit form and enter the address of our PHP script: scribus_test.php.
We match the Submit Data as HTML option to end with (the other option would be the FDF data, but this is a very different story) and we are done now.
We have still to define, to which URL the form contents will be sent (there is a simple PHP script at the destination address, which will format and display the received form data).
We choose in the button properties as the action type Submit form and enter the address of our PHP script: scribus_test.php.
We match the Submit Data as HTML option to end with (the other option would be the FDF data, but this is a very different story) and we are done now.
 The only thing else to do is to export the document to PDF: menu File -> Export...
->; Export to PDF.... We select Acrobat 5.0 as the file format and save the file.
The only thing else to do is to export the document to PDF: menu File -> Export...
->; Export to PDF.... We select Acrobat 5.0 as the file format and save the file.
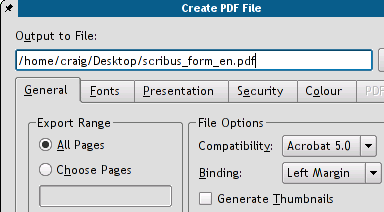 The result of our work can be downloaded from [3] and tested.
In order to submit the form we must open it from within a browser, Netscape 4.* or Mozilla are the safe choices (check the Mozilla plug-ins to see, if the Acrobat Reader plug-in is enabled.
If not, you have to symlink it into the Mozilla's plug-in directory.
In my particular case, the Mozilla's plug-in directory is /usr/lib/mozilla-1.3/plug-in, and the plug-in to be symlinked into it is /usr/local/Acrobat5/Browsers/intellinux/nppdf.so).
My very own impression: Scribus as a tool for working with PDF forms seems to be more comfortable in use than Adobe Acrobat 5.0 (the only version, I've worked with).
It's a lot easier to layout documents with Scribus, since Acrobat only allows you to edit existing documents, but not to create a new document from scratch.
Scribus provides us with the full control over the final results and allows us much more freedom in changing the document's layout.
More over, Scribus files can be edited even with a simple text editor, since its file format is entirely XML based.
Maciej Hanski - 22:10:2003
Some useful PDF/JavaScript Links:
Planet PDF
Acrobat JavaScript Object Specification
JavaScript and Scribus
Some useful CGI/PHP links:
http://www.cgi101.com/book/ch4/text.html
http://www.cgi101.com/book/ch4/post-cgi.html
http://www.mkaz.com/reference/php/setup_linux.html
The result of our work can be downloaded from [3] and tested.
In order to submit the form we must open it from within a browser, Netscape 4.* or Mozilla are the safe choices (check the Mozilla plug-ins to see, if the Acrobat Reader plug-in is enabled.
If not, you have to symlink it into the Mozilla's plug-in directory.
In my particular case, the Mozilla's plug-in directory is /usr/lib/mozilla-1.3/plug-in, and the plug-in to be symlinked into it is /usr/local/Acrobat5/Browsers/intellinux/nppdf.so).
My very own impression: Scribus as a tool for working with PDF forms seems to be more comfortable in use than Adobe Acrobat 5.0 (the only version, I've worked with).
It's a lot easier to layout documents with Scribus, since Acrobat only allows you to edit existing documents, but not to create a new document from scratch.
Scribus provides us with the full control over the final results and allows us much more freedom in changing the document's layout.
More over, Scribus files can be edited even with a simple text editor, since its file format is entirely XML based.
Maciej Hanski - 22:10:2003
Some useful PDF/JavaScript Links:
Planet PDF
Acrobat JavaScript Object Specification
JavaScript and Scribus
Some useful CGI/PHP links:
http://www.cgi101.com/book/ch4/text.html
http://www.cgi101.com/book/ch4/post-cgi.html
http://www.mkaz.com/reference/php/setup_linux.html
PDFpresentations
1 Creating PDF Presentations 1.1 Presentation PDFs 1.1.1 Hints: 1.1.2 Settings and OptionsCreating PDF Presentations
Presentation PDFs
Creating Presentation PDFs in Scribus, is not only easy, they work great. Using PDF in place of traditional "presentation" applications does have some advantages: They are portable. You can create a presentation PDF with Scribus and display it on almost any computer with Acrobat Reader. Other types, usually require the application to be installed, and few are cross-platform. You can use all the drawing, text manipulation and image handling tools in Scribus, which are in many cases superior to those in other presentation applications. Few can import SVG or EPS files really well. You will have more precise typographic control of text. Because they are created in Scribus, you can export them with a higher resolution and they will print beautifully. Unlike other presentation tools, with use of the powerful form and javascript capabilties in Scribus you can make truly interactive PDFs which can take counts, ask questions with dialogs and more. You are only limited by your imagination and scripting skills.Hints:
Down-sample all images to 72-96dpi. Depending on the resolution of the displaying device, you might go as high as 120dpi, but higher will not gain you sharpness. But do this in an image editing program like the GIMP. Then import them into Scribus. Embed all fonts. This ensures the spacing and layout will remain the same no matter which platform you are using. You can use US Letter or A4 in landscape mode for your layout. This will most closely match the screen output of Acrobat Reader in Full Screen mode. When displaying images like photos or screen shots, use a black or dark background on your page. They will make the colors more vibrant and give your viewers more contrast to see all the details in your slides. Use RGB colors for your images and always use Screen/Web for Export. One trick I have learned from using PDF for presentation. Load the PDF and run through each page once before giving the presentation, so the file is loaded in memory. This will make for smoother transitions on the screen.Settings and Options
Presentation effects and settings fall into two categories. The first is controlling the transition between pages when running a presentation PDF for example like you would when on stage. There are a variery of effects which are in the drop down boxes and they are often not only supported in Adobe Reader, but in other PDF viewers like KPDF or Xpdf for example. Moreover, each page can its own transition, different from the others. Viewer Options are the second and gives you control over how the viewing application is opened.
These mostly will only work in Adobe Reader alone as they are based on javascript commands in the PDF.
Special Actions are more advanced ways of controlling the viewer on opening, but requires custom javascript to work.
Viewer Options are the second and gives you control over how the viewing application is opened.
These mostly will only work in Adobe Reader alone as they are based on javascript commands in the PDF.
Special Actions are more advanced ways of controlling the viewer on opening, but requires custom javascript to work.
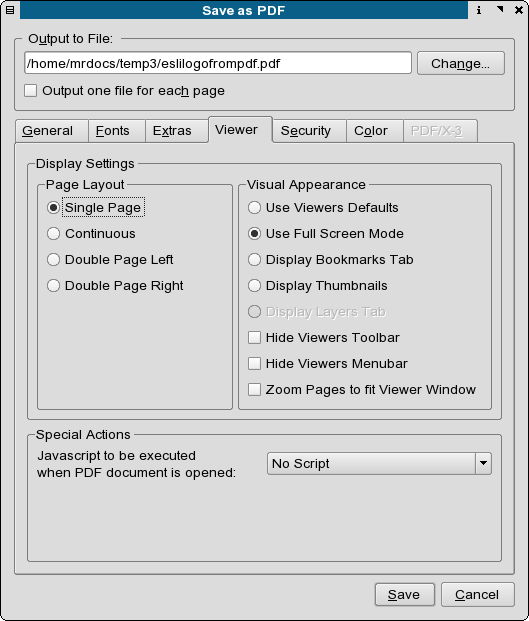
Printintro
Printing Introduction
One of the challenges of an advanced DTP application like Scribus, is the ability to generate what I refer to as "high-level" PostScript or PDF features. By high level, this is meant to describe things like transparency, blends, masks and gradients, usually created by professional grade DTP applications and illustration programs. Always make sure you have the newest updated versions of CUPS and Ghostscript available for your distribution. Newer versions of CUPS and Ghostscript are much better at supporting the kinds of high level PS3 and PDF features Scribus can create.Basic Options:
Print to your default printer with the defaults set either by kprinter, CUPS or Lprng, depending on your specific installation. You can also specify printing in gray scale, as well as reverse the order of printing, which makes the pages stack in correct order on many ink jet printers. You can also use an external print command example. XPP, or kprinter.Advanced Options:
"Print" a separation as shown below. This enables you to create a 4 color separation of the CMYK inks used in process printing. Each of the inks will print on a separate page. This can also be saved to a PostScript file for later processing.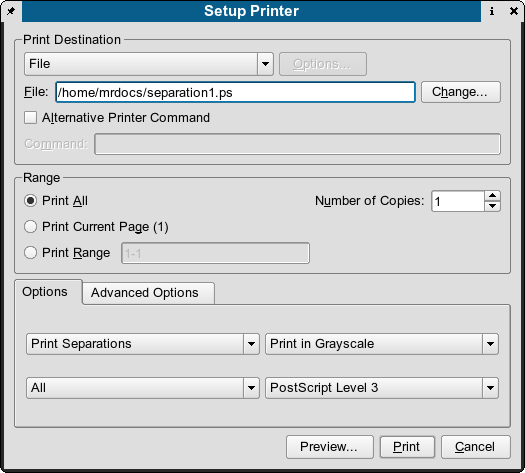 "Print" a PostScript file, which can be later "distilled" or transferred for processing by a printer or service bureau.
If you have the Gimp Print modules, selecting Options will bring up a panel similar to the one below.
The exact contents will vary with the capabilities of the printer - one very good reason for having CUPS-Gimp Print.
These modules are much less "generic" than many other printer drivers.
When installed correctly, they enable you to use all the options your printer is capable of handling such as: different paper types, duplex modes, color printing modes etc.
Scribus directly supports Gimp-Print drivers with CUPS, These high quality drivers are optimized for printing high resolution prints from ink-jet printers.
The specific details are here: CUPS and Gimp-Print.
"Print" a PostScript file, which can be later "distilled" or transferred for processing by a printer or service bureau.
If you have the Gimp Print modules, selecting Options will bring up a panel similar to the one below.
The exact contents will vary with the capabilities of the printer - one very good reason for having CUPS-Gimp Print.
These modules are much less "generic" than many other printer drivers.
When installed correctly, they enable you to use all the options your printer is capable of handling such as: different paper types, duplex modes, color printing modes etc.
Scribus directly supports Gimp-Print drivers with CUPS, These high quality drivers are optimized for printing high resolution prints from ink-jet printers.
The specific details are here: CUPS and Gimp-Print.
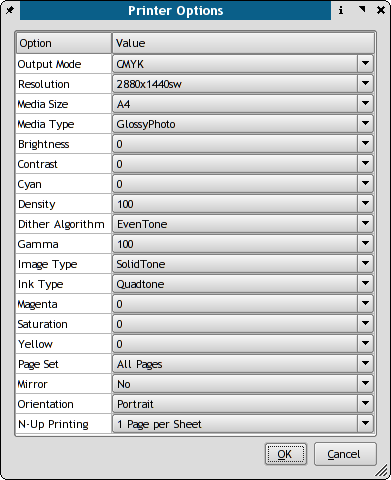 "Mirrored" Printing - this option enables you to mirror pages on the printer.
This is useful when printing things like card layouts, calendars or brochures to compensate for folds and cuts or when duplexing prints.
"Mirrored" Printing - this option enables you to mirror pages on the printer.
This is useful when printing things like card layouts, calendars or brochures to compensate for folds and cuts or when duplexing prints.
 Color Managed Printing - When color management is enabled Scribus can apply ICC profiles to the print output.
This option can be used to make simple simulations of CMYK press conditions.
This can also be used if have special profiles of your printer for special papers like glossy photo paper or specially coated stock paper for color laser printers.
More details are found in Scribus and littlecms.
Color Managed Printing - When color management is enabled Scribus can apply ICC profiles to the print output.
This option can be used to make simple simulations of CMYK press conditions.
This can also be used if have special profiles of your printer for special papers like glossy photo paper or specially coated stock paper for color laser printers.
More details are found in Scribus and littlecms.
Printpreview
Print Previewing
As mentioned in the prior section, one of the challenges of an advanced DTP application like Scribus, is the ability to generate what I refer to as "high-level" PostScript or PDF features. The print previewer in Scribus is quite special, as it does more than just generate a screen dump of your document. Scribus generates its print preview by actually outputting a temporary PS file and then using some of the special "devices" from Ghostscript. Have patience when launching the print preview, Scribus and Ghostscript do a lot of work in the background. Newer GS 8.x versions will have far fewer limits on the kinds of advanced PS which can be displayed. The print previewer also gives you the option to preview the individual inks in CMYK color. The print previewer can help you to identify images and artwork, which may have difficulty printing directly on your particular printing setup. This often depends on the capabilities of your printing system, along with the types of advanced features included in your documents. The types of features which can be troublesome with some printing setups include gradients, transparency and complex masking to name a few. The print previewer also can help to give you an idea of color shifts which might occur when printing in CMYK mode.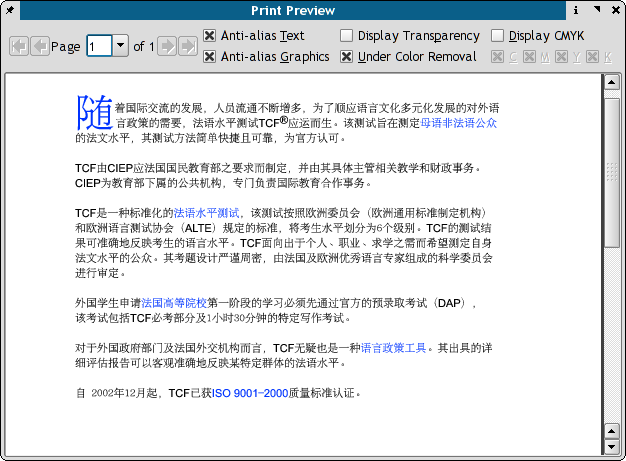
Print Previewer Options
Most of these options are for advanced CMYK or commercial printing. The first two check boxes are useful for all users. Anti-Alias Text - enables/disables previewing text with anti-aliased fonts. This only affects Type 1 fonts and does slow down rendering slightly. Anti-Alias Graphics - enables/disables previewing vector graphics, as well as TrueType and OpenType fonts. This does slow down rendering slightly. Display Transparency - renders items with transparency enabled with a special GS driver. Note: This function requires GS 7.07 or newer and the pngalpha device in GS. Under Color Removal - This feature enables/disables Under Color Removal, a technique which can improve CMYK printing, especially with media like newspaper or other highly absorbant papers. UCR, for short is used to prevent over saturation of inks in these situations. Normally, for common ink-jet printing this should be disabled. Display CMYK - Enabling this option gives you a simulation of generic CMYK inks on the screen. Once enabled, you can selectivly disable/enable any of the C (Cyan), M (Magenta),Y (Yellow) or K (BlacK) ink displays.Printcups
Linux Printing with CUPS, Gimp-Print and Scribus
CUPS, GIMP Print and Scribus together can give very good print output on Linux, provided it is installed and configured properly. With Scribus you can "drive" CUPS directly from Scribus. First, make sure you have the the correct CUPS development libraries installed before compiling Scribus. On Redhat, for example, they are named cups-devel. Complete details are in the BUILDING file with the source Second, on many Linux distributions there are optional gimp-print drivers. These drivers are not only for gimp, but can be used in any program to give you more exacting print control and in some cases much better output with photographs. Often many inkjet printers on Linux are supported by more than one driver - typically an 'ijs' driver and gimp-print. The difference lies mostly in the added options versus some speed loss. By the way, the next release of the gimp-print drivers will be known as gutenprint to avoid confusion. The cups control panel in Scribus with the regular ijs plus ghostscript driver:
Hints:
CUPS has a separate gimp-print plug in which really improves the output of Scribus and any color docs GIMP-Print Drivers, especially those which have lots of pictures. cups-calibrate is a command line program you can run as root to calibrate the printer. This only works with the gimp-print drivers - not other CUPS drivers. This is a step by step procedure which in some cases can improve the sharpness of your prints. CUPS also has an escputil command line utility for cleaning the heads or checking ink levels on Epson printers. If you have KDE installed, this can be accessed via the KDE Print Manager. Otherwise simply type: escputil -help for options. To access setup and configuration for locally installed CUPS printers, there are 2 recommended methods to this with CUPS: 1. Type:http://localhost:631 to use the CUPS web interface.
2.
Use the KDE Print Manager.
No other option will give you full access to all the features with CUPS.
The image below shows the difference with the GIMP-Print Plug-in installed.
 The main difference is the more refined color and ink density adjustments available in GIMP Print.
Often it will be slower than other drivers, but the output quality is the main reason.
You can also use kprinter in combination with other programs which are not CUPS aware, but can benefit from high quality printing.
As an example, Acrobat Reader on Linux before version 7.0.5 does not recognize CUPS, but has a command line window to call kprinter.
Thus, you can with the correct settings, print high resolution PDF's with the same high quality as Scribus.
What I recommend with CUPS is to set up your everyday printer with the ijs or regular kprinter driver and then add a second printer instance with GIMP Print, so you have quicker output with everyday docs like text files etc..
The main difference is the more refined color and ink density adjustments available in GIMP Print.
Often it will be slower than other drivers, but the output quality is the main reason.
You can also use kprinter in combination with other programs which are not CUPS aware, but can benefit from high quality printing.
As an example, Acrobat Reader on Linux before version 7.0.5 does not recognize CUPS, but has a command line window to call kprinter.
Thus, you can with the correct settings, print high resolution PDF's with the same high quality as Scribus.
What I recommend with CUPS is to set up your everyday printer with the ijs or regular kprinter driver and then add a second printer instance with GIMP Print, so you have quicker output with everyday docs like text files etc..
PostScript Printers and CUPS
Based on my experience working with a handful of true PostScript printers with Scribus: When you are using a real PostScript printer on Linux, expecially more complex ones which have multiple bins, sorting or advanced image and resolution settings, ideally you have the PPD file which comes on the driver disk with the printer. If not try to download the latest from the manufacturer's site. Then use the cupstestppd tool to verify the file. This is a very important step. A great many printer drivers come as windows .exe files. I know many of the HP ones are simple WinZip self extractors. Any recent wine will open them easily. Then, I strongly recommend that you run cupstestppd on the file to make sure it follows the PPD spec. If there is an error, and there are often minor ones, the actual specs are here: http://partners.adobe.com/public/developer/ps/index_specs.html cupstestppd is a command line utility which you can use to verify the correctness of PPD files. What is a PPD file ? A PPD file is a specially formatted text file which can be used on Linux, MacOSX and Windows to install a true PostScript printer. On Linux in combination with foomatic and CUPS it is used for all printers to enumerate all the printer's capabilities. This command line tool verifies that the ppd file meets the specs for ppd files. It there are issues, it will indicate how to remedy this. cupstestppd is most useful when using the manufactuerer's supplied PPD on Linux.Printprep
1 Prepping files for Commercial Printing 1.1 Ask questions: 1.1.1 If they accept PDF, which level ? 1.1.2 Will they be converting the PDF to other formats like EPS? 1.1.3 Can they provide an ICC profile of their printer if color fidelity is critical? 1.1.4 What is the PS level of their RIP ?Prepping files for Commercial Printing
If you have never dealt with printers, nothing will assure a worry free experience for printing files commercially better than talking to your printer well in advance. Preventing mis-understandings and making them well aware in advance of your goals will more than likely prevent 90% of the mistakes. If you do not get satisfactory answers shop around. The printing business is competitive. The best offer both technical savvy and good service.Ask questions:
If they accept PDF, which level ?
PDF 1.3 (Acrobat 4), PDF 1.4 (Acrobat 5) or PDF/X-3 (ISO Standard) ? If they accept PDF/X-3, consider yourself lucky. This type of PDF is the most advanced for commercial printing. PDF/X is expressly designed to assure good color fidelity between systems. If they can recommend specific ICC profiles to use, then even better.Will they be converting the PDF to other formats like EPS?
Be aware, not all page layout applications are capable of supporting some of the advanced PS3 or PDF 1.4 features Scribus supports. Unless the printer's systems are using PDF 1.4, this is not a recommended solution.Can they provide an ICC profile of their printer if color fidelity is critical?
What is the PS level of their RIP ?
This can be a determining factor in how you prepare the files. If their RIP is 3015.xxx+, you can be sure their RIP can handle 100% of the features of Scribus. They might not be able to directly answer that, but... Consult The Pre-Press Notes and you can even take a printed copy of the PDF with you if the printer has not heard of Scribus. We have an online a listing of printers who support Scribus. See: Scribus Printers If there remains unanswered issues, ask on the mailing list or on IRC. Usually, there is someone knowledgable who can answer your questions.Printprepresss
Pre-Press and Service Bureau Considerations with Scribus PDF
For service bureaus, printers, magazine publishers and other pre-press providers who are unfamiliar with Scribus, the notes available in the Pre-Press and Scribus PDF from http://docs.scribus.net are meant to address your concerns. Direct Link: http://docs.scribus.net/content/en/pdfs/pre-press.pdf This is currently an updated working draft, but it has much relevant information on Scribus created PDFs. This will updated with more information and test results as we have more information on hand. Moreover, members of the Scribus Team offer commercial support for printers, pre-press bureaus and other institutions who are implementing Scribus in their production. You can contact them at admin at scribus dot infoCmsintro
Color management with Scribus, an Introduction
Activating Color Management
For color management to function properly you need the following to be installed to be active and usable: Littlecms libraries installed and Scribus compiled with lcms support. You can tell by looking at Help > About Scribus and looking for C-C-T. The first C means Scribus is compiled with littlecms support. This is standard with MacOSX and Windows. You need a minimum of 1 RGB and 1 CMYK profile. Scribus provides two basic profiles to ensure CMS can be enabled immediately. In practical terms, you need more. One sRGB for most RGB colors and one for each color device. One for your monitor which is created with monitor profiling tools. Several CMYK profiles for printing. Some CMYK profiles are known as "press-standards", in that they represent common commercial print standards used in North America and Europe. The best bet is to download the "Windows" version of the Adobe ICC profile package and unzip it into a directory like $home/.colors/icc. Linux users can also download freely distributable profiles from the ICC downloads section on www.scribus.net Scribus, by default on Linux, will look in:$home/.color/iccand
/usr/share/color/icc/for both personal icc profiles or system wide ones. There is a small, but growing collection of freely available icc profiles for download on [1]. Look in the Downloads > ICC section. Scribus on Windows or MacOSX will look in the default system directories. Earlier versions of Scribus will look in the directory specified in preferences. If you are new to color management, please look over the " links and documentation on color management listed on [www.scribus.net]. These explain the theory and concepts far better than I could here.
Overview
The objective of a color management system is to reduce the differences between the on-screen colors and final printing, as well as showing colors which are out of gamut, beyond the color range of your selected printer. The caveat is you need to provide a profile of the printer and one for your monitor which is reasonably accurate. For users of other applications, the default settings and descriptions can be quite confusing to new users. Without prior knowledge of the terminology, it is very easy to choose the wrong settings. This can often makes images look worse on screen or print. Then, the first time user simply says enough and disables color management. In a word don't. Once you understand some basic concepts and know your final print destination, you will be able to predict - and - control more reliably how your document will look when printed. This is especially helpful when you will be sending files for later reproduction with four color printing or sending hi-resolution PDFs. The type of color management support within Scribus, I believe, is the first for an open source program. Future enhancements will bring even more exact control over color reproduction. The latest CUPS versions since 1.1.15+ now have support for true CMYK color printing. The newest version of little cms 1.15 has many new features which enhance the capabilities of Scribus to more accurately display color, along with much better performance. . The steps to making color management work reliably (what you see on screen is what you print) : Learn a little bit about color management concepts and terminology. Get the profiles setup properly. Below is a listing of color tools available for Linux. The most important is getting a good accurate monitor profile. The prof profilers do an excellent job at creating monitor profiles. Here is a how to for creating ICC profiles for your monitor with the lprof profile tools. Without a properly created monitor profile, enabling color management will give you unsatisfactory results in printing and inaccurate previews on screen. Embed the image profiles properly in image editing applications where possible. The color management system within Scribus is designed foremost for enabling color managed "soft proofs" of the images within the document. Scribus can also show "out of gamut" warnings for colors which might not be accurately reproduced by printing. (Most printers, have a narrower range of colors which can be printed, when compared to most monitors.) It does not embed or alter the profiles within your images. Some image files, png and Tiff, helpfully, can have an embedded ICM or ICC profile within the file header - also known as tagged, with a color profile. Later on, we will describe how and when it might be appropriate to use littlecms or Photopaint to apply a tag or embed a profile. If a file is tagged, Scribus will work with littlecms to read that profile within the image and use that profile to more accurately display the colors within an image. If an image does not have a tag but you know the device profile which should be assigned to the image, you can still use the CMS settings to preview with the profile temporarily assigned within the document. Caution is advised not to assign the wrong profile unless you are absolutely sure of the image source. The littlecms package has developed into a stable mature library. Independent tests vouch for its accuracy and littlecms is used within the printer firmware of some the most exotic and high end printers available. Given that this has come from a very small group of folks is really remarkably accurate considering the amount of development work done by large companies such as Kodak, Adobe, Agfa and others. What are color or device profiles? ICC or ICM profiles are a special type of file which describes the color characteristic of a device like a scanner, monitor or printer - basically any device which can create or display manipulate the color of a digital image. There are also color profiles which are known as device independent or working space profiles. These special files can be thought of as translators which are used to convert from one type of color profile to another. An icc or icm file is a set of tables which describes the mathematical values by which devices measure and describe color. Fortunately, these are set by open international standards and work the same way on a Mac, Windows PC, Linux or Solaris. Device Profiles - are separate files which describe the way a device creates (scanner or digital camera), displays (monitor) or outputs (printer) colors. Users of of Photoshop will be familiar with the choice of Working Profiles or Working Space - which are color profiles not related to a particular device, but to assist in the conversion of color from one device to another. Well known RGB "working spaces" Include sRGB, Adobe® RGB 1998, Colormatch,Bruce RGB or CIERGB. Users of Photoshop or other color may be wondering if this is a missing feature, but littlecms uses its own internal color conversion process to make the transformation between color spaces. One less setting to worry about! Why "soft proofing" ? With the proper setup of device profiles, Scribus can adjust the colors of your monitor to more accurately represent how your document will actually look when finally printed., This can be doubly helpful if you are sending it to be printed commercially or for service bureau output.
Moreover, each image can be individually modified by Scribus to assign profiles in an image, so that it can be properly color managed in document production, such as preparing film, a PDF/X-3 or direct to plate technologies.
This does not however, alter the image file internally.
Preview profiles assigned to an image are part of the setting retained in a Scribus document or in the creation of a PDF.
There is also are command line tools in littlecms to embed profiles with tifficc and jpegicc.
See the littlecms docs for exact options.
You can also embed ICC profiles using Cinepaint, Imagemagick, Krita along with Adobe Photoshop.
Why "soft proofing" ? With the proper setup of device profiles, Scribus can adjust the colors of your monitor to more accurately represent how your document will actually look when finally printed., This can be doubly helpful if you are sending it to be printed commercially or for service bureau output.
Moreover, each image can be individually modified by Scribus to assign profiles in an image, so that it can be properly color managed in document production, such as preparing film, a PDF/X-3 or direct to plate technologies.
This does not however, alter the image file internally.
Preview profiles assigned to an image are part of the setting retained in a Scribus document or in the creation of a PDF.
There is also are command line tools in littlecms to embed profiles with tifficc and jpegicc.
See the littlecms docs for exact options.
You can also embed ICC profiles using Cinepaint, Imagemagick, Krita along with Adobe Photoshop.
Cmsprofiling
Color management with Scribus, an Introduction Part 2 - Profiles
Getting good previews from color management depends on these steps from the user: Having accurately profiled input devices which create the images. Scanners, digital cameras etc. Further on, the specifics are spelled out under tools. Most importantly an accurately calibrated and profiled monitor. The first suggestion is to ease up on the eye candy. You might want to switch to or come up with a "vanilla" theme setup. Yes, KDE and Gnome have gorgeous desktops, but Scribus will like plain and simple - no animation, no fancy graphics. For the most accurate color calibration set your desktop to a neutral gray or light color with no gradients or fancy backgrounds. This will help your eye to better judge color balance for images. The same applies for the Gimp or other image programs. When I color calibrate monitors for Photoshop with a (expensive) hardware devices, this is the first step I make. What we are striving here is to accurately, as possibly, mimic the the way mixed inks look on paper. Calibrating is setting the monitor to a known state. Most monitors are set to a default to color temperature of 9300k or Kelvin, which is often too "cold" or bluish for accurate color work. www.color.org has a multitude of color specs for your reference. Most color standards are set to 5000k light temperature or "illuminant". For your monitor, I suggest 6500k, which more closely mimics natural sunlight, as a starting point adjusting for your monitor. At first your eyes will think your monitor has a yellowish cast, but your eyes will soon adjust, especially if the brightness and contrast are set properly. 9300K, which is the default factory setting for most monitors is fine for working with a word processor, but this will wash out colors and color will look less balanced with whites actually showing a bluish cast. Each of the "working" spaces are based on certain settings for your monitor. Gamma and color temperature of your monitor should match the specs of the working space. For example, Adobe® RGB and Bruce RGB specifies 6500k and 2.2 gamma, quite common for Intel based PC monitors and are the recommended defaults for users who are editing color critical images. Targeting the CMYK device (the printer) properly using a profile, which is appropriate for the paper and device. Printer profiles are highly dependent on the media chosen. Newsprint and un-coated stocks are grayer in appearance, so these profiles will have a narrower "gamut" or color range. They do not to produce the super vivid colors and saturation of coated stock or glossy photographic papers. A single printer could easily have a dozen or more profiles, based just on differences in the paper color and ink absorbency. So, how do I get profiles which are meaningful for my hardware.? Some profiles are "generic" and can be obtained from the device manufacturer. This type of profile is generated from a sampling of units by a manufacturer. A growing number of monitors, scanners and certain printer vendors will include this with any software bundled with the device. While these "canned" profiles are rarely a perfect match, this is a good first place to start. Go to the vendors website under drivers and see if there a profile available for your device. Another type of profile is a "generic" press standard profile. These are CMYK profiles which are defined to commercial press industry standards, such as SWOP, FOGRA, ECI and other print standards bodies. Linux Color Tools Monitor Gamma - Gamma, to greatly oversimplify, is a number which represents the brightness of neutrals or grays. Having Gamma accurately setup is an essential first step in getting good color balance before trying to creating an accurate profile. The monitor profiler from LProf is well designed to help you set this correctly. The next level in accuracy is a custom generated profile created with profiling software, like the ones in the the littlecms profile constructor set. <a href="moncal.html">See the instructions for profiling your monitor for details.</a> It was interesting to see how similar the profile was to one created with professional pre-press color calibration software and a hardware tool under Windows 2000. The most precise way to profile a monitor is with a electronic profiling device, basically a very special type of camera which measures color. The software sends known reference colors to the monitor which then read the output to the profiling device and creates a profile. Linux drivers for common "spiders" or colorimeters are not yet available, but the profiler can use hardware when device drivers are written. Users who have created custom profiles with a "spider" under Windows, might have try using this same profile if the monitor is set up exactly as in Windows AND if the Linux video driver does not make any radical adjustments to the color values of your display. It is worth trying at least! My "spider" created monitor profile works very well with Scribus. With color management activated, the colors within Scribus are just about exactly the same in Photoshop 6.0. Quite an achievement by both Scribus and littlecms! Scribus Color Management Settings System Profiles - These drop down boxes show the available profiles on your system. To enable Scribus to use profiles, they should be copied to the$prefix/share/Scribus/profilesdirectory or you can put them somewhere in your home directory and point to this directory in your preferences. Color profiles, .icm and .icc, are platform independent, thus files created or available for a Mac or Windows, are usable in Linux with littlecms and in Scribus as well. See the links page for more information about where to obtain profiles. I highly recommend having the Adobe profiles (which are listed on the links page) if you plan to do any type of cross platform or commercial printing, as most well set up DTP workstations, as well as most commercial printers will be able to work with these profiles.

Cmsrenderintents
Color management with Scribus, an Introduction Part 3
Rendering Intents The other puzzler for newcomers to color management is rendering intents. Your choice of rendering intents is a way of telling littlecms how you want colors mapped from one color space to another. Perceptual - This rendering intent maps color "smoothly", preserving relationships between similar colors. This prevents "gamut clipping" with its potential loss of detail and "tonal banding" problems. Gamut "clipping" happens when two or more colors that are different in the input image appear the same when printed. Perceptual rendering intent makes small adjustments throughout the image to preserve color relationships. It sacrifices some precision of colors in order to ensure pleasing results. For photographic images and scans, this is usually the best choice for a default setting. Perceptual intent will produce the most predictable results when printing from a wide range of image sources, for example, when printing RGB images on CMYK devices, or when trying to match CMYK devices that are radically different from each other. Consider this "foolproof" setting to be best for users who handle the wide variety of images that commonly enter large format printing facilities. Saturation stands for logos, spot colors, etc. It tends to preserve the amount of, or vividness of colors. But it can make photos look ugly. If you were working with logos with a specific shade, saturation will bring better color matching, as far as you give more importance to the color than to the image. Absolute Colorimetric: When a color is not printable within the "gamut "of the output device, this rendering intent simply prints the closest match. It reproduces in-gamut colors without compromise, as faithfully as possible. This produces the most accurate matching of spot colors. Unfortunately, it can also result in "gamut clipping" where two colors that are different in the original are identical on the print. White points are similarly clipped, then causing color relationship problems in the highlights of images. This type of clipping, and the resultant problems, typically make this rendering difficult to use with anything but spot colors . Some users will be disconcerted with a yellowish cast in their image, but this intent is measured in highly controlled lighting conditions with a D50 light box. This often has a "warmer" temperature than more typical viewing conditions. This rendering intent is almost exclusively used when a corporate logo or color must be matched exactly regardless of media. Kodak yellow would be a good example. Relative Colorimetric: When a color is not printable within the gamut of the output device, this rendering intent prints the closest match along with an adjustment that maps white to the paper of the output. This mapping of "white point" prevents the problems of "Absolute Colorimetric" with images that will not be printed with spot colors. When producing color proofs on RGB ink jet printers, while simulating CMYK printing presses you can use this intent, if you know the intended precise profile. Users of Adobe Press Ready will understand this concept quite well. This approach works well when you have accurate embedded profiles in images being converted to CMYK space with printer profiles that have been very precisely profiled with color measurement devices. These are typically scanner or more rarely in digital cameras, and is most likely when someone has spent a lot of time and effort to finely calibrate and profile their equipment. It takes sophisticated ($$$) color calibration equipment to measure the printer under fairly well controlled conditions.Other CMS Options
Mark Colors Out of Gamut is a setting which will show colors in your document which may be outside the gamut, or printable color range of your printer. Note, this is only a warning, as the current ICC specs do not define this uniformly. This is a function available from littlecms.Final Printing with Scribus
For Scribus users, there are a couple of options for printing with a color managed intent. When printing, Scribus can optionally apply the printing profile you have chosen in the color management panel. This can be very useful, if you want to simulate a commercial printer profile with your ink-jet printer via CUPS. PostScript Output - This would require having your images tagged before being placed in Scribus files when outputting a Scribus document either: as pure postscript or as individual EPS files. Scribus uses level 3 postscript.Level 2 and Level 3 postscript can read and use icc profiles within an image. Most color postscript devices will read the embedded profiles and use them to render color within the postscript using something called a rendering dictionary.Cmspdfx3
Color management with Scribus, an Introduction Part 4
PDF/X-3 and Color Management
Above, we covered the basics of getting color management working and configured properly. Now, let's consider using PDF/X-3 to optimize our output for commercial printing. PDF/X-3 is the latest and most advanced ISO standard for PDF files and Scribus fully supports it, as well as being the first DTP app to be able to directly export PDF/X-3 conforming files. The principal benefit of PDF/X-3 is the typically more accurate color conversion from RGB to a printer's CMYK output. The accuracy comes from working in RGB colors until very late in the printing process when the printer's own RIP does the RGB >CMYK conversion. The downside is only the latest and most updated RIPs support PDF/X-3, although others may support earlier PDF/X-x standards. As the RIP engine has detailed knowledge of the exact color range and capabilities, it is thought to offer, in most cases, a more accurate conversion. PDF/X-3 does not preclude using CMYK images, but is ideal for maintaining your colors in RGB as long as possible in the process. The major downsides to working in PDF/X-3 are twofold: You cannot use transparency natively. PDF/X-3 is based on PDF 1.3, which does not support transparency. The second is the limited, but growing number of printers who can support it. If in doubt, inquire. My testing show very reliable results with a minimum of color shifting. The other issue is which printer profile should I use. There are two strategies: The first is to have an actual ICC profile from your print for the matching paper type. The second is to use a well-known printing standard as SWOP, ECI or others. Using PDF/X-3 requires cooperation from your printer, but can really improve your print color matching. As always, a short visit to your printer in advance is strongly recommended. If answers are not forthcoming, try another one. Printing is a competitive business and alternatives almost always can be found. Real World Experiences The author has been testing Scribus with a variety of images with color management enabled in Scribus. These high resolution RGB and CMYK TIFFs were prepared using the latest color management tools with Windows 2000, Photoshop 6 with hardware calibrated and profiled professional DTP monitors, then later proofed with Level 3 PostScript printers. Using images have been used as cover photos for a magazine with a circulation of over one million per annum. Using the same printer profiles that are used in the production of the magazine, littlecms and Scribus can create previews which are remarkably accurate given the relative newness of littlecms and Scribus. The accuracy of littlecms has improved in every version of 1.1x, especially with absolute colorimetric intents. littlecms 1.11+ has Black Point Compensation, which can be used by Scribus if lcms 1.11+ is installed. This helps to improve contrast in photos. Conclusions So, by example, we have simply described a color managed strategy for our document. Take the image from the source, properly apply profiles and then choose correct rendering intents for conversions to another color model. In our example, Scribus, by checking the simulate printer box, tells littlecms to make a two step conversion so your monitor represents with reasonable accuracy how your images and color will print. Attempting to incorporate a simple, but effective color management system within Scribus is an ambitious, and the author believes first serious open source attempt to provide the end user with color management. These type of tools are more typically only found in high end professional pre-press applications. As this is uncharted territory for open source, your comments and suggestions on this document,as well as your experience using color management are most welcome. The reader should also know color management is still being perfected by the graphics industry. Have Patience - color management is a new and improving part of DTP. It takes quite a bit of time to understand the theory, which then brings practical results. Acknowledgments: Martí Maria; Developer of little cms, without which this would not be possible.Cmslprof
1 A Quick Start Guide to Monitor Profiling with Lprof 1.1 Overview 1.2 Installation 1.3 Preparation 1.4 Setting Profile Parameters 1.5 Setting Gamma 1.6 Using the monitor profile in ScribusA Quick Start Guide to Monitor Profiling with Lprof
Overview
Author's note, the Lprof profilers were originally the creation of Marti Maria and after some time of dormancy have been resurrected by some volunteers. Lprof is now a separate project from littlecms, though it still depends on littlecms. Some distros do have them in package form. Google is your friend. However, nothing else on Linux is capable of the profile creation so easily as Lprof. They are worth tracking down in rpm or other package form. One other thing to note for those who used the earlier Lprof tools that the update Lprof application is now a single executable. Otherwise, visit http://lprof.sourceforge.net for the latest info and packages. There is steady activity on refining these profilers to make them comparable to commercial grade applications. There are no native Windows packages yet available. For those users running on Windows and who do have an Adobe graphics application installed, creation of a profile with Adobe Gamma is recommended for creating a basic monitor profile. There are five separate tools included in the package: A monitor profiler A scanner profiler A measurement tool A profile checker Special utillities for with IT8 targets which are used for profiling scanners Here, we are going to focus on creation a monitor profile with the Monitor Profile tool. Without some sort of reasonably accurate monitor profiler, you will find it difficult to get consistent on screen color soft proofs with color management enabled, nor obtain good results from the other tools. Before starting, you need to find if possible, your monitor manual or a spec sheet from your vendor's website. In addition, you might wish to locate the factory ICC profile, if available, which we will use for comparison purposes later on.Installation
Lprof is uses a new build system called scons, which based on python. It is simple to untar and simply typepython scons.py in the source directory.
This will build lprof and then python scons.py install as root will install the package.
I strongly recommend you read the detailed readme file before compiling.
Preparation
First steps: You should have your monitor on for at least a half hour to stabilize the temperature. In addition, for optimum results, set your desktop to a neutral gray background without any bitmap backgrounds or images. This is one of those times, when all that beautiful eye candy is definitely not helpful. The switch to a gray desktop, helps to prevent your eyes from being being fooled by a lack of balance in the colors. My desktop is usually a darkish blue, but for color critical work - back to boring gray. Configure, if possible, your monitor's color temperature to 6500k through the on-screen controls. Your monitor manual should have directions to set this for your individual monitor. Explanation: This step, helps to get your monitor to display with a closer match to the standards which are used in color measurement. Typically, most monitors are set at the factory to 9300k to look brighter, however for accurate color management it is too "cold" or bluish to depict colors in a balanced manner. After changing your monitor temperature to 6500k, you might think it has a yellowish cast, but walk away for a few minutes and return. Your eyes will adjust. Next, set monitor contrast to nearly 100%. Then you want to use the brightness controls to adjust the brightness, so you can see the following, so that each of the shades of gray is distinct. The developers of Lprof highly recommend Monica for setting gamma with the best precision. Further down is the screen for setting Gamma within Lprof. It is nearly full screen and should be maximized to avoid effects of having nearby colors on the screen.Setting Profile Parameters
The first tab will bring up the panel. Check: "I want build a coarse monitor profile." Then select: Enter Monitor Values. Then, select
Then, switch to the panel here and select: Set Gamma and Black Point
Then, select
Then, switch to the panel here and select: Set Gamma and Black Point
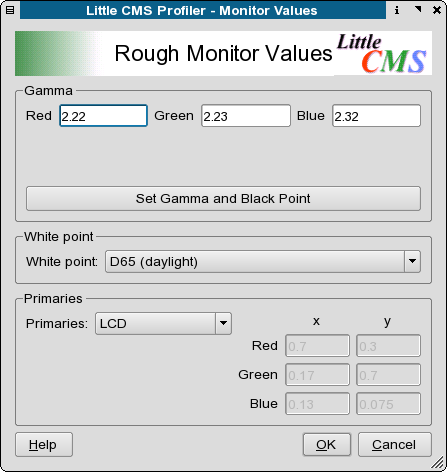
Setting Gamma
The panel below will take over almost all of your screen. Now that we have switched the monitor temperature to 6500K, set the same in the white point drop down list.
Unless you know there is a specific reason to over ride the default sRGB, leave this as is.
You do not need to name the profile as indicated just yet.
Knowledgeable folks in India indicate 7500K is a more common setting for that area.
Next adjust the slider to adjust the gamma so the two shades of gray blend together with the closest color match possible.
Most IBM compatible PC's have a gamma setting between 2.1 and 2.4.
Macs are generally 1.8.
This the reason it is common to find images on edited on a PC looking darker on a Mac.
If you monitor is older, it might have a slight color cast and you can try adjusting the individual color channel settings.
Don't overdo it.
Slight subtle adjustments are better.
Next name the profile.
On Linux or Unix, the recommended location is
Now that we have switched the monitor temperature to 6500K, set the same in the white point drop down list.
Unless you know there is a specific reason to over ride the default sRGB, leave this as is.
You do not need to name the profile as indicated just yet.
Knowledgeable folks in India indicate 7500K is a more common setting for that area.
Next adjust the slider to adjust the gamma so the two shades of gray blend together with the closest color match possible.
Most IBM compatible PC's have a gamma setting between 2.1 and 2.4.
Macs are generally 1.8.
This the reason it is common to find images on edited on a PC looking darker on a Mac.
If you monitor is older, it might have a slight color cast and you can try adjusting the individual color channel settings.
Don't overdo it.
Slight subtle adjustments are better.
Next name the profile.
On Linux or Unix, the recommended location is $home/.color/icc or /usr/share/color/icc for all users.
Mac OSX users can use the native ColorSync tool in the control panel to create a similar profile.
You can add addtional descriptive info in the Profile Identification panel below:
Using the monitor profile in Scribus
Next, go back to the main page, name your profile. You might want to name the profile something like:$home/.color/icc/d650023.icm This gives you a quick reference to what the profile means.
In this case, d= daylight 6500=the monitor is set to 6500k 23=gamma setting of 2.3.
If you have colored walls or large windows, you might want to create two monitor profiles: One for daylight and a second one, when you have indoor lighting on during the night.
The difference is subtle, but is noticeable.
for this preliminary profile, you can leave the Parameters and Tweaking tab alone.
The default is set to the icc default specs.
The last step is to Create Profile and the profiler will create the icm file.
This takes but a second or two.
Now you can close the profiler for now.
Then, copy the profile to the Scribus profiles directory from a console to $home/.color/icc : $ cp ./d650023.icm $home/.color/icc This is one the default directories Scribus will search for profiles.
Now Scribus can use this profile for more accurately managing screen previews.
Start or restart Scribus and go File > Preferences > Color Management .
Enable color management and select the monitor profile as below:
 By setting this monitor profile to be the default, you have enhanced the accuracy of your screen previews.
You can selectively enable the gamut checking in your previews, but this is not quite perfected in littlecms.
This is not a weakness in littlecms nor Scribus, but a limitation of the current icc specs.
When enabling this consider the preview a warning - not definitive.
The true test is what actually will print.
You can also use this profile to enhance the previews in Cinepaint, GIMP, Krita or other image editing programs which are color management savvy.
Monitor colors and brightness vary over time, so re-profiling at least once every couple of months is a good idea.
In professional settings, sometimes they are re-profiled every week.
By setting this monitor profile to be the default, you have enhanced the accuracy of your screen previews.
You can selectively enable the gamut checking in your previews, but this is not quite perfected in littlecms.
This is not a weakness in littlecms nor Scribus, but a limitation of the current icc specs.
When enabling this consider the preview a warning - not definitive.
The true test is what actually will print.
You can also use this profile to enhance the previews in Cinepaint, GIMP, Krita or other image editing programs which are color management savvy.
Monitor colors and brightness vary over time, so re-profiling at least once every couple of months is a good idea.
In professional settings, sometimes they are re-profiled every week.
Toolsintro
Toolsareader
1 Adobe Reader 1.1 Hints for Scribus users: 1.1.1 Known Issues 1.2 A note to OS/2 and eComStation usersAdobe Reader
Adobe Reader is one of the essential tools to have when using Scribus. Although mostly a viewing application, it has some advanced features which no other PDF viewer has, such as full support for JavaScript with a PDF and detailed information which is embedded in the PDF, but viewable only in Adobe Reader. As a general rule we cannot recommend judging color correctness in the Mac Preview application or any of the Open Source PDF viewers. Moreover, although PDF has become an ISO standard, Adobe invented PostScript and PDF, which is based on PostScript, and it has a commercial incentive to promote PDF, as well as standard compliance on all platforms.Hints for Scribus users:
We highly recommend upgrading to the latest Adobe Reader version. Simply put, there is nothing else more capable of rendering PDF correctly. Whatever your objections were to older versions (and there were some substantial ones, most notably on Linux), the later versions, especially after 7.0.9, ameliorate the vast majority of them. And while it's often being discarded as being a "resource hog", it is still far more stable, bug-free and loads quicker than older versions. On Linux it now has a modern look and feel. Versions after 7.0.9 also have direct support for CUPS and offer many extra options for printing. Any PDF rendering issues with Scribus exported PDF in other viewers should be cross-checked with Reader 7 or higher before reporting bugs to us. One of the major advantages of the latest Adobe Reader releases is the ability to "flatten" transparency in PDF 1.4+ files. This feature is important, because some printers still can't handle PDFs with transparency. Also, the PDF/X-3 standard, required by many printers these days, doesn't support transparency. While the PDF-to-PDF flattening remains a feature of Adobe's Acrobat program, Adobe Reader allows for creating a "flattened" PostScript file via the print dialog. The resulting PDF file can then be converted back to a PDF file with GSview or a command line tool.Known Issues
We are aware of color mismatches when viewing PDFs which have some kinds of transparency in PDF 1.4+ files. This has been reported as a bug to Adobe. It is always recommended to ensure your applications are patched to the latest version to ensure your system is secure. Despite its great benefits, the PDF format has become a target for malware creators and attacks via JavaScript. Disabling JavaScript execution in your PDF viewers when you don't need it may be advisable depending on your situation.A note to OS/2 and eComStation users
Unfortunately, Adobe doesn't provide new versions of AR for OS/2 anymore. The latest version that reportedly works on these platforms is 5.1, and it requires an additional runtime environment. The runtime environment can be downloaded here. The AR installer is available "> here.Toolsviewers
Other PDF Viewers
Another useful PDF viewer to use with Scribus is GSview which is a graphical viewer/front end to Ghostscript. The latest version (4.9) with Ghostscript 8.5+ work very nicely together allow you to convert PS to PDF, as well as view and convert EPS, PS and PDF files among other tools. GSview runs natively on Linux/Unix. OS/2 and Windows. More details are in GSview and Scribus. Kpdf 3.5+ / Xpdf The most recent Kpdf in KDE 3.4 shows me the the developers "get it". Based on Xpdf 3.x it has many nice touches and seems to be a pretty fast renderer. I say this not as a KDE fanboy, but based on using quite a bit in comparison to the larger Adobe Readers. One other note, look through Settings and enable "aggressive" in the performance options. If you have the required memory, enabling this makes a big difference in loading larger or complex documents. You still might want Xpdf 3.02+ from Foolabs, as it includes some command line tools for converting PDFs to PS. To display properly embedded fonts with Xpdf in all PDFs, not just Scribus ones, you should read the Xpdf man page about setting up the fonts paths correctly via the .xpdfrc file. Otherwise, embedded fonts may not display properly. One known limitation is the inability to display transparency in Scribus generated PDFs. In KDE 4, Okular, the sucessor to KPDF is a versatile PDF viewer which also can view a number of different image formats like Tiff and PSD.Toolsbatik
Batik
Batik is actually a collection of Apache XML modules for on the fly export/conversion of SVG. One of the really useful tools in the collection is Squiggle, a Java application for simply viewing SVG. From my experience, this is a difficult application to compile on some distributions, so hopefully its packaged for you. Why bother? Call it the sober judge of SVG. Of all of the SVG viewers, it is probably one of, if not, the most spec compliant viewers. If you receive or create an SVG and it won't import properly, see how it views with Batik. If it does not display properly it is more than likely an issue with the creating application. The exception to this is SVG exported from Adobe Illustrator, which often has Adobe only extensions included in the SVG file, thus only viewable in Adobe SVG viewers or applications. As the saying goes, your mileage may vary.
Toolsgimp
GIMP 2.x
There is not much to say about the best image application for Linux. GIMP 2.x has too many improvements to list. However, setting up GIMP for print work with Scribus requires some adjustments to the defaults as shown below: Make sure you have the latest 2.4.x stable version. GIMP now can work with CMYK colors. While the color model internally is still RGB plus alpha channels, you can use CMYK measurements and CMYK color definitions. To supplement this, there is a third party plug-in called separate+, which can export CMYK TIFF, using a neat trick with alpha layers. The separate+ plug-in can also embed ICC profiles into the exported TIFF and create duotone TIFF. One of the really appreciated improvements is the text handling. GIMP 2.x usesfontconfig, so finding the fonts on your system is much less of an issue.
Text can be kept in a separate layer to ease editing and correcting.
In the 1.2.x versions certain type of handling were difficult, but there is little to complain about now.
It is a pleasure to use the new text controls.
In addition, there is also a separate freetype plug-in for GIMP, which allows you to manipulate type in the same means Scribus and Inkscape do.
Recommended.
You can find this on the ftp.gimp.org site.
Most recent version of GIMP can export all paths as clipping paths in TIFF files and have much better support for clip paths in TIFF import as well.
The way that pixels are adjusted (interpolated) in filters and effects are applied use Linear as the default.
This is a good compromise for speed vs.
accuracy.
Lanczos should almost always be the default for print work, but do expect many operations, (re-scaling, filter application) to run slower.
Using Lanczos can make sometimes a dramatic difference in the perceived print quality of an image, so make sure GIMP is using it by default.
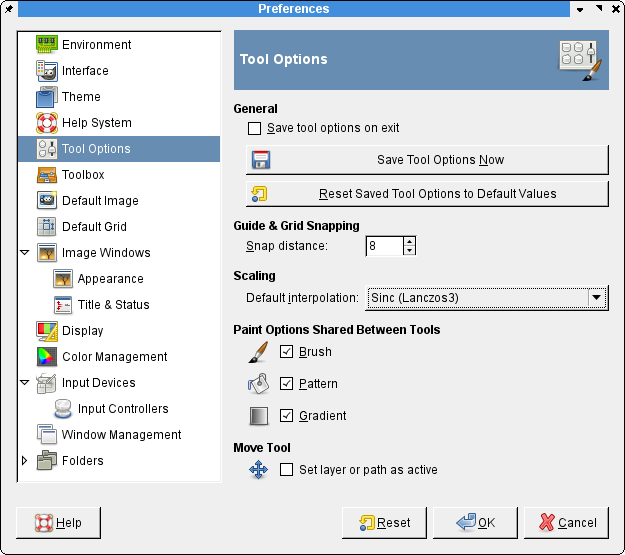 Like most image editors, GIMP's defaults are setup primarily for web site images, meaning waaaay too little resolution for print.
So first thing, set the defaults to a minimum of 144 DPI in resolution.
Remember using these higher resolutions will result in much larger size files, so you might also need to adjust maximum settings for memory usage as well in GIMP preferences.
Like most image editors, GIMP's defaults are setup primarily for web site images, meaning waaaay too little resolution for print.
So first thing, set the defaults to a minimum of 144 DPI in resolution.
Remember using these higher resolutions will result in much larger size files, so you might also need to adjust maximum settings for memory usage as well in GIMP preferences.
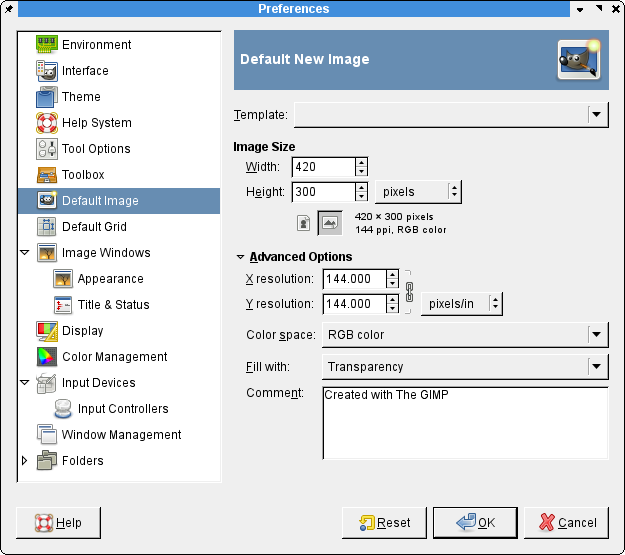 The other notable addition is the beginnings of some very basic color managed "soft proofs" of your images.
This is available via LittleCMS also used by Scribus.
You can set this in the preferences.
Where this will help you is to see how it will look when transformed into a CMYK color space when printed or exported as PDF.
The other notable addition is the beginnings of some very basic color managed "soft proofs" of your images.
This is available via LittleCMS also used by Scribus.
You can set this in the preferences.
Where this will help you is to see how it will look when transformed into a CMYK color space when printed or exported as PDF.
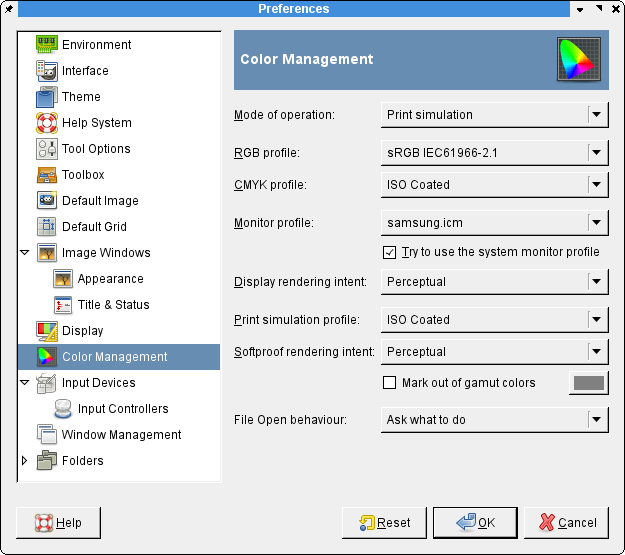
Toolsgs
1 Ghostscript - Black Box Magic 1.1 What is Ghostscript? 1.2 Installing Ghostscript 1.2.1 Linux/UNIX 1.2.2 Windows 1.2.3 Mac OS X 1.2.4 OS/2 and eComStationGhostscript - Black Box Magic
What is Ghostscript?
For those not familiar, Ghostscript (gs), strictly defined, is a so-called "PostScript interpreter", and many programs usegs for PostScript conversions and import/export.
Ghostscript has become one of the core building blocks of OSS software.
It would be hard to imagine modern OSS distributions and software without it.
Likewise, Scribus uses Ghostscript, sometimes taking advantage of the most sophisticated features that are available only in the latest versions.
Scribus uses gs for two purposes, the first one being the import of rasterized EPS files into image frames.
The second feature that requires gs is the Print Preview.
We always encourage you to have the latest Ghostscript available for your system.
Installing Ghostscript
Linux/UNIX
As mentioned above, Ghostscript is required by many applications. Thus, it's unlikely that it isn't installed on your system. If, for any reason,gs isn't available on your system or your system is being shipped with a version that's too old (you should at least use Ghostscript 8.6 with Scribus), you can download a tarball from the gs website.
Be careful to download Ghostscript itself, not ghostpdl, whose source code is in the same directory.
Then follow the build instructions in the tarball and install it.
Windows
See the general information about Scribus on Windows for further details.Mac OS X
There are different ways to install Ghostscript for Mac OS X, but unfortunately, none of them seems to be as easy as most Mac users are used to: You can download a ZIP archive with four DMGs ofgs for various OS X versions.
Please read the related info file to decide which version you need.
You can install gs via Fink.
The most current releases of Ghostscript are always available via MacPorts.
Finally, you can, of course, download the latest [http://ghostscript.com/releases/ source code and compile Ghostscript yourself.
OS/2 and eComStation
See the OS/2 general information about Scribus on OS/2 for further details.Toolsgsview
GSview*
One important thing to note is that GSview must not be confused with ghostview, gv and their derivatives! Although Adobe Reader® is often a better pure viewer for PDFs, GSview should be regarded as one of the most essential tools to have when using Scribus. GSview has some extremely useful functions. For those unfamiliar with the program, it provides an easy to use “front end†to Ghostscript, as well aspstoedit for converting bitmaps into vector files or vice versa.
For those coming from a traditional DTP background in the Mac/Windows world, it also provides some of the functionality of Acrobat Distiller.
You should always use the latest version, at least 4.7.
(GSview migrated from the Windows world, where it has been excellent since the 4.x versions.)
For use with Scribus, GSview has the following features:
With the help of pstoedit, you can convert bitmap images or PDF content back into SVG and other scalable vector file formats.
The ability to preview, convert and add previews (TIFF recommended) for raw EPS (Encapsulated PostScript files).
The ability to extract text from a PDF.
The ability to preview, convert and add previews for raw PostScript files.
An easy-to-use front end to Ghostscript’s less well known features such as image conversion and re-sampling.
There are other features in Ghostscript, including: converting between TIFF formats, changing the color depth of a TIFF, JPEG or the color space of an image.
One example where GSview is extremely useful with Scribus is troubleshooting or fixing EPS files that do not display correctly within Scribus.
Although many applications can generate EPS files, some add their own quirks into the EPS, which can cause problems when used in other programs (like Scribus).
So, if you find difficulty with an EPS you wish to use in Scribus, open the EPS in GSview.
Then, use the key command M to display messages from Ghostscript.
The messages can indicate problems which cause display or printing errors.
You can also use the epswrite “device†to re-save the EPS, which can help to strip out or fix issues with an EPS.
You can also rasterize an EPS image, by converting it to PNG or TIFF and then resize, adjust colors etc with an image program like GIMP or Krita.
Note that GSview uses the libgs.so shared library to access Ghostscript.
Not all Linux distributions ship this, so the hints for compiling Ghostscript with a paralell install really apply here.
Getting Gsview:
GSview is available for most Linux distributions, at least the major ones. Otherwise you can build GSview by following the instructions provided in the source package. For Windows and OS/2 and eComStation you can download conventional installers . Unfortunately, there is no current version for Mac OS X available. A special note to users of OpenSUSE 11.3: The required GTK 1 libraries are no longer available for this Linux distribution, but you can use the versions compiled for 11.2. You need to install the gtk-1.20 and glib packages (if you want to build GSview yourself, you also need the respective devel RPMs), as well as the lang package. Now, for advanced hints with GSview and Ghostscript, see: Advanced Ghostscript and GSview *) Parts of this section are thanks to Russell Lang, author and maintainer of GSview, epstool and Ghostscript for his hints and patiently answering questions about GSview and Ghostscript.Toolsadvgs
Advanced Ghostscript and GSview Hints
One of the frustrations for users of RPM-based or commercially created distributions, is the lack of availability of the latest versions of Ghostscript(GS). Because of the differences in licensing between the GPL Ghostscript and AFPL Ghostscript, GPL Ghostscript releases usually follow by about a year, the release of the most up to date AFPL GS. Because, there are certain restrictions in AFPL, most Linux distributions ship an older and heavily patched version of GPL Ghostscript. As the current GS 8.x resource configuration (where it looks for fonts and fontmaps) is new, simply dropping in the latest GS tarball and rebuilding the RPM does not quite work. Lord knows I've tried on Red Hat and I consider myself to be pretty well versed in RPM building. If you have ever seen the Red Hat or Suse rpm spec file for GS, you will know what I mean. ;) So, why do I want to go to the trouble of worrying about having the absolute latest version of GS? Not so difficult. There are real substantial improvements in the ability of GS 8.5+ to handle EPS and PDF files which have the kinds of advanced features Scribus and other DTP applications can create. This can in some cases directly affect the quality of EPS and PS imports into Scribus. You can build it with full on compiler optimization, which speeds up print and separation previews in Scribus. Many distributions only compile it with i386 instructions. This is probably more beneficial to older workstations compared to newer ones. Image processing programs are one area where compiler optimizations do make a difference. Having the latest GS, makes GSview (and Scribus) more capable and more robust at handling both EPS files and a special kind of EPS called DCS 2.0. Both Scribus and GSview have the ability in their preferences settings to use alternative locations for GS and GS libraries. So, how does one get the latest GS for Scribus and GSview - without breaking your existing distribution printing setup? The secret: a parallel build of GS. Disclaimer: This works for me. It could wreck your system, catch your hair on fire and other nastiness. First Steps: Get the latest GS from here: Ghostscript Downloads You can manually tweak the make files the old way or Use the new configure script with the following options (and optionally-with-jasper and -with-rinkj with very latest versions):
By default, './configure --enable-compile-inits -with-x
make install' will install all the files in '/usr/local/bin', '/usr/local/lib' etc.
You can specify an installation prefix other than '/usr/local' using '--prefix', for instance '
This default usually works fine and keeps the two sets of GS libs separated. Second Steps: There is a second step to compile Ghostscript as a shared library, which GSview needs:--prefix=$HOME
and as root:make so
Now, let's check briefly:make soinstall
You should have an output something like this:/usr/local/bin/gs -h
The key thing here is: You see the correct version of GS. Otherwise, you might need to adjust yourAFPL Ghostscript 8.51 (2005-04-18) Copyright (C) 2005 artofcode LLC, Benicia, CA. All rights reserved. Usage: gs [switches] [file1.ps file2.ps ...] Most frequently used switches: (you can use # in place of =) -dNOPAUSE no pause after page | -q 'quiet', fewer messages -g<width>x<height> page size in pixels | -r<res> pixels/inch resolution -sDEVICE=<devname> select device | -dBATCH exit after last file -sOutputFile=<file> select output file: - for stdout, |command for pipe, embed %d or %ld for page # Input formats: PostScript PostScriptLevel1 PostScriptLevel2 PostScriptLevel3 PDF Default output device: x11 Available devices: bbox bit bitcmyk bitrgb bj10e bj200 bjc600 bjc800 bmp16 bmp16m bmp256 bmp32b bmpgray bmpmono bmpsep1 bmpsep8 cdeskjet cdj550 cdjcolor cdjmono cljet5 cljet5c deskjet devicen djet500 epswrite faxg3 faxg32d faxg4 ijs jpeg jpeggray laserjet lj5gray lj5mono ljet2p ljet3 ljet3d ljet4 ljet4d ljetplus nullpage pbm pbmraw pcx16 pcx24b pcx256 pcxcmyk pcxgray pcxmono pdfwrite pgm pgmraw pgnm pgnmraw pj pjxl pjxl300 pkm pkmraw pksm pksmraw png16 png16m png256 pngalpha pnggray pngmono pnm pnmraw ppm ppmraw psdcmyk psdrgb psgray psmono psrgb pswrite pxlcolor pxlmono spotcmyk tiff12nc tiff24nc tiffcrle tiffg3 tiffg32d tiffg4 tifflzw tiffpack uniprint x11 x11alpha x11cmyk x11gray2 x11gray4 x11mono xcf Search path: . : /home/peter/.fonts : /usr/local/share/ghostscript/8.51/lib : /usr/local/share/ghostscript/8.51/Resource : /usr/share/ghostscript/fonts
$PATH settings
You have pngalpha and the x11 devices listed, along with bitcmyk for cmyk preview, and png16m.
There is a reasonable search path for fonts, so GS can find your fonts.
You will get errors in Scribus, when attempting to import EPS files or using the print preview, if this path is not set correctly and GS cannot find fonts.
GS determines where to find fonts in a file called Fontmap.
Setting this option is explained in the GS documentation.
If you are concerned about messing about with your existing packaging setup, you could use: checkinstall or Xstow.
These programs will keep track of applications which are outside of your normal packaging system.
I have used checkinstall with good luck in these kinds of situations on Red Hat systems.
Next,if installed, open up GSview and go to Options..
> Advanced Configure.
Then, make sure the "Ghostscript Shared Object" is pointing at the correct libgs.so.
Below is how I have setup GSview on my system.:
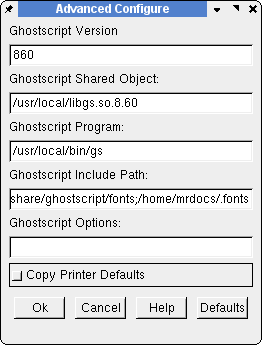 Next, we need to tell Scribus where to find the newer GS.
Go Edit..> Preferences..
>General.
Then in External Tools, add the path for the new Ghostscript under PostScript Interpreter.
Next, we need to tell Scribus where to find the newer GS.
Go Edit..> Preferences..
>General.
Then in External Tools, add the path for the new Ghostscript under PostScript Interpreter.
 Another tool which is available with GSview is
 epstool.
An older version is shipped with the current GSview 4.6, but a newer one is available on the GSview home page.
This is a great command line tool, which can perform advanced EPS/DCS 2.0 conversion.
This is very useful when someone sends you an EPS file from other DTP applications - even those created on Macs.
Upgrading this to work with GSview gives you excellent support on Linux to handle EPS files from all platforms.
Recommended.
Lastly, one other tool which works as a plug-in with GSview is pstoedit This is a command line tool for converting bitmap images into vectors and PostScript, which then, depending on the nature of the image, can be edited in a vector drawing tool like Inkscape or Skencil.
See the section Import Hints for hints on how I used this to convert the Scribus logo into SVG and then a native Scribus file.
GSview uses this as a plug-in to convert files into vector format.
GSview has been, in my experience, the most reliable and versatile EPS/PS viewer on Linux.
How good is it ? Well, the best example is letting you know this usually installed on every Windows DTP workstation I support for clients.
For DTP with Scribus, I consider it essential.
Toolsimagemagick
Imagemagick
Is a command-line image converter processor. While it does have a GUI display called Display, it is powerful in three ways: A batch conversion application. Ability to handle a wide range of image formats. The newest versions understand color management and use littlecms, just like Scribus. Imagemagick is kind of a black box for image processing, but incredibly powerful when used properly. Versions for Linux, Windows and MacOSX are available.Toolsinkscape
Inkscape
Disclaimer: I am technically one of the Inkscape Team members, though mostly to liaise with them and build rpms. However, I would not bother a: If Inkscape was not such a terrific application with a really bright future. b: The Inkscape Team was not a really great bunch to work with. Inkscape's development is an excellent model for OSS developers to follow. That said, Inkscape is rapidly becoming the leading OSS SVG vector drawing or "illustration" tool. The Inkscape Team has made a lot of effort to faithfully adhere to the W3C SVG specs. The most recent version has made a lot of progress and has new import/export options. Some more experimental than others. In its favor: A very friendly user interface, with extensive tool tips and a couple of really well done short tutorials on vector drawings. Almost every function can be handled by keyboard short cuts (the list of shortcuts is almost 10 pages). Like Scribus, the Inkscape Team is quick with bug fixes and is very open minded about feature requests and enhancements. The best part of Inkscape though it is its fidelity to SVG specs. No, it is not perfect, no application is, however. Inkscape SVG seems to work well with other SVG applications better than most, even some expensive commercial ones. For the most part, Inkscape SVG artwork will import into Scribus easily. There are some SVG features which are not yet supported by Scribus (patterns), however 99% of the time, It Just Works TM. If a file does not seem to import correctly into Scribus, try saving as "Plain SVG" within Inkscape. One other hint for working with Inkscape SVG is the SVG model for working with text is far different than the PDF/PostScript model. (One of the few weak spots in the spec in my opinion.) Save text input and text effects for Scribus. Scribus does a very good job of offering you a multitude of text effects and it will output them faithfully. Scribus uses the freetype2 libraries and this gives you a wide range of effects. That does not mean Inkscape does it wrong. Only that the way it is done in SVG and within a PostScript oriented application are sometimes very different and difficult to translate from one to the other. Actually, Inkscape does an excellent job of support for SVG font features including kerning and other advanced features.Toolsksnapshot
KSnapshot
Following the *nix mentality of one tool for the job, Ksnapshot does one thing really really well: Take screen captures. Even in preferences to the GIMP, which has a good screen capture feature. Ksnapshot is fast and generates perfect screen captures with a default export of 32bit PNG, the best format in my opinion for screen shots. Never, ever use Jpeg for screen shots which you intend to use for print. Probably 95% of the Scribus screen shots I've ever made for both web and print are done with Ksnapshot. As I mentioned, there are others, this is just my choice and it works TM.
Toolstracing
Tracing Tools - Converting Bitmap into Vector
The programs below are known as tracing tools of various types. I recommend if you are working a lot with scanned images, you might want all of them. They share common features in their ability to open bitmap files and convert them into vector format. This can very desirable if you have artwork, which needs to be replicated or reproduced with high fidelity. The reason I suggest all is they use different algorithms for performing conversions. Autotrace / FrontLine - can use Imagemagick to convert to many different formats. Frontline is a GTK gui front end to access the many command line options. Delineate - A java based front end to both Autotrace and Potrace. The neat thing is it converts directly into SVG. Potrace - works in black and white, but does have a very good tracing routine. Potrace also has a GUI front end written for Qt 3.x Pstoedit - is slightly different in that it specializes in the conversion of PostScript in to vector using Ghostscript. It works as a plug-in for GSview. The thing to keep in mind when using these is there are many options when performing traces and some experimentation is sometimes required, especially more complex artwork. Don't expect perfection. The first time, it took me a bit of experimenting when I converted the Scribus logo from an EPS with a bitmap embedded into pure SVG, which then imported in Scribus.Toolswine
1 A little WINE with Scribus 1.1 Overview 1.2 Hints and my experience 2 The Alternatives 2.1 Crossover Office from Codeweavers 2.2 Win4Lin from Netraverse 2.3 SuccessA little WINE with Scribus
Overview
One of the facts of life in the desktop publishing world, is the occasional need for working in a cross platform environment. Fortunately, for Linux users in particular, the Wine Project and Codeweavers have made much progress in being able to successfully run many Windows applications on top of Linux. My main interest and focus for these notes is being able to run the latest versions of Adobe Acrobat Reader and the full version of Acrobat, in order to test Scribus created PDF files, as well as occasionally running the odd Windows or DOS based utility. Since migrating my own personal workstation to Linux as my default environment, I have dabbled with installing various Windows apps and kept a eye on this project for several reasons: Until the recent enhancements to Gnucash, I needed a Windows accounting application to run the books for my own company. Professionally, I have to test and build training materials for a number of Windows applications, thus I try to avoid have to reboot into Windows. I have run VMware in the past and it is superb, but is too resource intensive at times. Sadly, many kinds of multimedia on the net needs a Windows based media application.Hints and my experience
My experience is packaged versions of Wine rarely work well, with the exception of the Codeweavers wine preview releases. I always build from source. Typically the Wine project releases a snapshot tarball once a month. With Wine, there is a slightly different way of building Wine from the usual:./configure && make && make install
It is not quite obvious, but there is a way to use the Wine installer scripts which make installing much less difficult.
To build the tarball from the root directory where you have un-tarred the source tarball, simply run ./tools/wineinstall and follow the instructions.
Compiling from source, takes quite a while, so the ideal time for this is when your workstation will be idle.
The benefit is the wine install will be carefully tailored to your setup, both software and hardware.
I find it runs more reliably this way.
If you really do not want to install from source, grab the latest Codeweavers rpm or deb.
Their wine package also includes a nice graphical configuration tool for creating the wine.conf file, which is the the key to making Wine work well.
After installation, you need a wine.conf file.
This is hidden in .wine in your home directory.
Open in a text editor and study it carefully, the slight adjustments you make here can make a big difference in its performance and reliability.
This is well commented and documented in the docs as well.
Sometimes, there are regressions: I will typically keep the previous snapshot source until I have found the newest one to work well as well as before.
Once or twice in the past couple of years, I have reverted to a previous release because something was broken.
Minuses: Printing support is weak.
You can generate PostScript for later conversion via Distiller or GSview.
Wine will support CUPS if you have the correct libraries installed, but in general it is nowhere a finished part of the code.
The good stuff: The Wine snapshot releases in the past few months have run Adobe Acrobat 5: both the 5.1 reader and full 5.0.5 version very reliably.
After installation, find the intertrust plug-in folder and delete it before launching Acrobat.
This was a very buggy plug-in to enable on-line buying of PDFs.
In corporate installs of Acrobat, I make sure this is never installed because it has caused so many problems.
The distiller part of Acrobat from Versions 3 to 5 install and work flawlessly, as long as it can locate all your font paths correctly.
I have distilled hi-res 35 MB "press-ready" composite CMYK PDFs with ease.
I have also loaded the free PDFInspektor plug-in from Callas.
I use this to test PDF/X-3 conformance of Scribus PDF/X-3 files.
Installing applications has become much more reliable in the last year.
Where Wine sometimes has troubles is custom installs.
Sometimes, you just have to click through the defaults to get an application to install properly.
The Alternatives
Crossover Office from Codeweavers
Versions 5.0+ run a number of applications quite well, including Photoshop 5,6,7, as well as in my tests, Illustrator 10 and Indesign 2.0.2. The last two can be taxing even on real Windows at times. I found the demo to have a very polished and easy to use installer, which makes configuration a snap. <a href= "http://www.codeweavers.com">Codeweavers</a> has contributed a great deal to the success of the Wine project thus far. You can also get Crossover Office with some versions of the Suse and Xandros distributions.Win4Lin from Netraverse
Disclaimer: Netraverse has provided the Scribus Team with in-kind sponsorship. Win4Lin allows you to run Win 2000 or XP natively on Linux with a translation layer, providing near native speeds and capabilities with few limitations. Basically, you need a licensed version of Win 2000 or XP and run the installer. It looks and works well and most Win32 applications can run. I would not discourage anyone from buying either. Both companies have been good citizens in the open source community. d align="center"> Although Acrobat 5.0.5 is not officially supported by Codeweavers, it installs and runs very well.
Until the day when Linux/Unix has the same parity in commercial application support, Wine is a good transition strategy.
Hopefully, you will find these notes useful in supporting your use of Scribus.
Although Acrobat 5.0.5 is not officially supported by Codeweavers, it installs and runs very well.
Until the day when Linux/Unix has the same parity in commercial application support, Wine is a good transition strategy.
Hopefully, you will find these notes useful in supporting your use of Scribus.
Toolsxnview
Xnview
There are loads of image previewer/thumb nailing applications from some web based - even Konqueror and Nautilus have some of these features.So why do I pick Xnview?
Its ugly. It uses old, Motif type libraries, but it has two very redeeming qualities: Its very fast, as fast or faster than some similar proprietary apps. It handles a wide array of image formats with very good conversion capabilities. There are some real obscure file formats Xnview can open and convert. It's probable that only Imagemagick can handle more. I've found it very stable and worth at least adding to your toolbox.
Toolslprof
LProf
For those running BSD, Linux or Unix LProf is an essential tool for making color management work reliably in Scribus. Why so?LProf is like visiting your eye doctor.
LProf is the only graphical tool available on Linux and Unix capable of creating ICC monitor profiles or scanner profiles. It also works on Windows and, soon, Mac OS X. Very simply LProf is a tool for creating an ICC profile of your monitor which helps make color managed previews more accurate. Think of a monitor profile as a set of glasses which magically transform your eyes to see with perfect color balance. Within Scribus a correct monitor profile can make a big difference in viewing accurately how your print or PDF will appear on a PostScript printer or when printed commercially. Without an individual profile of your monitor - no two monitors are alike - you have no real assurance the color transforms will be anywhere near close, when you are for example sending PDFs to a printer. LProf has a simple step by step method to walk you through creating a profile of your monitor which then can be used in Scribus. You should take the 5 minutes it takes to create a profile and then add this to your Scribus Color management preferences. LProf can also create profiles for your scanner or digital camera. A look at the LProf's documentation will give you a more detailed understanding of its capabilities. Currently available released version (0.11.4) doesn't allow using calibration devices yet. Adding this feature is a work in progress and quite successful one: with the next version of LProf you will be able to use devices like X-Rite DTP94, EyeOne Display 2 and EyeOne Display LT to measure your display on both Windows and Linux. On Mac OS X, you can also use the native built in ColorSync applet to create a monitor profile. On Windows, if you have installed Photoshop, Indesign or Illustrator, Adobe Gamma performs a similar, if more simplistic method of creating a monitor profile.
Toolskrita
Krita
Seemingly rising from the ashes, Krita, a part of the KDE Office suite, has become a wonderful application focused on natural painting. Using a brushes metaphor on screen, it has some innovative and quite interesting features like the ability to emulate the way watercolors dry on canvas, a filters gallery to display previews of each filter, adjustment layers, layer groups and tools to precisely manipulate brush strokes. That alone would be worth adding it to your publishing toolbox for the occasional artwork. The bonus for Scribus users is its versatile handling of a large number of formats and color spaces. Not only RGB, but CMYK, Greyscale (up to 16 bit) and L*a*b are handled using the same littlecms color engine as Scribus. Krita fully supports RGB to CMYK conversion needs in a simple easy to use manner, but can also convert 16 bit images into 8 bit to import into Scribus. (Scribus will support 16-bit images and possibly higher in the future.) Notes: There is one limitation in the current 1.6.x Krita in the way resolution works when Krita writes an image to disk. Thus, Scribus will always interpret the resolution as 72 DPI, which is not usually high enough for good quality print, so rescaling may need to be done within Scribus. Krita is only available on BSD, Linux, MacOSX (via fink) and Unix. Krita 2 is expected to be available as a native Win32 application. For importing into Scribus, exporting Tiff from Krita with LZW compression should yield good results and Krita reliably embeds ICC profiles into the images to make color matching from print to screen much easier.
Toolsfontmatrix
Fontmatrix
For those users coming from MacOSX or an even older MacOS one of the perceived missing parts on Linux is a nice graphical font manager. Enter Fontmatrix. While it is young, it has all the essentials to manage fonts both individually and in groups via "tags". Fontmatrix also has some nice features to preview not just sample text, but at scalable sizes along with the ability to view individual glpyhs. Even better, Fontmatrix supports Open Type fonts very well and in the future plans are advanced Open Type abilities. While Fontmatrix does not "activate" fonts on the fly for open applications, it can add and remove fonts quickly without messing with the important system fonts which all applications rely on. So for working with Scribus or other graphics applications, simply preview and add fonts as needed, then restart your application. Lastly, Fontmatrix can create "fontbooks" which are PDFs displaying each font.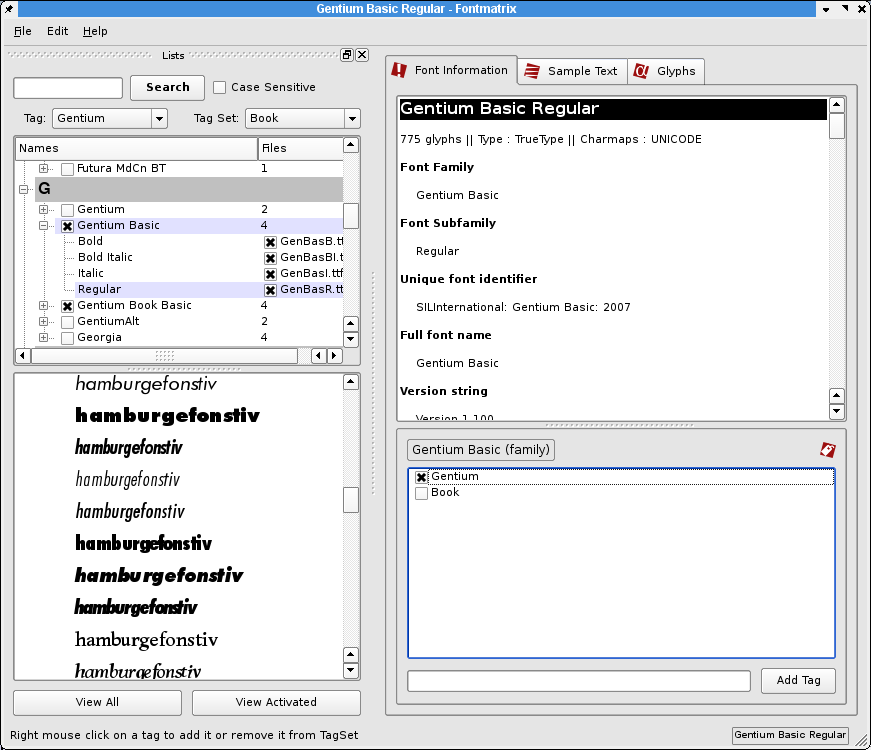
Toolsswatchbooker
SwatchBooker
Just like old habits die hard, many designers rely on color palettes from vendors like Pantone, HKS, Toyo or others, and especially those that have been shipped with the drawing or design application they are used to for years, if not decades. Although the Scribus Team has succeeded in licensing many of those palettes for future stable versions, not all of the efforts resulted in a success, which means you have to get the palettes you need from other resources. The Scribus Team is aware of some external palette collections in Scribus's own palette format that contain these colors, but we cannot endorse their use, since their legality is as questionable as their reliability. Until the licensing issues with regard to Scribus are solved and as long as you have a valid license for a program like CorelDraw, PageMaker or InDesign, you should be free to use the included color palettes in Scribus, even though Scribus doesn't support many proprietary color palette formats yet. This is where you should consider SwatchBooker as the tool of choice. SwatchBooker will not only help you to convert color palettes, whether it be proprietary or Open Source, for use with Scribus; you can also modify existing palette files by changing color values, assigning color profiles or translating color names. If you use SwatchBooker for anything but color palette conversion, you do so at your own risk. Changing names of spot colors or their alternative CMYK/RGB values may result in serious color issues, and it defies the purpose of standardized color palettes. Once you have converted the color palettes with SwatchBooker (via "File > Save As"), you have to copy them to directory that contains the palette files: On Linux and Unix: /usr/lib/scribus/swatches. On Mac OSX: Your installation directory, followed by /lib/scribus/swatches, eg: /Applications/Scribus.app/Contents/lib/scribus/swatches/ On Windows: C:\Program Files\Scribus1.3.x\libs\swatches. Requirements: Python, PyQt4, lcms
Supported formats:
Import: Adobe (ACO, ACB, ACT, ASE, ACF, BCF, CLR); AutoCAD (ACB; unencrypted only!); ColorSchemer (CS); Corel (CPL); GIMP (GPL); ICC named colors profiles; OpenOffice.org (SOC); QuarkXPress (QCL+CUI; note that you need both files to be able to convert an XPress color palette); RAL (BCS); RIFF (PAL); Scribus (XML); VivaDesigner (XML)
Export: Adobe (ASE); GIMP (GPL); HTML; OpenOffice.org (SOC); Scribus (XML)
Requirements: Python, PyQt4, lcms
Supported formats:
Import: Adobe (ACO, ACB, ACT, ASE, ACF, BCF, CLR); AutoCAD (ACB; unencrypted only!); ColorSchemer (CS); Corel (CPL); GIMP (GPL); ICC named colors profiles; OpenOffice.org (SOC); QuarkXPress (QCL+CUI; note that you need both files to be able to convert an XPress color palette); RAL (BCS); RIFF (PAL); Scribus (XML); VivaDesigner (XML)
Export: Adobe (ASE); GIMP (GPL); HTML; OpenOffice.org (SOC); Scribus (XML)
Faqintro
Hints, Tips and Tricks to make better documents faster in Scribus
These are some of our hints for using Scribus: Get the latest Adobe Reader® installed. Without this, is it impossible to open PDFs from Scribus and see all the features Scribus can create within a PDF. Plus, it renders PDF better than most any other viewer. In the future more documentation for Scribus will be in PDF format, optimized for display in Adobe Reader. More details Tool Tips When, you are unsure of a function, use tool tips. While it is not 100% complete, a great many of the GUI functions have extensive tool tips to guide you about each option for a given function, especially more complex ones. To enable tool tips, make sure Help > Tooltips is checked. Then hover your mouse over the check box or GUI option. Use guides to help visually align things in your document. Guides are invisible rulers you can place on the canvas to align different text boxes, as well as centering objects. In almost every document, I create a vertical guide to split the page in two. Then you can use this guide to center objects much easier. Use the "nudge" tool. Select an object and then use the arrow keys to move object a tiny bit at a time - .01 in, or .01 mm. Shift and Ctrl + Shift + Arrow will change the distance per 'nudge' Save Paper - Instead of printing a proof, export a low res PDF and open in Acrobat Reader. A properly setup PDF will display on the screen with a great deal of fidelity to the printed page. Use PNG, in place of jpeg or gif. PNG is a much more versatile image format and it usually prints much better at the same resolution. Most importantly, it uses lossless compression and compresses some types of images really well. Lastly, the [[Help:Manual_Toolsgimp|GIMP], which most users have as their primary bitmap editor, does a superb job of handling PNG, as well as compressing them very well. Get a good Ghostscript- The newest 8.5x versions are much better at helping Scribus import EPS and generating high quality print previews. Versions 8.5x+ allows the best print previews in Scribus as they enable proper transparency and CMYK previewing. [[Help:Manual_Fontsadvanced|Get good fonts] - By good fonts, we mean high quality Type 1 or TrueType fonts from foundries like Adobe Bitstream and Monotype. Luckily, the available MS Web fonts are also pretty reliable in PostScript printing. A good source of fonts is the collection of Bitstream fonts included with most versions of Corel Draw. We know people who have used these fonts for years and can't remember a font problem with these fonts. Most disks have the same font in Type and TrueType versions. Some Adobe applications, like Pagemaker or InDesign include a small collection of useful high quality Type 1 fonts. This will make printing and PDF creation much more reliable. Master Pages can be big time saver. Anytime you have common elements on several pages, add those elements to a template. This also avoids accidently moving or deleting objects. Backup your Preferences - This is more important for users of CVS versions of Scribus. Occasionally - much less common now, a program crash caused by a bad image etc., can corrupt your preferences. So, to get a good replacement setup, close Scribus and rename the hidden.scribus folder in your home directory to .scribusbak.
Reopen Scribus with no document open and change every setting as you wish and then close Scribus.
Now copy the whole directory somewhere else.
Then, if you have weird behavior in Scribus, the first thing to do is copy the good .scribus directory over the current one and restart.
This is also important if, you have lots of custom keyboard shortcuts.
A cool trick for precision adjustments.
This may or may not work on your workstation, depending on how your wheel mouse is configured.
You can use the mouse wheel with the spin boxes instead of clicking the arrows.
For small steps, look carefully at the dialog below where I have put the cursor to the far right.Then spin the mouse wheel up and down to adjust the measurement or setting.
This adjusts 10ths of a unit.
For larger adjustments, put the cursor to the left side.
tments 100th of a unit, Hold Crtl + Shift keys while moving the wheel mouse up and down.
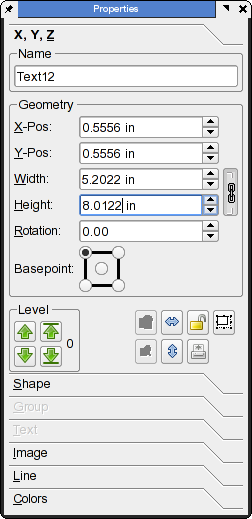 Let Scribus do the math for you. Almost every spinbox where you enter values with measurements can magically do math.
You can mix and match units as well.
Special units are: pageheight, pagewidth, height, width
Let Scribus do the math for you. Almost every spinbox where you enter values with measurements can magically do math.
You can mix and match units as well.
Special units are: pageheight, pagewidth, height, width
Faqgeneral
 This article is outdated.
Please update the information to reflect the current status or knowledge.
This article is outdated.
Please update the information to reflect the current status or knowledge.
General Questions
How do I contact the Scribus Team, find interactive help or hire an experienced Scribus trainer? 1. There is an active and friendly mailing list. 2. Find the developers on IRC in the #scribus channel. How do I get formatted tables in Scribus? Scribus added basic table support in 1.1.6, but unfortunately, tables are nothing more than combined text frames, and it is a bit hard to work with them. If you need to have more complex tables, here is a reliable workaround: Create your table in either OpenOffice.org Writer or Calc. Copy the table cells you need in Scribus (i.e: not the whole spreadheet in Calc) to the clipboard, create a new OpenOffice.org Draw document, and use Edit > Paste Special > GDI Metafile to insert the table as a vector file into Draw. Use File > Export to export the graphic as an EPS file. Make sure that Selection is checked in the export dialog, because otherwise the whole page will be exported. Now import the EPS file as a vector drawing in Scribus via File > Import > Import Vector FileHelp! My palettes have disappeared! Close Scribus. Then open
~/.scribus/scribus.rc, a hidden file in your home directory in a text editor.
Then look down in the file for the section beginning about 10 lines from the top.
ex: MEASUREMENTS YPOS="-264" XPOS="-692" VISIBLE="1".
Notice the negative numbers in front of the YPOS and XPOS statements.
Remove the minus, set the visible setting to 0 and save.
You might find the coordinates too large: (YPOS="3046" XPOS="7690").
Either way, these coordinates are screen positions in pixels.
They should be within 1024x768 or whatever screen resolution you are running.
Restart Scribus, go to the Windows menu and select show for the missing palette.
It will reappear like normal.
This has been corrected in the most recent versions of Scribus and should not be a problem in the future.
Why do Scribus DMGs from SourceForge not work on Mac OS X 10.4.x? To run Scribus under OS X 10.4.x, you need to install Fink, an Open Source packaging system for OS X, and [http://finkcommander.sourceforge.net/ FinkCommader, Fink's graphical user interface. In FinkCommnader, go to Preferences > Fink and check Use Unstable Packages. You can also build Scribus from source. Scribus is slow to launch. Why? For those who are new at desktop publishing, unlike most programs, DTP applications care greatly about which fonts are installed and if the font paths are valid. So, when Scribus launches, one of the things it does is to completely and thoroughly scan your font paths and ensure they are valid. This takes time. If you have a large number of fonts installed and slow launch times are a problem, reduce the number of fonts or font paths. The other reason is that your Scrapbook might be filled with complex or large objects. Deleting unneeded items or saving the Scrapbook under a different name and then creating a new blank Scrapbook will also help reduce the startup time.
What is the difference between PDF 1.3, PDF 1.4 and PDF 1.5? PDF 1.2 = Acrobat 3.0 - Relatively obsolete now. PDF 1.3 = Acrobat 4.0 - The first version of PDF which truly had all the needed features to support "press-ready" PDFs including color managment, ICC profiles etc. It also added JavaScript, interactive and multimedia capabilities. This standard is probably the safest to send if you are unsure of the capabilities of the receiver of your file. PDF/X-3 and a number of commercial print work flows are based on PDF 1.3. PDF 1.4 = Acrobat 5.0 - actually introduced with Illustrator 9, The main difference to concern Scribus users is that PDF 1.4, has both transparency and alpha transparency capabilites, which make a major difference in where a PDF with these features can be printed. It takes either the latest commerical RIPs or a Level 3 PostScript printer to use these features properly. The latest versions of Ghostscript support the advanced PDF 1.4 features Scribus can create when exporting PDF. PDF 1.5 = Acrobat 6.0 - Among the most interesting for Scribus users: Many improvements for "press-ready" PDF, the capability to have true layering within the PDF, PDF-X "pre-flight" capability, more security and interactive features, like the ability to add comments which are separate from the original document.
How do you change paper size once a document has been created? In 1.3.x, you can change the size of the current page or a range of pages in the Page menu, under Manage Page Properties. You can change this for the whole document under File > Document Setup. Scribus 1.3.x allows multiple page sizes per document.
How do you get your printer to print on a non-standard size sheet? It depends: If you are printing to a local printer which is not a PostScript printer, but using CUPS, you can't. It is a limitation, as far as we can tell of CUPS. If you have a "real" PostScript printer, Scribus - with CUPS support - will support any arbitrary page size, as long as the printer supports it.
The CUPS options do not show up in print options dialog, What is wrong? See this bug for an explanation of how CUPS can be misconfigured.
Scribus crashes when launching and searching for fonts and I have updated my freetype2. I upgraded my freetype2 to enable the bytecode interpreter. We do not recommend trying to update freetype2, except rebuilding your existing distro's source RPMs or source packages. Recent versions of freetype have an autohinter, which works very well. Many packages are compiled against freetype2 (Xfree86, Qt, Gtk+ etc..), thus, upgrading freetype2 will require recompiling all of these packages or system instability might be the result.
Scribus seems to hang in an infinite loop when importing EPS or PS files. Why? Three possible solutions: Upgrade to the latest Ghostscript. There are <a href= "toolbox7.html">notes</a> in the "Toolbox" section on parallel installs of GS. Reduce the complexity of your EPS/PS file. You do not have enough memory/swap space when importing complex EPS files.
How do i get Arabic or Hebrew text to display correctly with proper glyph shaping and RTL text direction? The glyph shaping is a very difficult thing to achieve. We plan to add this in one of the 1.5.x development versions.
There are many Scribus versions. Which one should I use? There are currently three branches of Scribus available: The officially stable branch is 1.3.3.x, and installers for Windows and OS/2 are available from Sourceforge. This branch is unlikely to see any updates or bugfixes. The next version of Scribus is being developed in the branch called "Next Generation" (NG), and it will result in Scribus 1.4. This branch is already quite stable and useable. Installers for this branch are regularly updated and available for Mac OS X 10.5+, OS/2 and Windows. Users of Linux/UNIX can use their distribution's package management or check out svn and build from source</a>. 1.5.x is an experimental branch, in which new features are implemented and tested. If possible, those new features will be backported to the 1.3.x/1.4 branch. There are no installers or packages available, as it's only recommended for users who want to test the latest features. Do not use 1.5+ for serious work, because we cannot even guarantee that the file format won't change! 1.5+ must be compiled from source.
Why is Scribus built with Qt and not some other toolkit? When Franz Schmid launched the project, it was originally written in Python, but for performance reasons he decided to port it to C++. The toolkit with the most complete documentation at the time was Qt 2.2. The first Qt 2 release was 0.3 in 2001. Scribus was ported to Qt 3 after the release of version 0.6. Currently, Scribus uses Qt 4.
Where does the name "Scribus" derive from? When Franz Schmid launched the project, the first working name was "Open Page", but he thought it would be too generic. "Scribus" is derived from the Latin name of the official writers in Ancient Rome, "scriba", from which we get "scribe" or writer. This translates well in to many languages besides English. The German word is "Schreiber", for example.
Why are there no import filters for Quark, InDesign or other commercial DTP applications? There are several reasons why there are no import filters for commercial DTP applications. DTP file formats are very complex internally - they are probably the most complex file formats. Creating import/export filters is a task far more difficult than importing a spreadsheet or simpler word processing document. An engineer familiar with the internal file format of PageMaker compared it to a 2m x 3 m flow chart diagram in 6 point type. It was not until the arrival of InDesign 2.0 that reliable PageMaker file import was possible in another DTP application, even though Adobe had the file format specs. The file formats are not documented publically. So, is it unethical/illegal to apply hexedit to an InDesign or XPress file to reverse engineer the file format with hexedit or others for the purpose of creating the export/import plugins for Scribus? Probably not, but given their closed nature, we cannot rule out the possibility of legal bullying by a commercial vendor, as we did from Quark when there was a Quark importer in testing. We do not have the legal resources to challenge large proprietary software companies. A German vendor of DTP software successfully reverse-engineered Quark's file format and created an import filter. It took a long legal battle for them to succeed. Developer constraints. It is the considered judgement of the development team that efforts to improve Scribus is a more valuable use of time. As an exception to the rule, we are open to implement publically available format specifications. For example, the XML version of InDesign's file format (IDML) is very well documented, and the spec is freely (i.e. without any legal restrictions that prevent the implementation of an import filter) available. Thus, a team member took the time and wrote an import filter, which is currently being tested. The same goes for formatted text snippets from QuarkXPress, called XPress Tags.
Is there or will there be a Microsoft Publisher importer? There is none and very unlikely to be provided by the Scribus Team. As with InDesign and QuarkXpress, the file format is undocumented. PUB files are difficult and sometimes impossible to reverse engineer. As with InDesign or XPress, we are considering to implement a workaround: Newer versions of Publisher are capable of exporting to Microsoft's XML Paper Specification (XPS), which is freely available and can be implemented without any legal encumbrances. Thus, if time constraints permit, we may create XPS import/export filters. If you urgently need to exchange files with users of Publisher, you should consider to either get your hands dirty by writing the filters yourself or by paying someone to do so for you.
So, how can I work with those who use other page layout applications? Use EPS, PS, SVG or PDF as an exchange format. Scribus created PDFs can be easily imported into a number of commercial applications. SVG import is excellent for vector artwork. Scribus can import EPS files as long as they are conformant to the specs - this includes spot colors in DCS 2.0 files. The documentation has detailed notes covering these subjects.
The ">Scribus Wiki has an additional FAQ.
Reference Appendix
Reference Information
This section will help you go beyond using Scribus. Look here when you need to find out some specific information on how to file a bug, contact the development team or ask for help from the greater Scribus Community.Reference Specifications
1 Scribus Specifications 1.1 Summary: 1.2 General: 1.3 Import Filters: 1.4 Typography 1.5 Text Editing 1.6 Image Editing 1.7 Vector Editing 1.8 Color 1.9 Professional Publishing Features: 1.10 Ease of use features: 1.11 Architecture: 1.12 Target Usage:Scribus Specifications
Summary:
Scribus is an Open Source, cross-platform desktop publishing (DTP) program. Originally developed on Linux, Scribus also runs natively on *BSD, Mac OS X 10.5 or later, OS/2 Warp 4, eComStation and Windows 2000 or later. The goal of the Scribus Team is to enable beginners to create professional-grade page layout and output, without limiting the advanced requirements of professional designers.General:
Scribus uses an XML-based file format, so that Scribus files (SLA) can be easily edited with a text editor or manipulated via Scripts (Perl, Python etc.). Frames that can be edited more flexibly than in most other DTP programs. Master Pages and Page Palettes allow for easy page management Document-wide layers: Items can be moved between layers, and it's possible to apply blend modes and transparency to individual layers. Object linking, grouping, moving, locking, resizing and converting between different object types. A sophisticated Scrapbook allows for easy sharing of design objects (such as text blocks, logo images, backgrounds etc.) between documents or via a network. Render Frames allow for importing LaTeX formulas and other markup content directly into frames, as well as editing the markup code in an integrated editor.Import Filters:
Text: Open Document Text (ODT), OpenOffice.org Writer 1 (SXW), HTML, MS Word (DOC), Comma Separated Values (CSV) and Plain Text in various encodings. Bitmap Images: Encapsulated PostScript (EPS), Graphics Interchange Format (GIF), JPEG, Portable Networks Graphic (PNG), Photoshop Document (PSD), Tagged Image File Format (TIFF), Windows/OS/2 bitmap (BMP), and X PixMap (XPM). Vector Formats: Adobe Illustrator (AI), Calamus Vector Graphics (CVG), Dia Shapes (SHAPE), Encapsulated PostScript (EPS), Kivio Stencils (SML), OpenDocument Graphics (ODG), OpenOffice.org Draw 1 (SXD), Macintosh PICT File (PICT), PostScript (PS), Scalable Vector Graphics (SVG, SVGZ), Windows Metafile (WMF) and Xfig (FIG). Color Swatches: Adobe Illustrator (AI), Encapsulated PostScript (EPS), GIMP Palette (GPL), OpenOffice.org Swatch (SOC) and PostScript (PS). Other: Almost all supported vector formats can also be opened as documents. In addition, there is an experimental PDF filter that can open some PDF files directly. PDF files can also be imported into image frames.Typography
Paragraph and Character Styles with numerous paragraph and text style options Integrated versatile Style Manager for managing Paragraph, Character and Line Styles. Style inheritance. Sophisticated type handling including manual kerning of type, optical margins and word and glyph spacing options. Various line spacing options, including basline grid and first line offset. Full support for Type 1, TrueType and OpenType fonts. Integrated font preview and font management. Various options for text flow around objects. Configurable hyphenator. Short Words plug-in to avoid undesirable line breaks.Text Editing
Integrated Text Editor for quick text editing. Search and Replace for text and text formatting. Spell checker. Flexible page numbering options.Image Editing
Non-destructive image effects for all supported image files. Extensive support for Photoshop PSD and layered TIFF files. Layer blending modes and clipping paths are supported. Photoshop Duo, Tri and Quadtones are similarly well supported. 16-bit TIFF and PSD support is in testing. Support for DCS (Desktop Color Separations) files. An option to start an image editor of choice (e.g. GIMP, Krita, Photoshop) from within Scribus.Vector Editing
All imported vector drawings can be edited with the help of Scribus's own set of vector tools. Scribus is shipped with a considerable set of default shapes. A versatile set of path and transform tools, comparable only to specialized vector drawing programs. Integrated line editor. Gradients, transparency and blend modes for vector items. Support for bitmap and vector patterns. PostScript barcode generator.Color
ICC color management, including previews of images and embedding ICC profiles in PDF documents for accurate screen to print color. Scribus supports the proposed OpenICC specification for profiles. Emulation of various kinds of color blindness. Creation of color harmonies with the Color Wheel. Support for spot colors. A Search and Replace feature for solid colours. A large collection of color swatches, including those from commercial vendors.Professional Publishing Features:
Creation of CMYK color PostScript separations. Creation of RGB, CMYK and Greyscale PDF files. Full support for Level 2 PostScript output, a very large subset of Level 3 and support for PDF 1.4/1.5 features including transparency, gradients and 128 bit security. Full Compliance with PDF/X-3. Supports font embedding and subsetting in both PostScript and PDF export. Advanced pre-press features, like bleed and printing marks Creation of PDF forms, including nearly all PDF field types, and JavaScript actions. Creation of PDF presentations, including presentation effects.Ease of use features:
Online Help Browser with extensive and continually updated documentation in English, French and German. User-configurable keyboard shortcuts. Ability to run in 27 different languages without recompilation or application re-start. Detailed and flexible user preferences for document and application default settings. A continually updated set of templates, especially created for new users to reach quick results and to get accustomed to Scribus. A set of useful scripts, including a calendar wizard. A flexible Undo/Redo system. Easy precision placement of items on a page, including guides, multiple duplicate, align and distribute etc.Architecture:
The current version of Scribus is being developed with Qt 4.x. Plug-in support and API (C++) including import and export plug-ins. Powerful Python scripting plug-in for extending Scribus functions and automating tasks, as well as calling external applications within Scribus.Target Usage:
Layouts for newsletters, corporate stationery, posters, training manuals, technical documentation, business cards and other documents which need flexible layout and/or sophisticated image handling, as well as precise typography controls and image sizing not available in current word processors. Users needing the ability to output to professional quality image setting equipment, as well as re-purposing for internal printing, web-distributed PDFs or presentations. Users needing to create interactive PDF forms, including CGI/PHP form submission via PDF, or PDF presentations.Reference Printers
1 Scribus Friendly Printers 1.1 What defines a "Scribus Friendly Printer" ? 1.2 North America / Canada 1.3 North America / USA 1.4 Europe / GermanyScribus Friendly Printers
Once you have your masterpiece created, sometimes the next step is getting is your file commercially printed.What defines a "Scribus Friendly Printer" ?
First and foremost the ability to handle PDF directly without conversion to other formats. Conversion for placement into other page layout applications is not recommended and may result in reduced print quality. Ideally, a printer can handle a Scribus file natively, but is not a necessity. The most important is the ability to handle correctly newer versions of PDF without further alteration. This list is by no means comprehensive, but are printers who have been involved in developing Scribus and or have expressed a willingness to handle Scribus files natively or as PDF:North America / Canada
Mardigrafe Based in Montreal - Capable of working with native Scribus files. Can work with English, French, German, Italian, Russian and Spanish texts.North America / USA
Cape Cod Ink based in Massachusetts. Can handle a range of printing needs including short run color print jobs. Can handle native Scribus files on request.Europe / Germany
http://unitedprint.de/ and http://unitedprint.ch/ accept Scribus PDF natively. Before submitting any work, carefully read the requirements (like the 2mm boarder around the whole document that is required for boderless printing). If you know of printers who should be added to this list, please mail admin at scribus.net.Reference Bugs
1 Filing a Bug Report 1.1 Introduction 2 How to Create an Account 3 Before filing a bug 4 How to file a bug report 5 Personalised ViewFiling a Bug Report
Introduction
Software development is almost useless without testing, and that's true for Scribus as well, of course. Testing means using the software, especially development versions. Bugs, when discovered, need to be reported to let the developers know that something's wrong or at least seems to be wrong, so the problem can be fixed, if necessary. Sometimes the fix may simply be an update to the online documentation, the wiki or the next edition of the Official Manual. Moreover, the developers need to know what kind of features users need. In such a case case, someone who is missing a feature or has a great idea, should also let the team know about it. In both cases, the procedure is the same. There is a software called bug tracking system, in Scribus' case this is Mantis. A bug tracking system allows developers to keep track of, discuss and review bug reports and RFEs (requests for enhancement). If you want to help to improve Scribus or absolutely need a feature, you are advised to use it.How to Create an Account
First, visit the signup page. You will see a page that looks like this: Enter a login name, your email address and the digits displayed.
Then click Signup and wait until your account has been confirmed and you received a password.
You can change your personal preferences any time in the tab "My account," provided you are logged in.
Please take the time to check the different options.
They may or may not be useful to you.
Enter a login name, your email address and the digits displayed.
Then click Signup and wait until your account has been confirmed and you received a password.
You can change your personal preferences any time in the tab "My account," provided you are logged in.
Please take the time to check the different options.
They may or may not be useful to you.
Before filing a bug
If something doesn't work as expected or you think you have the idea of the century, please don't start firing up bug reports galore. Chances are that someone has already had the same problem, perhaps even the same great idea. Five steps are recommended to ensure your report won't be closed as "duplicate" or "no change required". Read the Scribus documentation, rummage the Scribus wiki or even consider buying the Official Scribus Manual. There are lots of informations in different languages available, and perhaps someone has already turned his own experiences into a wiki article, or the documentation team may have documented a feature/issue thoroughly by then. Try to really use Scribus and learn about its concepts. Compared to other DTP programs, Scribus is not hard to learn, but it is still quite different from, say, a word processor. Tell one of the mailing lists about your problem or your idea. Things normally get sorted out quickly. Often enough, a supposed bug is just lack of experience. Ask questions on IRC. This is especially useful for "real time" support. If your questions still haven't been answered, you should browse the bug database. You can search for keywords. As you can see on the screenshot below, you can enter a keyword in the "Search" field. Then click Apply, and Mantis will search for all reports containing the text string. If you don't know the correct English word to search for, you can skim the multilingual Glossary on the Wiki for a translation. If you use a non-English version of Scribus and want to look up the English names of menu items, just switch the Scribus interface to English: File > Preferences > General > Language You will notice that the reports are coloured differently.
The meaning of the different colours is:
New: The bug/RFE is reported, and no decision has been made as to how to handle it.
Feedback: Feedback is required from either the original reporter or someone who added a note to the report.
This happens quite often in cases where an issue can't be reproduced.
Acknowledged: Once the team has decided a suggestion is worth keeping in mind for further development, the status is changed to "acknowledged." This is mostly the case with RFEs.
Confirmed: If a reported bug could be reproduced by others, the status will change to "confirmed." This is what usually happens to bug reports.
Assigned: A bug or RFE is assigned to a developer for fixing it or adding a feature.
Resolved: A bug or RFE is resolved.
That doesn't necessarily mean a developer wrote any code.
If things cannot or need not be fixed, the issue will be resolved as well.
Closed: The end of a life span of a report.
If all works well, the issue will finally be closed, and the scary number of reports/requests is a bit smaller.
You will notice that the reports are coloured differently.
The meaning of the different colours is:
New: The bug/RFE is reported, and no decision has been made as to how to handle it.
Feedback: Feedback is required from either the original reporter or someone who added a note to the report.
This happens quite often in cases where an issue can't be reproduced.
Acknowledged: Once the team has decided a suggestion is worth keeping in mind for further development, the status is changed to "acknowledged." This is mostly the case with RFEs.
Confirmed: If a reported bug could be reproduced by others, the status will change to "confirmed." This is what usually happens to bug reports.
Assigned: A bug or RFE is assigned to a developer for fixing it or adding a feature.
Resolved: A bug or RFE is resolved.
That doesn't necessarily mean a developer wrote any code.
If things cannot or need not be fixed, the issue will be resolved as well.
Closed: The end of a life span of a report.
If all works well, the issue will finally be closed, and the scary number of reports/requests is a bit smaller.
How to file a bug report
To file a bug report, you have to click on the Report Issue link in your browser. You will be presented a page with lots of fields for entries: Categories: Choose a category you think your report fits best.
If you can't find an appropriate category, choose "General."
Reproducibility: If you report a bug, can you reproduce it? How often does it happen? Choose the appropriate degree of frequency.
RFEs have the reproducibility "Always," since the feature is always missing, until the issue is resolved.
Select Profile: In your personal preferences you can create user profiles for your reports.
This is especially useful if you use more than one operating system or Distribution.
You create a profile for each operating system, and if you file a report on an issue that occured on a particular system, you can simply choose the profile instead of inserting the data (Platform, OS, OS Version) by hand all the time.
Platform: Insert your CPU platform (e.
g.
x86, x86-64, PPC, SPARC)
OS: Your operating system (e.g.
Linux, Windows, OS X)
OS Version: e.
g.
Debian 3.1, SuSE 10.1, Win2000, OS X 10.3
Product Version: Scribus has many incarnations: the stable branch, the developer branch with some more or less stable versions (1.3.xSVN, 1.5SVN etc.).
Make sure you choose the right one from the drop down menu.
Product Build: This is especially important if you are using SVN versions of Scribus.
You find the relevant date in Scribus under Help > About Scribus.
The date is very important, because the source code changes almost daily.
An issue you report with an older version may very well already be resolved, in which case you will receive the recommendation to try the latest SVN version.
Please don't report issues for deprecated versions of Scribus.
If you have finished the preparations, you can finally start writing:
Categories: Choose a category you think your report fits best.
If you can't find an appropriate category, choose "General."
Reproducibility: If you report a bug, can you reproduce it? How often does it happen? Choose the appropriate degree of frequency.
RFEs have the reproducibility "Always," since the feature is always missing, until the issue is resolved.
Select Profile: In your personal preferences you can create user profiles for your reports.
This is especially useful if you use more than one operating system or Distribution.
You create a profile for each operating system, and if you file a report on an issue that occured on a particular system, you can simply choose the profile instead of inserting the data (Platform, OS, OS Version) by hand all the time.
Platform: Insert your CPU platform (e.
g.
x86, x86-64, PPC, SPARC)
OS: Your operating system (e.g.
Linux, Windows, OS X)
OS Version: e.
g.
Debian 3.1, SuSE 10.1, Win2000, OS X 10.3
Product Version: Scribus has many incarnations: the stable branch, the developer branch with some more or less stable versions (1.3.xSVN, 1.5SVN etc.).
Make sure you choose the right one from the drop down menu.
Product Build: This is especially important if you are using SVN versions of Scribus.
You find the relevant date in Scribus under Help > About Scribus.
The date is very important, because the source code changes almost daily.
An issue you report with an older version may very well already be resolved, in which case you will receive the recommendation to try the latest SVN version.
Please don't report issues for deprecated versions of Scribus.
If you have finished the preparations, you can finally start writing:
 Summary: A short description of your report.
This will become the "headline" in the bug tracker.
Description: Describe your issue as precisely as possible, but keep it concise.
No Novels here! It may also be helpful to upload some screenshots (see below).
If you file a feature request, please add a real world scenario.
The team needs examples to understand what the idea is and how this new feature would help people to work better and more efficiently.
In other words, try to describe not only what and how, but also why.
Steps to reproduce: If you are able to reproduce a bug, please write down the steps necessary for reproduction on other machines.
Additional information: If you think other information, e.g.
postings from the mailing list or messages from a debugger</a>, are useful in this context, you can add them here.
You're almost done now, but you may want to upload a file, a screenshot for instance, or a Scribus sample file.
Click Searchor enter the path to the file on your hard drive or a URL.
Summary: A short description of your report.
This will become the "headline" in the bug tracker.
Description: Describe your issue as precisely as possible, but keep it concise.
No Novels here! It may also be helpful to upload some screenshots (see below).
If you file a feature request, please add a real world scenario.
The team needs examples to understand what the idea is and how this new feature would help people to work better and more efficiently.
In other words, try to describe not only what and how, but also why.
Steps to reproduce: If you are able to reproduce a bug, please write down the steps necessary for reproduction on other machines.
Additional information: If you think other information, e.g.
postings from the mailing list or messages from a debugger</a>, are useful in this context, you can add them here.
You're almost done now, but you may want to upload a file, a screenshot for instance, or a Scribus sample file.
Click Searchor enter the path to the file on your hard drive or a URL.
 If you don't want a report to be seen by other reporters, but only the team, you can switch the status to "Private." This may be the case if you discover issues with a file that is protected by copyrights.
Check "Private," and only a handful of people will see the file.
Once everything is to your satisfaction, click Submit Report, and you're done.
If you don't want a report to be seen by other reporters, but only the team, you can switch the status to "Private." This may be the case if you discover issues with a file that is protected by copyrights.
Check "Private," and only a handful of people will see the file.
Once everything is to your satisfaction, click Submit Report, and you're done.
Personalised View
Provided you are logged in, you can choose a more clearly laid out view of the bugtracker. Click on the link My view, and Mantis will present a structured view of recently changed issues: Left column: Unassigned reports, resolved reports, and reports monitored by you.
Right column: Your reports, all reports recently modified.
This material may be distributed only subject to the terms and conditions set forth in the Open Publication License, v1.0 or later.
Distribution of the work or derivative of the work in any standard (paper) book form is prohibited unless prior permission is obtained from the copyright holder.
A copy of the license is included in the section entitled "Text of the Open Publication License."
Left column: Unassigned reports, resolved reports, and reports monitored by you.
Right column: Your reports, all reports recently modified.
This material may be distributed only subject to the terms and conditions set forth in the Open Publication License, v1.0 or later.
Distribution of the work or derivative of the work in any standard (paper) book form is prohibited unless prior permission is obtained from the copyright holder.
A copy of the license is included in the section entitled "Text of the Open Publication License."
Reference Community
Scribus Community
Scribus has a small development team, surrounded by regular contributors and translators. The userbase is steadily growing and a large number of users are in constant contact with the development group, using Scribus and contributing in their own way to the project. This section contains information on the Scribus community, how to get in contact with the development team and the users at large. Copyright information is also provided here.Reference Community Resources
1 Community Resources 1.1 Mailing List Etiquette 1.2 Deutsch 1.3 Français 1.4 Italiano 1.5 Polish 1.6 RussianCommunity Resources
The scribus mailing list is on-line at http://lists.scribus.net/mailman/listinfo/scribus. There is a multi-lingual interface to the mailing list manager. This list is for end-user support and DTP discussion. The scribus-dev mailing list is on-line at http://lists.scribus.net/mailman/listinfo/scribus-dev. There is a multi-lingual interface to the mailing list manager. This list is for Scribus development discussion.Mailing List Etiquette
The Scribus mailing list is active and very friendly. Do not be suprised if your questions receive several replies within a day. That said, there are a few rules we (and most list readers) like folks to follow. Please read our <a href="mailing_lists.html">Mailing List policy and disclamers</a> The Bug Tracker is located at http://bugs.scribus.net/ The Wiki is located at http://wiki.scribus.net/ An IRC channel #scribus on freenode.net is quite active. There is usually at least one person from the core development team present there. For immediate assistance, this is the best along with the mail list, but does not excuse not searching the docs :-) See: [[Help:Reference_Community_IRC|Scribus IRC] The Scribus Developers maintain a blog at: http://rants.scribus.net/. This would be of interest to anyone using Scribus.Deutsch
http://scribus-forum.de/news.php Open DTP a German language forum on all things related to page layout and using open source graphics applications. Hosted by long time Scribus user and contributor Thomas Zastrow. There is a German Scribus documentation site, based on an earlier (1.1.x )version of Scribus.Français
Pour les francophones, trois de l'equipe parle français. Nous vous demandons d'abord d'essayer en anglais, mais en français marche aussi sur IRC et sur la liste. Il y a plusieurs francophones souvent sur le canal. Il y a aussi un forum dedie pour Scribus sur Linuxgraphic.orgItaliano
There is an introduction to Guida a Scribus, thanks to Tommaso CappelloPolish
There is a Polish translation of the "Get Started with Scribus" tutorial at:http://linux.hanski.info/static/scribus/index.html French, German and Polish versions of the docs are making progress and will be viewable at this address.Russian
Русскоязычный сайт о работе с графикой в Linux: http://www.linuxgraphics.ruReference Community Lists
1 Mailing List Policy and Disclaimers 1.1 Introduction 1.2 Basic Use 1.3 Subscription / Unsubscription 1.4 Member Options Page 1.5 Code of Conduct 1.6 List Maintenance and Administration 1.7 Disclaimer/Privacy Policy 1.8 Scribus Mailing List Advertising Policy 1.9 LicenseMailing List Policy and Disclaimers
Introduction
Scribus is developed by a team whose members are located on every continent and often are geographically quite far from each other. The larger Scribus Community is even more diverse and geographically distributed. Therefore, IRC and e-mail are the preferred ways to discuss Scribus use and development. The email communications for the Scribus Developers and the Community are supported by Scribus Mailing Lists. Our lists are public, meaning anyone can read everything that is posted, and participate in the discussions. Everyone is encouraged to help with the development of Scribus and to spread the word of Free Software. The "scribus" list is intended for Scribus usage and general Desktop Publishing discussion, requests for help, and announcements. The "scribus-dev" list is intended for development-related discussions between the Scribus Team and interested members of the Scribus Community.Basic Use
Each Scribus mailing list (henceforward referred to as "listname") has a submission address in the form listname@lists.scribus.net, a control request address in the form listname-request@lists.scribus.net, and a web page at http://lists.scribus.net/mailman/listinfo/. To send an email to a list, simply send it to the submission address listname@lists.scribus.net. To subscribe to a list to be able to read incoming mails as they arrive, or to unsubscribe from a list, use the control request address (see below). The current list of available mailing lists is at http://lists.scribus.net presented as an alphabetical list.Subscription / Unsubscription
Anyone is able to subscribe/unsubscribe on their own to any mailing list, presuming the subscription policy for a particular list is open. You can use simple web forms to subscribe or unsubscribe from individual mailing lists, available at their respective web pages at http://lists.scribus.net/. The requests for subscription or unsubscription can also be sent by email, to a special control address, which is slightly different from the lists address. Subscription or unsubscription messages should NOT be sent to the address of the mailing list itself. To subscribe to or unsubscribe from a mailing list, please send an email to listname-REQUEST@lists.scribus.net with the word subscribe or unsubscribe as subject. Please remember the -REQUEST part of the address. As part of the subscription process, the list software will send you an email to which you must reply in order to finish subscribing. This is a security measure to keep people from subscribing others to the lists without their permission. Please remember that an unsubscription request should be sent from the address that is subscribed. If that is not possible, the Subject: header should be: unsubscribe subscribedaddress@subscribed.domain If you're receiving mail from a mailing list but you can't find the address through which you are subscribed, you can use the full headers of the received messages which will include lines like these:To: quux@example.com List-Id: <scribus.lists.scribus.net> Sender: scribus-bounces@lists.scribus.netThis tells you reliably that the list in question is called scribus and that the subscribed address is quux@example.com. In this (fictional) case you would send e-mail to scribus-request@lists.scribus.net with unsubscribe quux@example.com in the Subject field.